Swift ARC Overview
Swift ARC Overview
Leave a reply

Swift ARC Overview
Swift is smart enough at memory management, it automatically deallocates an instance and free up occupied resources when instance is no longer needed. Deinitialization is the process which deallocate or freeup occupied memory and other system resource for an instance no longer in use.
In swift, we have special method called deinitializer that can take care of whole deinitialization process. Deinitializer are invoked immediately before a class instance is deallocated.
In swift, an deinitializer can be created by implementing deinit() method with zero parameters, there can be only one deinitializer per class.
Following is the syntax of an deinitializer , an instance method with no parameters is created with the deinit keyword.
Syntax:-
|
1 2 3 4 |
deinit { // Deinitialization stuff come here } |
Example:-
|
1 2 3 4 5 6 7 8 9 10 11 12 13 14 |
var ctr = 0 class Counter { init() { ctr = ctr + 1; } deinit { ctr = ctr - 1; } } var c: Counter? = Counter() print("W3Adda - Swift Deinitializer ") print(ctr) c = nil print(ctr) |
Output:-

When an instance of a class, structure, or enumeration is created it must be provided with some initial values before it is ready to be used. Instance initialization is the process which involves setting up initial value for instance property and to perform any required task to make instance ready to use.
In swift, we have special method called initializers that can take care of whole initialization process. Initializers are invoked automatically when an instance of a particular is created. The Initializers ensure that new instances of a type created is correctly initialized before they are used for the first time.
In swift, an intializer can be created by implementing init() method with zero more parameters, initializers does not mean to return any value.
Syntax:-
Following is the simplest form of an initializer, an instance method with no parameters is created with the init keyword.
|
1 2 3 |
init() { //Initialization stuff come here } |
Example:-
|
1 2 3 4 5 6 7 8 9 10 11 12 13 14 |
class Circle{ var radius:Double = 3 var area:Double init() { area = 3.14 * radius * radius } func getArea() -> Double{ return area } } var c = Circle() var result = c.getArea() print("W3Adda - Swift Initialiazer") print("Area of circle is: \(result)") |
Here, we have defined a class with two(radius and area) properties and defined a initializer init() method. For radius we have assigned initial value during its declaration and we have calculated area value in initializer init() method, and there is instance method getArea return area value when invoked.
When you run above swift program you will see the following output –
Output:-
![]()
In swift, an intializer init() method is allowed to accept zero more parameters. An intializer init() method with zero more parameters can be defined as following –
Syntax:-
|
1 2 3 |
init(parameterList) { //Initialization stuff come here } |
Example:-
|
1 2 3 4 5 6 7 8 9 10 11 12 13 14 15 16 17 18 |
class Rectangle{ var height:Int var width:Int var area:Int = 0 init( h:Int, w:Int) { self.height = h self.width = w } func getArea() -> Int{ area = height * width return area } } var rect = Rectangle(h: 50, w: 30) var area = rect.getArea() print("W3Adda - Swift Initialiazer With Parameters") print("Area of Rectangle is: \(area)") |
Output:-
![]()
In swift, we are allowed define multiple initializer init() methods, initializer is executed based on argument list.
Example:-
|
1 2 3 4 5 6 7 8 9 10 11 12 13 14 15 16 17 18 19 |
class Area{ var area:Double init( h:Double, w:Double) { self.area = h * w } init(r: Double) { self.area = 3.14 * r * r } func getArea() -> Double{ return area } } var rect = Area(h: 50, w: 30) var cir = Area(r:3) var a1 = cir.getArea() var a2 = rect.getArea() print("W3Adda - Swift Initialization With Multiple Initializers") print("Area of Circle is: \(a1)") print("Area of Rectangle is: \(a2)") |
Output:-

In swift, we are allowed define multiple initializer init() methods. In an initializer parameter names are used to refer parameters internally while argument labels are used when initializer is called. As all the initializers are defined with the same name init, then only way to identify which initializer to be executed is argument list. An initializer is invoked based on the number of arguments, name of arguments or type of arguments.
If you want to ignore argument labels in initializer parameters, then you can use underscore (_) instead of an external argument label before particular parameter name.
In swift, if we have properties with optional type, those properties are automatically initialized with nil or no value during initialization.
In swift, class or structure is provided with a default initializer which allows it to set default values for all of its properties. The default initializer creates an instance for class or structure itself that sets default values of its properties.
Example:-
|
1 2 3 4 5 6 7 8 9 10 |
class Employee { var empName: String = "Alex?" var empSalary: Int = 2000 var empAge:Int? } var emp = Employee() print("W3Adda - Swift Default Initializer") print("Employee's Name is :\(emp.empName)") print("Employee's Age is :\(emp.empAge)") print("Employee's Salary is :\(emp.empSalary)") |
Output:-

Initializer delegation is a process in which an intializer is allowed to call another initializers to perform part of an instance’s initialization. Initializer delegation helps to avoid duplicate code across multiple initializers. Initializer delegation works in differently for value types and class types.
In swift a subclasses is not allowed to inherit their superclass initializers by default. If a subclass initializer matches a superclass designated initializer, this way you are providing an override for superclass designated initializer. Therefore, you are required to add override modifier before the subclass’s initializer definition, this is applicable even if you are overriding an automatically provided default initializer.Conversely, if a subclass initializer matches a superclass convenience initializer, you are not required to write override modifier when providing a matching
implementation of a superclass convenience initializer.
In swift a class, structure or enumeration initializer may fail for any of the following reason –
In swift a Failable Initializer allow us to catch and notify initializer method exceptions. The failable initializer can be defined by placing question mark after the init keyword (init?). The failable initializer creates an optional value for the type it is initialized, here a return statement with nil value is used to indicate initialization failure.
Example:-
|
1 2 3 4 5 6 7 8 9 10 11 12 13 |
class Employee { let empName: String init?(empName: String) { if empName.isEmpty { return nil } self.empName = empName } } print("W3Adda - Swift Failable Initializer") let emp1 = Employee(empName: "Alex") print(emp1?.empName) let emp2 = Employee(empName: "") print(emp2) |
Output:-

The failable initializer created with question mark after init keyword (init?) creates an optional instance of the respective type. In swift there is an alternate way you can create failable initializer by placing an exclamation mark after the init keyword (init!), this way an implicitly unwrapped optional instance is created.
Example:-
|
1 2 3 4 5 6 7 8 9 10 11 12 13 14 15 16 17 18 19 20 21 22 23 24 25 26 27 28 29 30 31 32 33 34 35 |
class EmpInfo { var empName: String init!(empName: String) { if empName.isEmpty { return nil } self.empName = empName } } class SalaryInfo: EmpInfo { var empSalary: Int init!(empName: String, empSalary: Int) { if empSalary < 1000 { return nil } self.empSalary = empSalary super.init(empName: empName) } } print("W3Adda - Swift init! Failable Initializer") if var result = SalaryInfo(empName: "John Doe", empSalary: 25000){ print("Name: \(result.empName), Salary: \(result.empSalary)") } if var result1 = SalaryInfo(empName: "John Doe", empSalary: 500){ print("Name: \(result1.empName), Salary: \(result1.empSalary)") } else { print("Unable to Initialize employee Salary") } if var result2 = SalaryInfo(empName: "", empSalary: 25000){ print("Name: \(result2.empName), Salary: \(result2.empSalary)") } else { print("Unable to Initialize employee Name") } |
Here, we have defined a super class “EmpInfo” and sub class “SalaryInfo” with failable initializers to catch exceptions in super and sub classes. As we discussed if one initializer fail, the entire program stops execution immediately.
When we run the above swift program, we see the following output –
Output:-

In swift, initializer with required modifier is termed as “Required Initializer“, it tells compiler that we must implement the initializer method in all sub classes.
Example:-
|
1 2 3 4 5 6 7 8 9 10 11 12 13 14 15 16 17 |
class EmpInfo { required init() { let empName:String = "John" print(empName) } } class SalaryInfo: EmpInfo { required init() { let empSalary:Int = 2000 print(empSalary) } } print("W3Adda - Swift Required Initializer") let empName = EmpInfo() let empSalary = SalaryInfo() |
Output:-

The inheritance is one of the important feature in object oriented programming, that facilitates the code reusability. Inheritance is a mechanism through which a class(derived class) can inherit properties and methods from an existing class(base class).
Sub Class:- The class that inherits properties and methods from another class is know as Sub-class or Derived-Class.
Super Class:- The class whose properties and methods are being inherited by sub class is called Base Class or Super class.
The class whose properties and methods are being inherited by sub class is called Base Class or Super class.In swift any class that is not being inherit from any other class is known as a base class.In swift, there is no universal base class, any classes you define without specifying a superclass automatically become base classes.
In Swift, class can be defined using the class keyword as following –
Syntax:-
|
1 2 3 4 |
class className{ // Properties // Methods } |
Here, className is replaced with the actual class name then in between the curly brackets {} we define all the associated class properties and methods.
Example:-
|
1 2 3 4 5 6 7 8 9 10 11 12 13 14 15 16 17 |
class employee { var empName: String = "" var empAge: Int = 0 var empSalary: Int = 0 init(empName: String, empAge: Int, empSalary: Int) { self.empName = empName self.empAge = empAge self.empSalary = empSalary } } var emp = employee(empName: "Keith", empAge: 25, empSalary: 4000) print("W3Adda - Swift Inheritance Baseclass") print("Employee Name is :\(emp.empName)") print("Employee Age is :\(emp.empAge)") print("Employee Salary is :\(emp.empSalary)") |
Output:-

The class that inherits properties and methods from another class is known as Sub-class or Derived-Class.In swift subclass are also allowed to override the properties or methods of base class. In addition to the inherited properties and methods a sub class can also have their own properties and methods.
In swift, a subclass can be defined using subclass name before the superclass name, separated by a colon.
Syntax:-
|
1 2 3 |
class subclassName: superclassName { // subclass body } |
Example:-
|
1 2 3 4 5 6 7 8 9 10 11 12 13 14 15 16 17 18 19 20 21 22 23 24 25 26 |
class employee { var empName: String = "" var empAge: Int = 0 var empSalary: Int = 0 init(empName: String, empAge: Int, empSalary: Int) { self.empName = empName self.empAge = empAge self.empSalary = empSalary } } class manager : employee {} class engineer : employee { } let mng = manager.init(empName: "Keith", empAge: 25, empSalary: 4000) let eng = engineer.init(empName: "John", empAge: 25, empSalary: 2000) print("W3Adda - Swift Inheritance Subclass") print("Manager's Name is :\(mng.empName)") print("Manager's Age is :\(mng.empAge)") print("Manager's Salary is :\(mng.empSalary)") print("Engineer's Name is :\(eng.empName)") print("Engineer's Age is :\(eng.empAge)") print("Engineer's Salary is :\(eng.empSalary)") |
Output:-

In swift, a subclass is allowed to customize an instance method, type method, instance property, type property, or subscript as per requirement, this feature is known as overriding in swift.
We have seen using inheritance method defined in a baseclass is inherited by its subclass and is used by subclass instances. However, we may want an instance to respond behave differently for the same method defined in baseclass. This can be achieved by method overriding. In method overriding we are allowed to define a method in subclass with same name, parameter list and return type. Then, when that method is called, method defined in the subclass is invoked instead of the one defined in the baseclass.
In swift, a baseclass methods can be overridden in subclass by the “override” keyword followed by method definition with same name, parameter list and return type as in baseclass.
Example:-
|
1 2 3 4 5 6 7 8 9 10 11 12 13 14 15 16 17 18 19 20 21 22 |
class employee { func sayHello(){ print("Hello from employee.") } } class manager : employee { override func sayHello(){ print("Hello from manager.") } } class engineer : employee { override func sayHello(){ print("Hello from engineer.") } } let emp = employee() let mng = manager() let eng = engineer() emp.sayHello(); mng.sayHello(); eng.sayHello(); |
Output:-

Inherited properties of a baseclass can be overridden in subclass to provide own custom getter and setter for that specific property, or to add property observers to overriding property to observe when that property value changes.
Example:-
|
1 2 3 4 5 6 7 8 9 10 11 12 13 14 15 16 17 18 19 |
class employee { var empPos: String = "employee" var pos: String { return "Emploee\'s position is \(empPos)" } } class manager: employee { var mngPos = "manager" override var pos: String { return super.pos + ", the override position is \(mngPos)" } } let emp = manager() emp.empPos = "engineer" emp.mngPos = "Sr. Engineer" print("W3Adda - Swift Overriding Properties") print("\(emp.pos)") |
Output:-
![]()
In swift, property observer can be added to an inherited property as property overriding. Adding property observer allows us to be notified when the value of an inherited property changes.
Example:-
|
1 2 3 4 5 6 7 8 9 10 11 12 13 14 15 16 17 18 19 20 21 22 23 24 25 26 27 28 29 30 |
class employee { var empPos: String = "employee" var pos: String { return "Emploee\'s position is \(empPos)" } } class manager: employee { var mngPos = "manager" override var pos: String { return super.pos + ", the override position is \(mngPos)" } } let emp = manager() emp.empPos = "engineer" emp.mngPos = "Sr. Engineer" print("W3Adda - Swift Overriding Property Observer") print("\(emp.pos)") class techlead: manager { override var empPos: String { didSet { mngPos = empPos } } } let emp1 = techlead() emp1.empPos = "techlead" print("Position is \(emp1.empPos)") |
Output:-

In swift, all of the methods and properties can be overridden in subclass by default. If we want to prevent a method, property, or subscript from being overridden in subclasses, we can declare them as final using final keyword. Making a method or property final ensures that they won’t be altered in subclasses. Similarly if we want to prevent a class being inherited or subclassed further then we can make it final using final keyword.
In Swift, subscripts are used to retrieve any specific information from a collection, list, or sequence without using a method. With the help of subscripts we can store and retrieve the values directly using associated index.
In swift, general syntax to declare a subscript is very similar with syntax to declare instance method and computed property. You need use subscript keyword followed by parameter list and a return type, in the subscript body there is a getter and a setter properties to define whether subscript is a read-write or ready-only.
Syntax:-
|
1 2 3 4 5 6 7 8 |
subscript(parameterList) -> ReturnType { get { // return someValue } set (newValue) { // set someValue } } |
Syntax for read only:-
|
1 2 3 |
subscript(parameterList) -> ReturnType { } |
Example:-
|
1 2 3 4 5 6 7 8 9 |
struct addition{ let sum: Int subscript(i: Int) -> Int { return sum + i } } let sum = addition(sum: 45) print("W3Adda - Swift Subscript Read Only") print("Subscript Value of: \(sum[5])") |
Output:-
![]()
Example:-
|
1 2 3 4 5 6 7 8 9 10 11 12 13 14 15 16 17 18 19 20 21 22 |
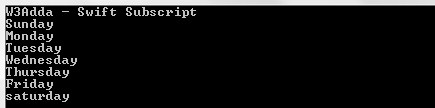
class daysOfWeek { private var days = ["Sunday", "Monday", "Tuesday", "Wednesday", "Thursday", "Friday", "saturday"] subscript(index: Int) -> String { get { return days[index] } set(newValue) { self.days[index] = newValue } } } var dow = daysOfWeek() print("W3Adda - Swift Subscript") print(dow[0]) print(dow[1]) print(dow[2]) print(dow[3]) print(dow[4]) print(dow[5]) print(dow[6]) |
Output:-
Subscripts are allowed to take one or more parameters of any data type and subscripts does not support default parameter values.In swift we can provide multiple subscripts for a class or structure based on requirement, it is known as “subscript overloading”.
Example:-
|
1 2 3 4 5 6 7 8 9 10 11 12 13 14 15 16 17 18 19 20 21 22 23 24 25 26 27 28 29 30 31 32 33 |
class employee { var paramOne: String? var paramTwo: String? subscript(row: Int, col: Int) -> String { get { if row == 0 { if col == 0 { return paramOne! } else { return paramTwo! } } return paramTwo! } set { if row == 0 { if col == 0 { paramOne = newValue } else { paramTwo = newValue } } } } } var emp = employee() print("W3Adda - Swift Subscripts Options") emp[0,0] = "John" emp[0,1] = "Alex" print(emp[0,0]) print(emp[0,1]) |
Output:-

In Swift, methods are actually functions associated with classes, structures, and enumerations.Methods describes the behavior for a instance of a classes, structures, or enumerations and mean to provide specific functionality to that type instance and operates on its properties. In swift following two type of methods available –
Instance methods are associated with the instances of a specific class, structure, or enumeration. Instance methods are used to perform certain functionality or task for those instances.Instance methods can be invoked using the instance of that type. In swift, instance method can be defined same way as function.
Syntax:-
|
1 2 3 4 |
func fun_name(parameter_list) -> return_type { statements return statement } |
func :- It is swift a keyword which is used to define a function.
fun_name :- It is replaced with the name of the function .
parameter_list :- It represents the list of the parameters need to be passed when function call made.
return_type :- It represents return type of the function.
Once an instance method is defined it can be invoked using the instance of that class, structure, or enumeration.
Example:-
|
1 2 3 4 5 6 7 8 9 10 11 12 13 14 |
class employee { var empName: String = "John" var empAge: Int = 35 var empSalary: Int = 5000 func showEmpName(){ print("Employee name is : \(emp.empName)") } } let emp = employee() var empSalary:Int = emp.empSalary print("W3Adda - Swift Access Class Property and Method") emp.showEmpName() print("Salary of \(emp.empName) is \(empSalary)") |
Output:-

Every instance in swift has an implicit property that refer the current instance within its own instance methods.This implicit property is called as “self” and it is exactly equivalent to the current instance itself.Self property allow us to refer any property or method for the current instance using self keyword followed by dot(.) operator and then property name as following –
Syntax for Property:-
|
1 |
self.propName |
Syntax for Method:-
|
1 |
self.methodName() |
Example:-
|
1 2 3 4 5 6 7 8 9 10 11 12 13 14 15 |
class employee { var empName: String = "John" var empAge: Int = 35 var empSalary: Int = 5000 func showEmpName(){ print("Employee name is : \(self.empName)") print("Employee age is : \(self.empAge)") print("Employee salary is : \(self.empSalary)") } } let emp = employee() var empSalary:Int = emp.empSalary print("W3Adda - Swift Access Property and Method using Self") emp.showEmpName() |
Output:-

In swift properties of a structures and enumerations type cannot be modified from within its instance methods because structures and enumerations are value type.
However, if you want to allow structure or enumeration properties to be modified from within its instance method then it can be achieved by opting in for this behavior by placing the mutating keyword before the func keyword for that method.
Example:-
|
1 2 3 4 5 6 7 8 9 10 11 12 13 14 15 16 17 18 |
struct Counter { var ctr = 10 func getCtrNormal() -> Int { return self.ctr } mutating func getCtrMut(c:Int)->Int{ ctr=ctr+c return ctr } } print("W3Adda - Swift Modify Value Types from Instance Methods") var ctr = Counter() print(ctr.getCtrNormal() ) print(ctr.getCtrMut(c:10) ) print(ctr.getCtrNormal()) var ctr1 = Counter() print(ctr1.ctr) |
Output:-

In swift we can assign an entirely new instance to the implicit self property inside a mutating method.
Example:-
|
1 2 3 4 5 6 7 8 9 10 11 12 13 14 15 16 17 18 19 20 21 |
enum TrafficLight { case red, yellow, green mutating func next() { switch self { case .red: self = .yellow case .yellow: self = .green case .green: self = .red } } } print("W3Adda - Swift Self Property for Mutating Method") var signal = TrafficLight.yellow signal.next() print(signal) // signal is now equal to .green signal.next() print(signal) // ovenLight is now equal to .red |
Output:-

Instance methods are called on an instance of a particular type. In swift, we are allowed to define type method that can be called on the type itself.Type methods can be created using static keyword before the a method’s func keyword. Type method can be invoked using dot syntax(.) with the type itself instead if instance.
Example:-
|
1 2 3 4 5 6 7 8 9 10 11 12 13 14 15 16 17 |
class MathOps { class func sum(num:Int)->Int { return (10 + num) } } struct MathOpsStruct{ static func multiply(num:Int)->Int { return (10 * num) } } let res_sum = MathOps.sum(num:10) let res_mul = MathOpsStruct.multiply(num:5) print("W3Adda - Swift Type Method") print(res_sum) print(res_mul) |
Output:-

Properties is way to associate an attribute and its value with a particular class, structure, or enumeration.Properties can be a constant or variable that stores associated values for classes, structures or enumerations. In swift, properties have getter and setter methods to set, modify or retrieve property value.
In Swift, properties can classified into following two types –
The stored properties are simply a constant or variable that is being associated and stored as part of an instance of any specific class or structure. The stored properties can be a variable or constant stored properties that can be declared using var or let keyword with an initial value.
Example:-
|
1 2 3 4 5 6 7 8 9 |
struct employee { var empName: String = "John" let empAge: Int } var emp = employee(empName: "Alex", empAge: 35) print("W3Adda - Swift Stored Properties") print("Employee Name: \( emp.empName) ") print("Employee Age: \( emp.empAge) ") |
Output:-

In Swift we have a flexible property type called as lazy stored properties whose initial values is not evaluated until it is accessed or used for the first time. Lazy stored properties are useful when we want to hold initialization for some complex computations or when initial value of property to dependent upon some external factors. In swift a property can be declared as lazy stored property using lazy keyword just before its declaration.
Example:-
|
1 2 3 4 5 6 7 8 9 10 11 12 13 14 15 16 |
class getSum{ lazy var sum = getNum(n1: 10, n2: 15) // 'var' declaration is required. } class getNum{ var n1:Int = 10 var n2:Int = 15 var sum:Int init(n1: Int, n2: Int) { self.n1 = n1 self.n2 = n2 self.sum = n1 + n2 } } var result = getSum() print("W3Adda - Swift Lazy Stored Properties") print(result.sum.sum) |
Output:-
![]()
In swift unlike stored properties computed properties calculates value at the run time rather than to store.Computed properties have a getter to retrieve the value and an optional setter to initialize values.Computed properties can be defined for classes, structures, and enumerations whereas stored properties are defined for classes and structures.
Computed properties can also be declared using var keyword, but rather than an initial value we assign a function to calculate the value.
Example:-
|
1 2 3 4 5 6 7 8 9 10 11 12 13 |
class Circle{ var radius:Double init(radius: Double) { self.radius = radius } var area:Double { return(3.14 * radius * radius) } } var c = Circle(radius: 3) var result = c.area print("W3Adda - Swift Computed Properties") print("Area of circle is: \(result)") |
Output:-
![]()
The Read-Only computed property are computed property with only getter but no setter. Read-Only computed property are always mean to return a value and can be accessed through dot (.) syntax.
Example:-
|
1 2 3 4 5 6 7 8 9 10 11 12 13 14 |
class mathOps{ var num1 : Int = 5 var num2 : Int = 10 var sum: Int { get { return num1 + num2 } } } let mo = mathOps() var result = mo.sum print("W3Adda - Swift Read Only Computed Properties") print("Sum of two numbers is :\(result)") |
Output:-
![]()
In swift property observers observe and responds to changes in a property’s value. Property observer is invoked every time property’s value changes or set to new value, even if the new values is same as current value.Property observers can be added to any stored properties except lazy stored properties, it can also be added to any inherited property by overriding the property within a subclass.
In swift, we have following two types of observers.
Example:-
|
1 2 3 4 5 6 7 8 9 10 11 12 13 14 15 16 17 18 19 20 21 22 23 |
class employee { var empAge: Int = 30 { willSet(newAge){ print("Employee's age is: \(empAge)") if newAge != empAge { print("Setting employee's age to : \(newAge)") } } didSet { if empAge != oldValue { print("Employee's new age is : \(empAge)") } } } } let emp = employee() print("W3Adda - Swift Property Observer") emp.empAge = 35 |
Output:-

In Swift, Instance properties are associated with individual instance of a class or structure. Every a new instance created it has separate copy of property values from other instances.In Swift, we can define a special kind of properties that is associated to the class or structure itself, rather than any individual instance no matter how many instances have been created, there will always one copy of these properties will available for all instances of that type.These properties are termed as type properties.Type properties can be defined using ‘static‘ keyword and for class types ‘class‘ keyword is used.
Example:-
|
1 2 3 4 5 6 7 8 9 10 11 12 13 14 15 16 |
struct sayHello { static let msg = "Hello, W3Adda!" } class welcomeOne { func printMsg() { print(sayHello.msg) } } class welcomeTwo { func printMsg() { print(sayHello.msg) } } var insOne = welcomeOne() var insTwo = welcomeTwo() insOne.printMsg() insTwo.printMsg() |
Output:-
![]()
Class can be defined as a blueprint or prototype of associated objects. Class wrapper that binds the data and methods which can be later accessed by objects of that class. We can think of a class as a user-defined data type, that describes the behavior and characteristics shared by all of its instances.
In Swift, class can be defined using the class keyword as following –
Syntax:-
|
1 2 3 4 |
class className{ // Properties // Methods } |
Here, className is replaced with the actual class name then in between the curly brackets {} we define all the associated class properties and methods.
Example:-
|
1 2 3 4 5 |
class employee { var empName: String var empAge: Int var empSalary: Int } |
Once a class has been defined, we can create instance or objects of that class which has access to class properties and methods. In swift, an instance of a class can be created as following –
Syntax:-
|
1 |
let objectName = className() |
Here, objectName and className is replaced with actual object name and the class name respectively.
Example:-
|
1 2 3 4 5 6 7 8 9 |
class employee { var empName: String = "John" var empAge: Int = 35 var empSalary: Int = 5000 } let emp = employee() print("W3Adda - Swift Class and Objects") print("Salary of \(emp.empName) is \(emp.empSalary)") |
Output:-
![]()
In swift once we have got an instance of a class created, we can access properties and method of that class using property/method name separated by a dot (.) operator after the instance name as following.
Syntax for Property:-
|
1 |
objectName.propName |
Syntax for Method:-
|
1 |
objectName.methodName() |
Example:-
|
1 2 3 4 5 6 7 8 9 10 11 12 13 14 |
class employee { var empName: String = "John" var empAge: Int = 35 var empSalary: Int = 5000 func showEmpName(){ print("Employee name is : \(emp.empName)") } } let emp = employee() var empSalary:Int = emp.empSalary print("W3Adda - Swift Access Class Property and Method") emp.showEmpName() print("Salary of \(emp.empName) is \(empSalary)") |
Output:-
In swift class instances are of the reference types, which means all of the class objects shares memory reference to the class store instead of having an copy of class. There may be possibilities that multiple constants and variables will refer the same class instance.
In Swift, we have a set of identity operators allow us to check two constants and variables referring to same instance of a class or not.
| Operator | Description |
|---|---|
| Identical Operator(===) | It returns true when two constants or variables pointing to a same instance |
| Not Identical Operator used is (!==) | It returns true when two constants or variables pointing to a different instance |
Example:-
|
1 2 3 4 5 6 7 8 9 10 11 12 13 14 15 16 17 18 |
class employee { var empName : String init(empName: String) { self.empName = empName } } var emp1 = employee.init(empName: "Alex") var emp2 = employee.init(empName: "John") print("W3Adda - Swift Class Identical Operators.") if emp1 === emp2 { print("Identical") } if emp1 !== emp2 { print("Not Identical") } |
Output:-
![]()
In swift class are of the reference types, which means when we assign it to any constants, variables or function reference to same existing instance will be used instead of an individual value copy of class.
Example:-
|
1 2 3 4 5 6 7 8 9 10 11 12 13 14 15 |
class employee { var empName : String init(empName: String) { self.empName = empName } } var emp1 = employee(empName: "Alex") var emp2 = emp1 emp2.empName = "John" print("W3Adda - Swift class are reference type") print(emp1.empName) print(emp2.empName) |
Here, in the above example we defined a class employee, we created an instance emp1 with initial value “Alex” for empName property, then we have created another instance emp2 by assigning it previous instance emp1 and updated the value of empName property for emp2 instance, now we printed the value of empName property for both the instances and see the value is updated for both the instance because class are reference type and both instances having reference to the same class instance.
Output:-

In Swift, higher order function is simply a function that either takes a function as an argument, or returns a function. In swift array type has some important higher order functions.
Map –
It loop over the elements in a collection and applies the same operation to each of the element in collection. It returns an array containing result after applying required operation on collection elements.
Example:-
|
1 2 3 4 |
let weekdays:[String] = ["sun" ,"mon" , "tue" ,"wed" , "thu", "fri", "sat"] let daysInCaps = weekdays.map { $0.uppercased()} print("W3Adda- Higher Order Function Map") print(daysInCaps) |
Output:-
![]()
Filter –
It loops over array elements and returns an array contains only elements that satisfy filter specified in your closure.
Example:-
|
1 2 3 4 |
var numbers = [1, 2, 3, 4, 5, 6, 7, 8] var oddNumbers = numbers.filter{ $0 % 2 == 1 } print("W3Adda- Higher Order Function Filter") print(oddNumbers); |
Output:-
![]()
Reduce –
The reduce function combine all items in a collection to create a single new value. The Reduce function takes two parameters, an initial value of the result and a closure which takes two arguments, one is the initial value or the result from the previous execution of the closure and the other one is the next item in the collection.
Example:-
|
1 2 3 4 |
var nums= [1, 2, 3, 4, 5, 6, 7, 8] let sumOfNumbers = nums.reduce(0,{$0 + $1}) print("W3Adda- Higher Order Function Reduce") print(sumOfNumbers) |
Here, the initial value ($0) will be 0 and then the value from nums array is added to the initial value, which is retained for next iteration. In the end, one single value is returned
Output:-
![]()
Structure is a user-defined data type, that encapsulate the properties (variables and constant) and methods(functions). It is named type, you can define and five it a name and later you can use it in your. In Swift, Classes and structures are much similar, but one key differences is that classes are reference and structures are value types.
Unlike many other programming languages where structure are mostly used to group related data together, swift structures are fully feature rich and you are allowed to do following things only possible with class –
properties
instance methods
type methods
initializers
subscripts
extensions
protocols
In Swift, structure can be defined using the struct keyword as following –
Syntax:-
|
1 2 3 4 |
struct structName{ // Properties // Methods } |
Here, structName is replaced with the actual structure name then in between the curly brackets {} we define all the properties and methods associated with the structure.
Example:-
|
1 2 3 4 5 |
struct employee { var empName: String var empAge: Int var empSalary: Int } |
Once a structure has been defined, we can create instance or objects of that structure which has access to structure properties and methods. In swift, an instance of a structure can be created as following –
Syntax:-
|
1 |
var instName = structName() |
Here, instName and structName is replaced with actual instance name and the structure name respectively.
Example:-
|
1 2 3 4 5 6 7 8 9 |
struct employee { var empName: String = "John" var empAge: Int = 35 var empSalary: Int = 5000 } let emp = employee() print("W3Adda - Swift Structure and Instance") print("Salary of \(emp.empName) is \(emp.empSalary)") |
Output:-
![]()
In swift once we have got an instance of a structure created, we can access properties and method of that structure using property/method name separated by a dot (.) operator after the instance name as following.
Syntax for Property:-
|
1 |
objectName.propName |
Syntax for Method:-
|
1 |
objectName.methodName() |
Example:-
|
1 2 3 4 5 6 7 8 9 10 11 12 13 14 |
struct employee { var empName: String = "John" var empAge: Int = 35 var empSalary: Int = 5000 func showEmpName(){ print("Employee name is : \(emp.empName)") } } var emp = employee() var empSalary:Int = emp.empSalary print("W3Adda - Swift Access Structure Property and Method") emp.showEmpName() print("Salary of \(emp.empName) is \(empSalary)") |
Output:-

An initializer is a special kind of function in swift, it is used to provide initial values to structure properties while an instance of structure is created.
Example:-
|
1 2 3 4 5 6 7 8 9 10 11 12 13 14 15 16 17 |
struct employee { var empName: String = "John" var empAge: Int = 35 var empSalary: Int = 5000 init(empName: String, empAge: Int, empSalary: Int) { self.empName = empName self.empAge = empAge self.empSalary = empSalary } } var emp = employee(empName: "Keith", empAge: 25, empSalary: 4000) print("W3Adda - Swift Structure Initializers") print("Employee Name is :\(emp.empName)") print("Employee Age is :\(emp.empAge)") print("Employee Salary is :\(emp.empSalary)") |
Output:-

In swift class are of the value types, which means when we assign it to any constants, variables or function an individual copy of structure is created for each of the instance.
Example:-
|
1 2 3 4 5 6 7 8 9 10 11 12 13 14 15 |
struct employee { var empName : String init(empName: String) { self.empName = empName } } var emp1 = employee(empName: "Alex") var emp2 = emp1 emp2.empName = "John" print("W3Adda - Swift structures are value type") print(emp1.empName) print(emp2.empName) |
Here, in the above example we defined a structure employee, we created an instance emp1 with initial value “Alex” for empName property, then we have created another instance emp2 by assigning it previous instance emp1 and updated the value of empName property for emp2 instance, now we printed the value of empName property for both the instances and see that both the instance having individual copy of property.
Output:-

A variadic function is a function that can accept variable number of arguments. In Swift, when are you not sure about the input parameter for a function then you have option to create a A variadic function. A variadic function allows us to You can pass zero or more parameters for a function. A variadic function can be declare using an ellipsis/three dots after type of parameter.
Example:-
|
1 2 3 4 5 6 7 8 9 |
func addnum(_ nums: Int...) -> Int { var sum: Int = 0 for num in nums { sum += num } return sum } print("W3Adda - Swift variadic function") print(addnum(10,11,12,13,14,15)) |
Output:-
![]()
An Enumeration is a first-class data type in swift.It is consist of a set of predefined named values, called as members. Enumerations are useful when we want deal with limited set of values for variable. For example you can think of the colors of a traffic light can only be one of three colors– red, yellow or green.
Swift enumerations are much powerful yet flexible, we can access its values in a type-safe manner within your code. Enumeration values can be a string, a character, or a value of any integer or floating-point type.
In Swift, enumeration can be declared using the enum keyword followed by a list of the individual members introduced between curly brackets {} using the case keyword.
Syntax:-
|
1 2 3 4 5 6 7 |
enum enumname{ //Case A //Case B //Case C --------- //Case N } |
Example:-
Let’s define an enumeration for days of week –
|
1 2 3 4 5 6 7 8 9 |
enum DaysofWeek { case Sun case Mon case Tue case Wed case Thu case Fri case Sat } |
Dot syntax can be used to refer enumeration’s member if the type of an enumeration is known or can be inferred.
Example:-
|
1 2 3 4 5 6 7 8 9 10 11 12 13 14 15 16 |
enum DaysofWeek { case Sun case Mon case Tue case Wed case Thu case Fri case Sat } print("W3Adda - Enumeration dot syntax.") // in this case the type is known var toDay: DaysofWeek = .Mon // in this case the type can be inferred if toDay == .Mon { print("It's Monday.") } |
Output:-
![]()
In Swift, an enumeration can be used in switch statement as following –
Example:-
|
1 2 3 4 5 6 7 8 9 10 11 12 13 14 15 16 17 18 19 20 21 22 23 24 25 26 27 28 29 30 31 32 33 |
enum DaysofWeek { case Sun case Mon case Tue case Wed case Thu case Fri case Sat } print("W3Adda - Switch Statement using Enumeration.") var toDay: DaysofWeek = .Mon switch toDay { case .Sun: print("It's Sunday.") case .Mon: print("It's Monday.") case .Tue: print("It's Tuesday.") case .Wed: print("It's Wednesday.") case .Thu: print("It's Thursday.") case .Fri: print("It's Friday.") case .Sat: print("It's Saturday.") } |
Output:-
![]()
In Swift Enumeration members can be associated with a prepopulated raw value of type Int, String, Character, etc. All of the enum member should have raw values of same type and must be unique.If integers are used for raw values, they auto-increment if no value is specified for any members.
Example:-
|
1 2 3 4 5 6 7 8 9 10 11 12 |
enum DaysofWeek: String { case Sun = "Sunday" case Mon = "Monday" case Tue = "Tuesday" case Wed = "Wednesday" case Thu = "Thursday" case Fri = "Friday" case Sat = "Saturday" } print("W3Adda - Enumeration with Raw Value.") print(DaysofWeek.Sat.rawValue) print(DaysofWeek.Sun.rawValue) |
Output:-

In associated values we can store data with member of an enumeration, which changes between different instances of an enumeration. With associated values you can associate a tuple with multiple to a member of enumerations, this tuple can be of different type for each of the enumeration members.
Example:-
|
1 2 3 4 5 6 7 8 9 10 11 12 13 14 15 16 17 18 19 20 21 |
enum studentInfo { case stdName(String) case stdMarks(Int,Int,Int,Int) } var sname = studentInfo.stdName("Keith") var smarks = studentInfo.stdMarks(75,80,90,95) print("W3Adda - Enumeration with Associated Value.") switch sname { case .stdName(let sname): print("Student name is: \(sname).") case .stdMarks(let Mark1, let Mark2, let Mark3, let Mark4): print("Student Marks are: \(Mark1),\(Mark2),\(Mark3),\(Mark4)") } switch smarks { case .stdName(let sname): print("Student name is: \(sname).") case .stdMarks(let Mark1, let Mark2, let Mark3, let Mark4): print("Student Marks are: \(Mark1),\(Mark2),\(Mark3),\(Mark4)") } |
Output:-

In swift, it is possible to iterate over the enumeration cases, for this we have to enable this property by adding CaseIterable after the enumeration name, then swift exposes a collection of all the cases in an allCases property of the enumeration type.Once all set, we can loop through the enum members using for-in loop as following –
Example:-
|
1 2 3 4 5 6 7 |
enum DaysofWeek: CaseIterable { case John, Steve, Keith, Alex } for day in DaysofWeek.allCases { print(day) } |
Output:-
|
1 2 3 4 |
John Steve Keith Alex |
Note:- Above Syntax must comply with the CaseIterable protocol.
An enumeration with another instance of the enumeration as the associated value for one or more of the enumeration is termed as recursive enumeration.A indirect keyword is used to indicate that enumeration is a recursive.
Example:-
|
1 2 3 4 5 6 7 8 9 10 11 12 13 14 15 16 17 |
indirect enum ArithmeticExpression { case num(Int) case mul(ArithmeticExpression, ArithmeticExpression) } func evaluate(_ expression: ArithmeticExpression) -> Int { switch expression { case .num(let value): return value case .mul(let n1, let n2): return evaluate(n1) * evaluate(n2) } } let a = ArithmeticExpression.num(7) let b = ArithmeticExpression.num(5) let result = ArithmeticExpression.mul(a, b) print("W3Adda - Recursive Enumeration") print(evaluate(result)) |
Output:-
![]()