In this tutorial you will learn about the Kotlin Navigation Drawer and its application with practical example.
Navigation Drawer
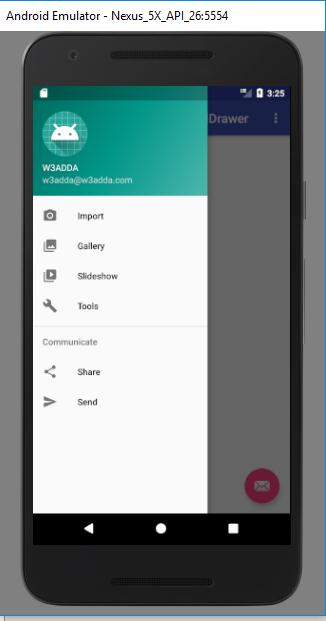
The navigation drawer is a panel that displays the app’s Main Navigation options on the left edge of the screen. It is only show when any user swipe a finger from the left edge of the screen or tapping the app icon on the action bar, Most of the time it is in hidden condition.
Example: Now a days most of the applications have navigation drawer like Facebook, Youtube, Google+ .So let’s get understand it by this example. I have used Kotlin Language for this. Follow the steps for creation of navigation drawer.
Project Creation:
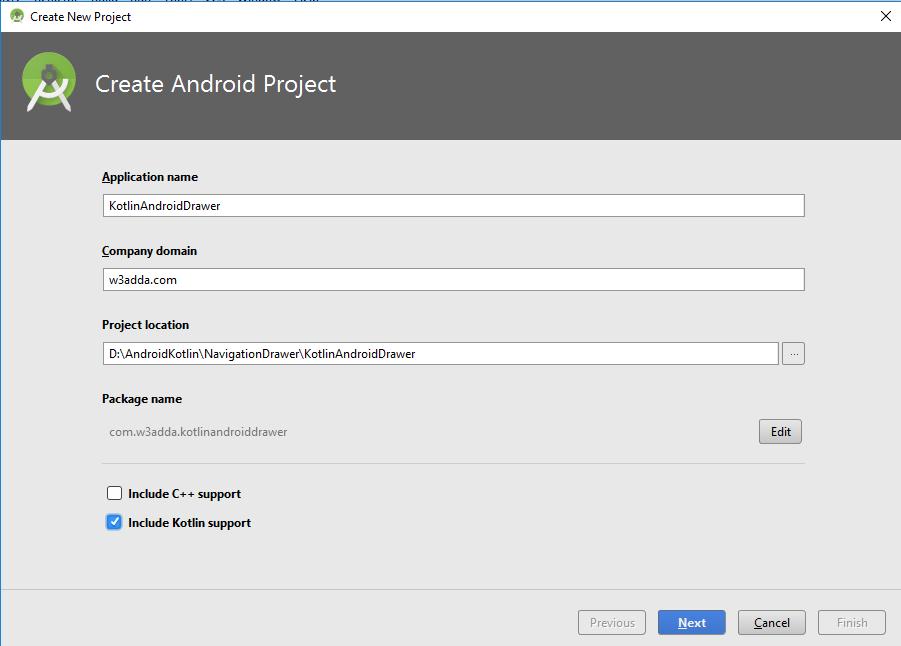
- Create New Project: Click on “File” and then go to “New” =>”New Project” in Android Studio. The below screen will appear, please fill all details and click on “Next”.
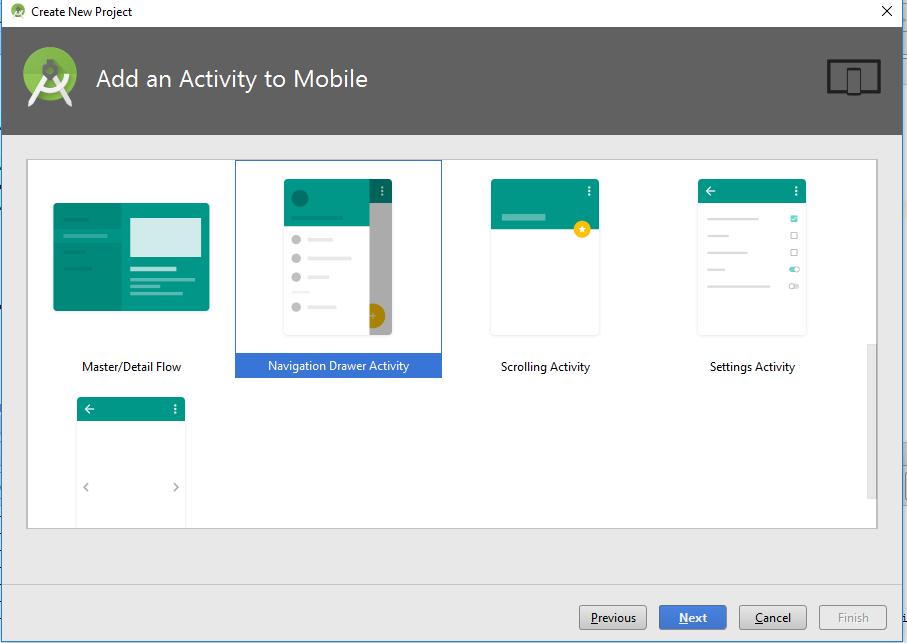
Activity Selection:Please select “Navigation Drawer Activity”, It will auto create navigation drawer in your application. You can use it as you want. After Selection click on “Next” like below image.
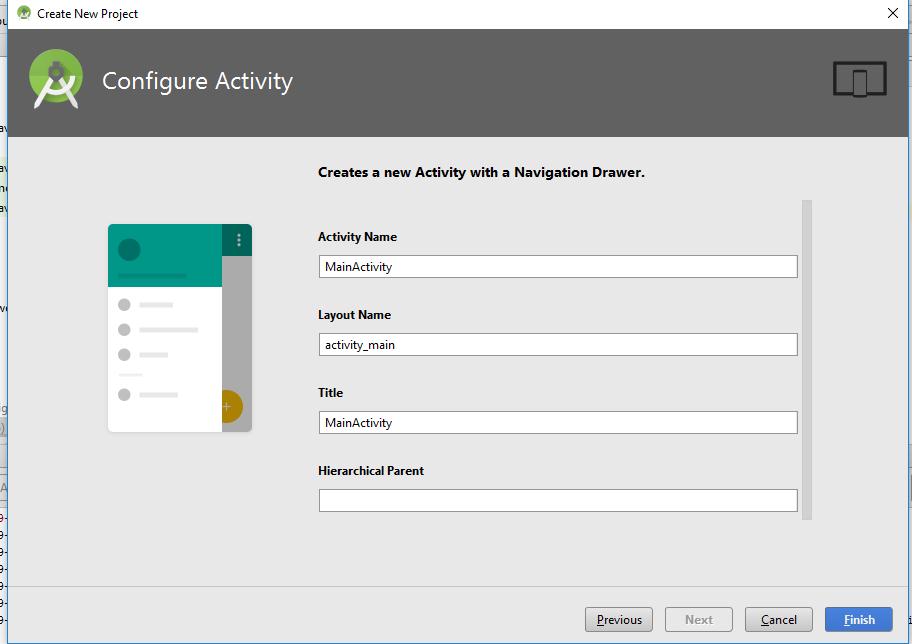
- Finish: Click on “Finish” and wait till configuration of your project. Like below image.
- Used Class and XML: There are some auto created xml which are used for creation of Navigation Drawer and bind with MainActivity. You can customize them according to your requirements. Let’s get understand one by one.
#1. Menu=>activity_main_drawer.xml: From here you can add new options in navigation drawer with icon and also you can change default options.
|
1 2 3 4 |
<item android:id="@+id/nav_send" android:icon="@drawable/ic_menu_send" android:title="Send" /> |
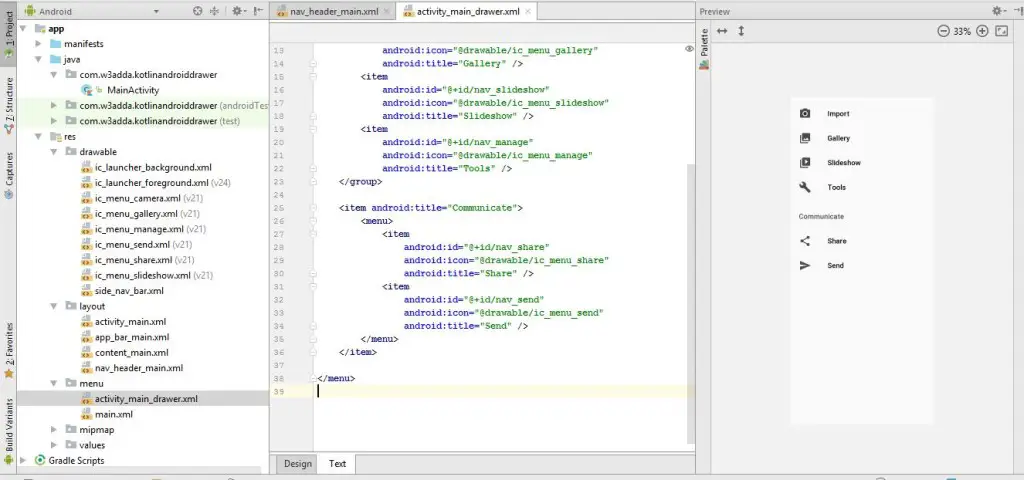
Item is used to add an option in navigation drawer.
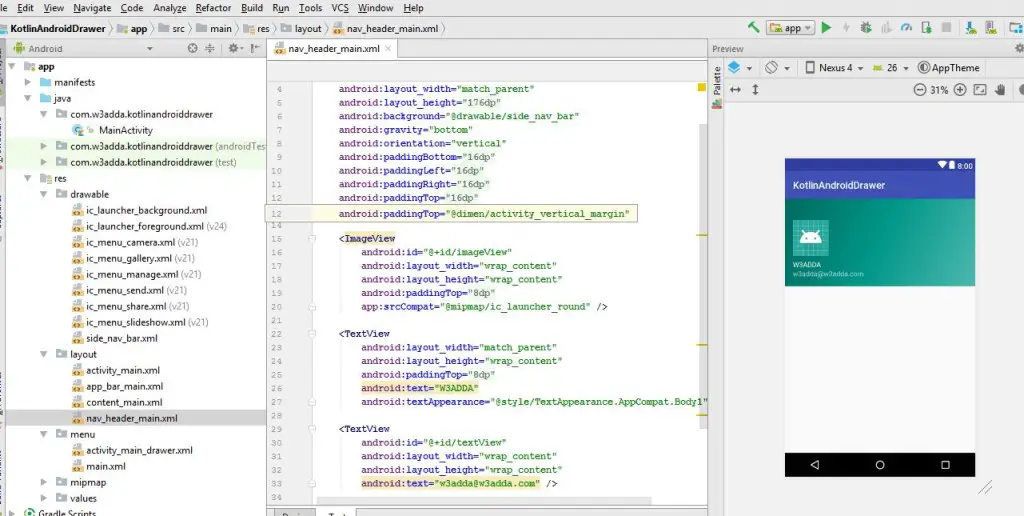
#2.Layout=>nav_header_main.xml:This is the header of Navigation Drawer. You can change it according to your requirements like you can add your Image, Email, Name etc. Check below image.
#3.layout=>app_bar_main.xml:The app bar is also known as the action bar. It is most important design elements in our app’s activities. It gives dedicated space for giving your app an identity and indicating the user’s location in the app. The app bar looks like below image

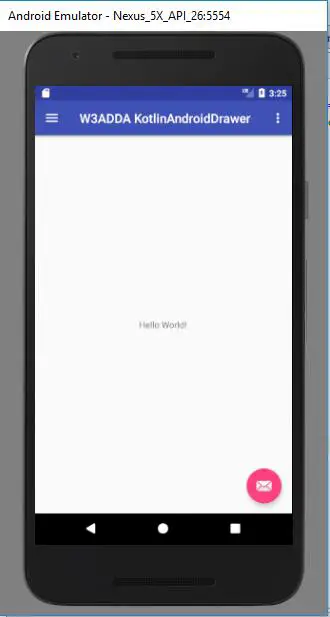
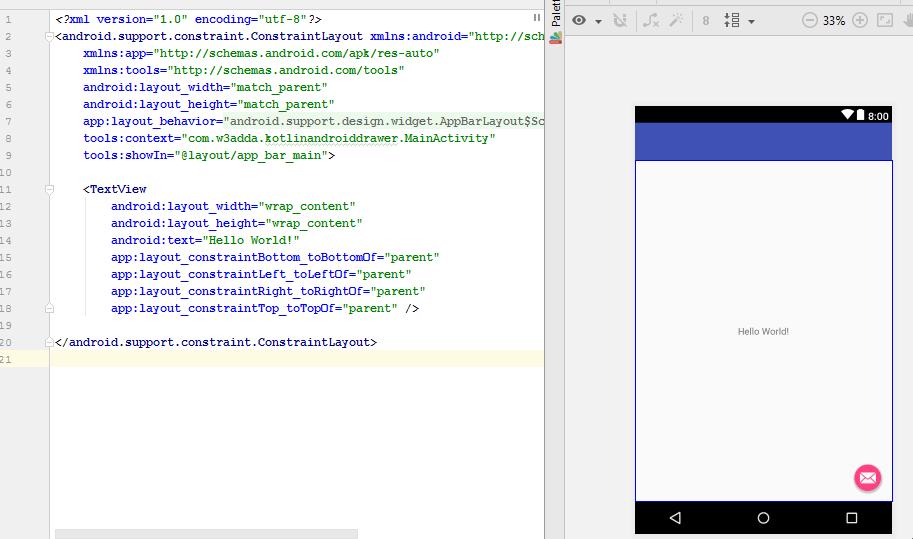
#4.layout=>content_main.xml:In this xml you can write code of main activity layout which will appear like below image.
#5.activity_main.xml: In this xml you have to add NavigationView(Represent a standard navigation menu for application) and include app_bar_main.xml in this XML. Like below code.
|
1 2 3 4 5 6 7 8 9 10 11 12 13 14 15 16 17 18 19 20 21 22 23 24 25 |
<?xml version="1.0" encoding="utf-8"?> <android.support.v4.widget.DrawerLayout xmlns:android="http://schemas.android.com/apk/res/android" xmlns:app="http://schemas.android.com/apk/res-auto" xmlns:tools="http://schemas.android.com/tools" android:id="@+id/drawer_layout" android:layout_width="match_parent" android:layout_height="match_parent" android:fitsSystemWindows="true" tools:openDrawer="start"> <include layout="@layout/app_bar_main" android:layout_width="match_parent" android:layout_height="match_parent" /> <android.support.design.widget.NavigationView android:id="@+id/nav_view" android:layout_width="wrap_content" android:layout_height="match_parent" android:layout_gravity="start" android:fitsSystemWindows="true" app:headerLayout="@layout/nav_header_main" app:menu="@menu/activity_main_drawer" /> </android.support.v4.widget.DrawerLayout> |
#6.MainActivity:An Activity is a class, Its represent single screen. Parent class for Any Activity is Activity, Means You need to implement an Activity as a subclass of Activity, like
|
1 2 |
class MainActivity:AppCompatActivity { } |
If you created an activity so you must declare it Manifest.xml file. In MainActivity we have to write our code for navigation drawer. Default code will be there, you can simply run that code and check output for this.
From below method you can operate your navigation menu click. For an example if you want operate camera on click of Navigation item click so write your code under the “R.id.nav_camera” where nav_camera is the unique id of Camera option in navigation drawer.
|
1 2 3 4 5 6 7 8 9 10 11 12 13 14 15 16 17 18 19 20 21 22 23 24 25 26 |
override fun onNavigationItemSelected(item: MenuItem): Boolean { // Handle navigation view item clicks here. when (item.itemId) { R.id.nav_camera-> { // Handle the camera action } R.id.nav_gallery-> { } R.id.nav_slideshow-> { } R.id.nav_manage-> { } R.id.nav_share-> { } R.id.nav_send-> { } } drawer_layout.closeDrawer(GravityCompat.START) return true } |
- Run: Simply run this project and you will get output like below image.