In this tutorial you will learn about the Struts 2 Example and its application with practical example.
Struts2 Example
In previous articles, We have learnt about struts2. In the struts2 architecture we have learnt that if we click on hyperlink or submit form action in Struts2 Web Application so the input is collected by the Controller and then Controller sends it to Java class which is called Actions. After the execution of Action the resources are selected to render the response. JSP, PDF , an Excel spreadsheet and a Java applet window are the resources which has been selected by the action. JSP is generally used as resources. Detailed about Action will be in Next Article.
Let’s understand struts2 by an example. Please follow the steps. This project is created in Netbeans IDE.
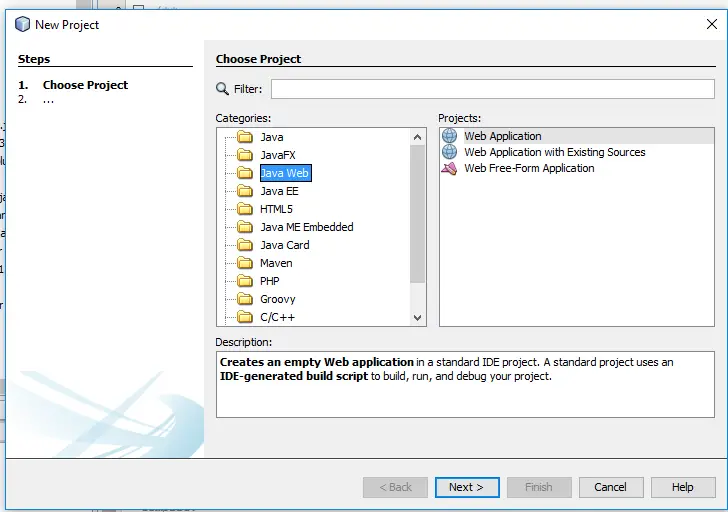
Step 1:-
Create new project on click on File and then New Project and then select JavaWeb->Web Application like below image.
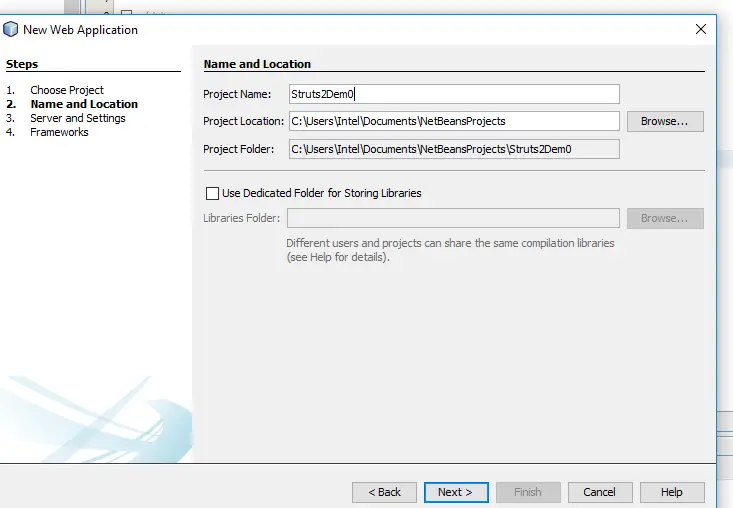
Step 2:- In this step enter your project name and then click on Next. Check below image.
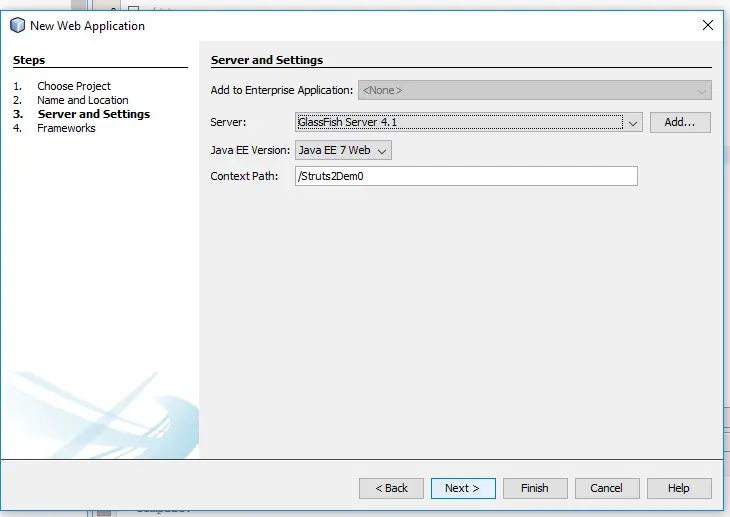
Step 3:- This step is used for selecting “Server and Settings”. I am using “GlassFish Server”, you can also use “apache tomcat server”. Check below image.
Step 4:- This is the step where we are going to select our framework , I hope you are gone through with previous article in which we have explained that how can we add struts2 in Netbeans, if not please follow instruction of previous article first. Check below image for this step.
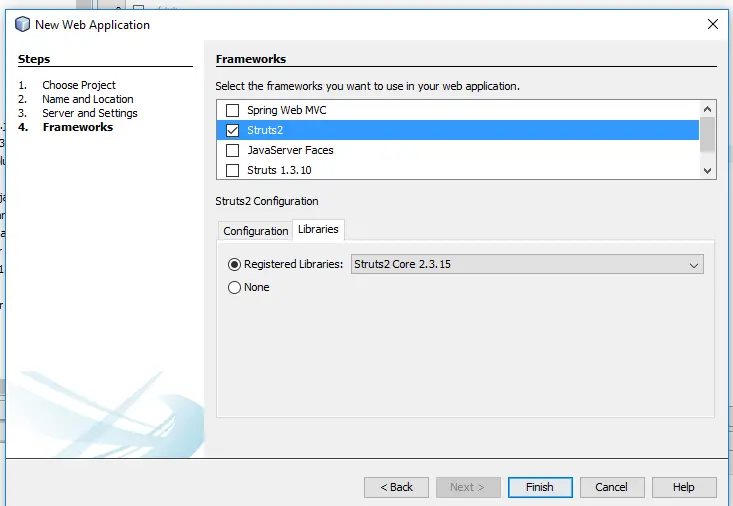
On finishing you will be done with project creation. Now let’s do some coding part.
Requirement: Below are listed files which are required for this example.
1. HelloWorldAction.java
2. index.jsp.
3. HelloWorld.jsp
4. struts.xml
5. web.xml
HelloWorldAction.java
This is our Action class which respond to a user action, as we know that Action class is the key to Struts2 application and most of the logics are implemented in this class. So Let’s create this class. Below is our action class which is very simple, here we have used only getter and setter method for the “name” property, there is also an execute method which return string message. Check below class.
|
1 2 3 4 5 6 7 8 9 10 11 12 13 14 15 16 |
package example; public class HelloWorldAction { private String name; public String execute() throws Exception { return "success"; } public String getName() { return name; } public void setName(String name) { this.name = name; } } |
index.jsp
This is our welcome page from where we will going to perform action. Here on click of submit button action will perform which call specific method of the “HelloWorldAction” class. Check below code.
|
1 2 3 4 5 6 7 8 9 10 11 12 13 14 15 16 17 18 19 20 |
<%@ page language = "java" contentType = "text/html; charset = ISO-8859-1" pageEncoding = "ISO-8859-1"%> <%@ taglib prefix = "s" uri = "/struts-tags"%> <!DOCTYPE html PUBLIC "-//W3C//DTD HTML 4.01 Transitional//EN" "http://www.w3.org/TR/html4/loose.dtd"> <html> <head> <title>W3Adda Struts2 Hello World</title> </head> <body> <h1>Hello World of Struts2 From W3adda.com</h1> <form action = "welcome"> <label for = "name">Enter Your Name</label><br/> <input type = "text" name = "name"/> <input type = "submit" value = "Submit"/> </form> </body> </html> |
HelloWorld.jsp
This page will present final message , and will be called by Struts2 Framework when predefined action will happen. In “struts.xml” file we have done with mapping of this class which will be showing in next step. For this page check below code.
|
1 2 3 4 5 6 7 8 9 10 11 12 |
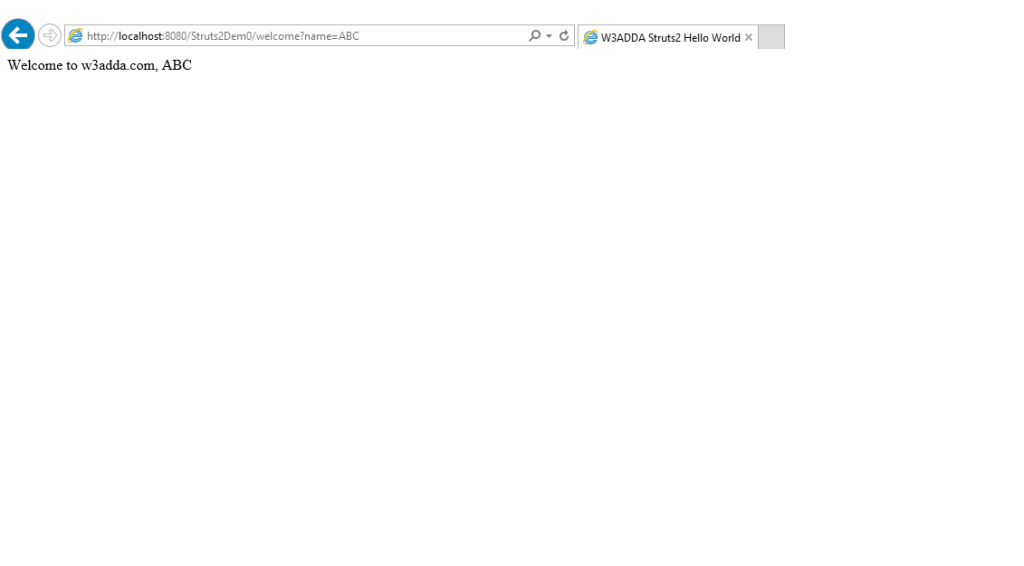
<%@ page contentType = "text/html; charset = UTF-8" %> <%@ taglib prefix = "s" uri = "/struts-tags" %> <html> <head> <title>W3ADDA Struts2 Hello World</title> </head> <body> Welcome to w3adda.com, <s:property value = "name"/> </body> </html> |
struts.xml
This is our configuration file which is created automatically when you create a project. Here we have done with mapping of our action. Check below code for this. Here we can see that when action will be “welcome” and result will be “success” from “HelloWorldAction” class So “HelloWorld.jsp” will be called.
|
1 2 3 4 5 6 7 8 9 10 11 12 13 14 15 |
<!DOCTYPE struts PUBLIC "-//Apache Software Foundation//DTD Struts Configuration 2.0//EN" "http://struts.apache.org/dtds/struts-2.0.dtd"> <struts> <constant name = "struts.devMode" value = "true" /> <package name = "example" extends = "struts-default"> <action name = "welcome" class = "example.HelloWorldAction" method = "execute"> <result name = "success">/example/HelloWorld.jsp</result> </action> </package> </struts> |
web.xml
This is our another configuration file in which we will update our welcome file. Like below code.
|
1 2 3 4 5 6 7 8 9 10 11 12 13 14 15 16 17 18 19 |
<?xml version="1.0" encoding="UTF-8"?> <web-app version="3.1" xmlns="http://xmlns.jcp.org/xml/ns/javaee" xmlns:xsi="http://www.w3.org/2001/XMLSchema-instance" xsi:schemaLocation="http://xmlns.jcp.org/xml/ns/javaee http://xmlns.jcp.org/xml/ns/javaee/web-app_3_1.xsd"> <filter> <filter-name>struts2</filter-name> <filter-class>org.apache.struts2.dispatcher.FilterDispatcher</filter-class> </filter> <filter-mapping> <filter-name>struts2</filter-name> <url-pattern>/*</url-pattern> </filter-mapping> <session-config> <session-timeout> 30 </session-timeout> </session-config> <welcome-file-list> <welcome-file>example/index.jsp</welcome-file> </welcome-file-list> </web-app> |
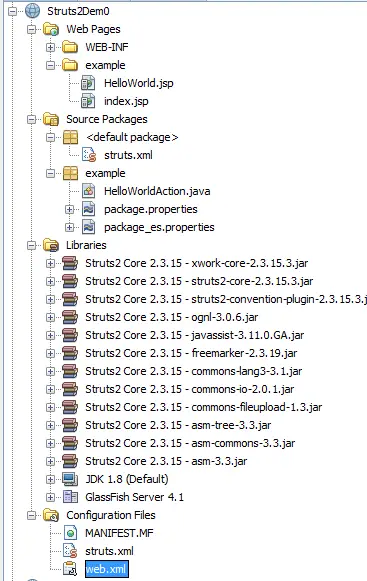
below is the structure of this project.
Output :-
We are done with our coding part now simply run your project. You will get output like below Images.
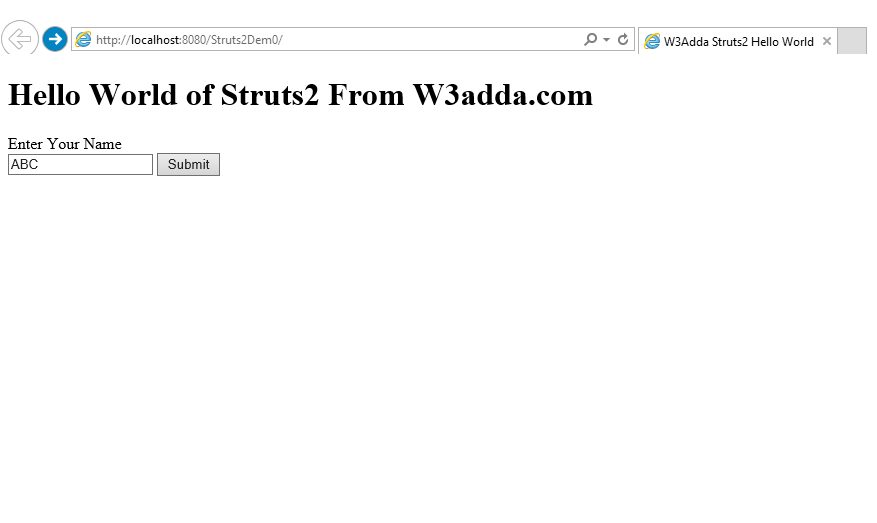
Enter the Name and click on Submit button, after submitting the name above image will be next output.