In this tutorial you will learn about the Flutter Hello World Application and its application with practical example.
The Flutter “Hello world!” application is a simplest flutter application that will display some text on the screen. The flutter “Hello world!” application is a simple yet complete application for beginners that guide you through the process of creating simple flutter application . The “Hello world!” application gives you a way to test flutter installation and development environment setup on you local system.
Prerequisites
Before starting with this tutorial we assume that you already done with flutter installation (If you do not have flutter installed then install it before you get started) as well as a local programming environment set up on your computer. We also assume that you are best aware of dart programming.
Creating Simple Flutter Application in Android Studio
In this tutorial, we will create a simple Flutter application to guide you through the basics of creating a flutter application in the Android Studio.
Step 1:- Open the Android Studio.
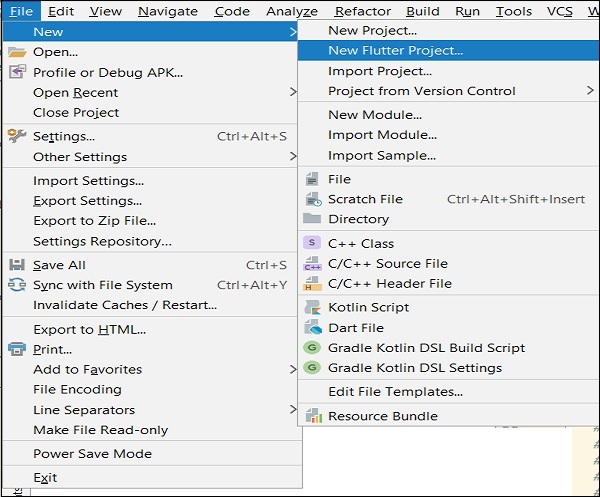
Step 2:- Let’s create a flutter project. Go to File-> New->New Flutter Project. The following screen will help you to understand.
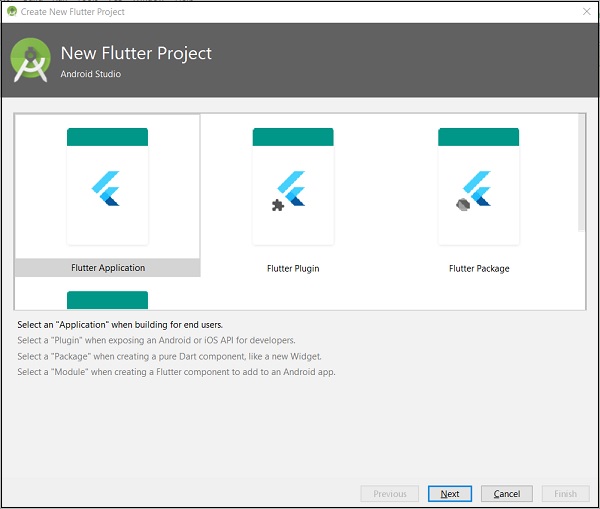
Step 3:- This will open you following wizard, select Flutter Application-> click Next.
Configuring Flutter Application
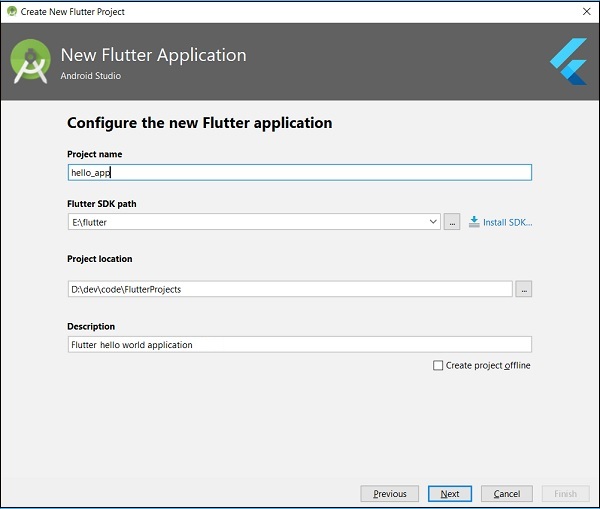
Step 4:- Now, we will configure the application providing details as below and click Next button.
- Project name: hello_app
- Flutter SDK Path: <path_to_flutter_sdk>
- Project Location: <path_to_project_folder>
- Description: Flutter hello world application
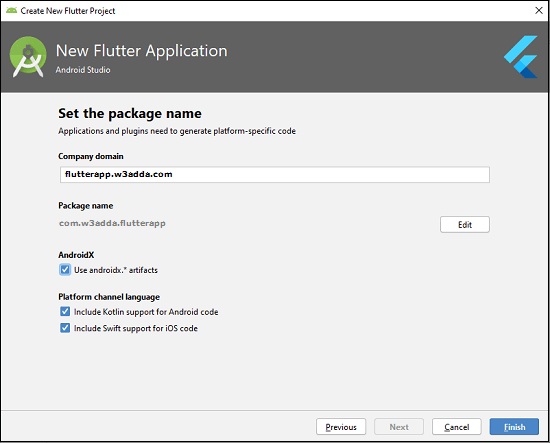
Step 5:- Next, you need to set the company domain name and click the Finish button. Here we have used flutterapp.w3adda.com as company domain name.
Clicking on the Finish button will create a fully working flutter application with minimal functionality. Below is image provided to show you the directory structure of the flutter application created.
Flutter Application’s Directory Structure
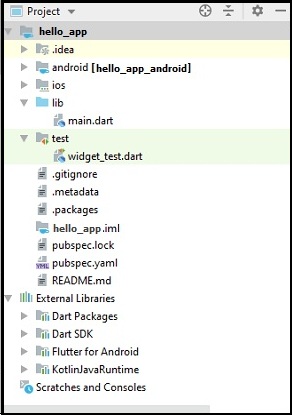
In the image you can see the various folders and components of a flutter application structure. Lets understand structure and various components of the application.
.idea :- This is the folder at the very top of the project structure, it holds the Android studio configuration.
.android :- This folder holds auto generated source code for complete android project while creating flutter application for android. When the Flutter project is compiled into the native code, this will be injected into this Android project to generate native Android application.
.ios :- This folder holds auto generated source code for complete iOS project while creating flutter application for iOS. When the Flutter project is compiled into the native code, this will be injected into this iOS project to generate native iOS application.
.lib :- The lib stands for the library. It is the main working directory where we will do our project work. This folder mainly holds all of our Dart files written using flutter framework while creating our flutter application. By default, it contains a main.dart file for our flutter application.
lib/main.dart − By default lib folder contains a main.dart file which works as entry point for our flutter application.
.test :- This folder contains Dart code to perform automated testing of our flutter application.
test/widget_test.dart :- This file contains sample code.
.gitignore :- A git file containing a list of files and folders that should be ignored by Git version control.
.metadata :- It is an auto generated file by the flutter tools, typically holds metadata or properties of our flutter application. You do not need to edit this file manually at any time.
.packages :- It is an auto generated file contain a list of packages for tracking dependencies of our Flutter project.
hello_app.iml :- It is always named as your Flutter project’s name. It is a project file contains additional settings of the project used by Android studio.
pubspec.yaml :- It is a project configuration file that is used by Pub, Flutter package manager.
pubspec.lock :- It is an auto generated file by Pub, Flutter package manager based on the .yaml file.
README.md :- It is an auto generated file that holds project description.
Step 6:- Now open the lib/main.dart file and replace the code with the following code.
|
1 2 3 4 5 6 7 8 9 10 11 12 13 14 15 16 17 18 19 20 21 22 23 24 25 26 27 28 29 30 31 32 33 34 35 36 |
import 'package:flutter/material.dart'; void main() => runApp(MyApp()); class MyApp extends StatelessWidget { // root widget of your application. @override Widget build(BuildContext context) { return MaterialApp( title: 'Hello World Application', theme: ThemeData( primarySwatch: Colors.blue, ), home: MyHomePage(title: 'Home page'), ); } } class MyHomePage extends StatelessWidget { MyHomePage({Key key, this.title}) : super(key: key); final String title; @override Widget build(BuildContext context) { return Scaffold( appBar: AppBar( title: Text(this.title), ), body: Center( child: Text( 'Hello World', ) ), ); } } |
Now, we will understand the above code snippet line by line –
- First line in the code snippet is an import statement to import the Flutter package material. Now, we have imported the flutter Material package in the application. Material is a flutter package used to create user interface of the application as per the Material design guidelines specified by Android.
- The second line in the code snippet specifies the entry point of our Flutter application. It invokes the runApp method and pass it an object of MyApp. The runApp function is primarily used to attach the given widget to the screen.
- Next is a widget method used for creating UI in the Flutter framework. Here, MyApp extends a StatelessWidget that overrides its build, the build method is used for creating a part of the UI of the application. The build method return MaterialApp widget that creates the root level UI of the application and contains typically three properties as listed below.
- Title: It specifies the title of the Flutter application.
- Theme: It specifies the theme of the widget. Here, we have set blue as the primary color of the application using ThemeData class and its property primarySwatch.
- Home: It specifies the the inner UI of the application, which further sets another widget (MyHomePage) for the application.
- Next, the MyHomePage is similar to MyApp, except it returns a Scaffold widget. The Scaffold widget is a top-level widget after the MaterialApp widget for creating the user interface as per the Material design specification. This widget contains two important properties of the application appBar and body. The appBar displays the header of the application while body displays the actual content of the application. Here, AppBar render the header of the application, Center widget is used to center the child widget, and Text is the final widget used to show the text content and displays in the center of the screen.
Running Flutter Application
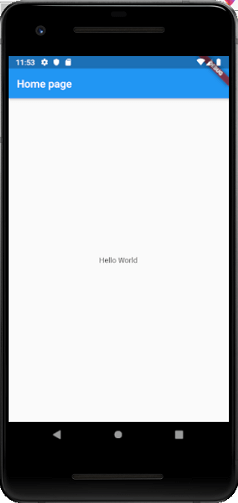
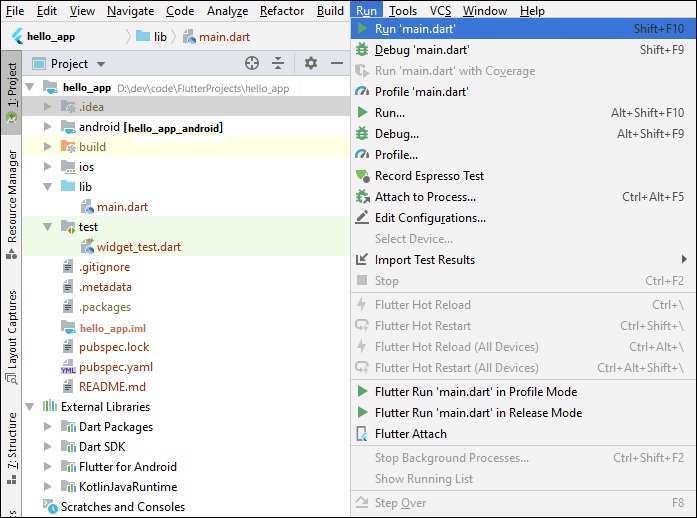
Step 7:- Now, we will run the application. Go to Run -> Run main.dart as shown in the screen below.
Step 8:- Finally, you will see the output in the screen as below –