In this tutorial you will learn about the JSP useBean Action Tag and its application with practical example.
JSP useBean Action Tag
This action tag is used in jsp page when we want to use java bean class in our jsp page. This tag is used to locate or instantiate a bean class. Depending on the scope this tag does not create the bean if bean object of the Bean class is already created. If the bean’s object is not created so it instantiates the bean.
Syntax:
|
1 2 3 4 |
<jsp:useBean id= "instanceName" scope= "page | request | session | application" class= "packageName.className" type= "packageName.className" beanName="packageName.className | <%= expression >" > </jsp:useBean> |
After successful loading of bean class,we have to use jsp:setProperty and jsp:getProperty action tags to use the parameters of bean class.
jsp:setProperty: This action tag is used to sets a property value in bean.
Syntax:
|
1 |
<jsp:setProperty name="beanId" property="some Property" value="some value" /> |
jsp:getProperty: This tag is used to get the value from the bean object.
Syntax:
|
1 |
<jsp:setProperty name="beanId" property="some Property" .../> |
Attributes: Let’s get understand it’s attributes one by one.
#id:This attribute is used to identify the bean in the specified scope.
#scope: This attribute is used to represent the scope of bean that can be anything page,request,session,application. Let’s understand scope one by one.
- page: This is the default scope of this attribute for useBean action tag and specifes that you can use it within this JSP page.
- request: With the help of this scope you can this bean class from any jsp page which are processing same request. The scope of request is wider than page.
- session: With the help of this scope you can use this bean from any jsp page which are using same session, it doesn’t matter that they are processing same request or not. The scope of session is wider than request.
- application: With the help of this scope you can use this bean from any JSP page within application. The scope of application is wider than session.
#class: This attribute used to creates an object of bean class.
#type: If bean is already in scope so this attribute provides the bean a data type.
#beanName: This attribute is used to instantiates the bean with the help of java.beans.Beans.instantiate() method.
Example: In this example we will learn that how to use useBean, setProperty, getProperty action tags. Check below pages.
#userBean: First we need to create bean class, which will consist getter and setter method like below code.
|
1 2 3 4 5 6 7 8 9 10 11 12 13 14 15 16 17 18 19 20 21 22 23 24 25 26 27 28 29 30 31 32 33 |
package w3adda; public class userBean { private String name,phone,email; public String getName() { return name; } public void setName(String name) { this.name = name; } public String getPhone() { return phone; } public void setPhone(String phone) { this.phone = phone; } public String getEmail() { return email; } public void setEmail(String email) { this.email = email; } } |
#index.jsp: From here we will send some data to next jsp page, check below code.
|
1 2 3 4 5 6 7 8 9 10 11 12 13 14 15 16 17 18 19 20 21 |
<%@page contentType="text/html" pageEncoding="UTF-8"%> <!DOCTYPE html> <html> <head> <meta http-equiv="Content-Type" content="text/html; charset=UTF-8"> <title>W3Adda Index Page</title> </head> <body> <form action="process.jsp" method="post"> Name : <input type="text" name="name"><br> Ph No.: <input type="text" name="phone"><br> Email : <input type="text" name="email"><br><br> <input type="submit" value="Sign Up"> </body> </html> |
#process.jsp: On this page we will do process of setting and getting data. Here I have declared useBean , setProperty and getProperty Tag. Please check below code.
|
1 2 3 4 5 6 7 8 9 10 11 12 13 14 15 16 |
<%@page contentType="text/html" pageEncoding="UTF-8"%> <jsp:useBean id="ub" class="w3adda.userBean"/> <jsp:setProperty property="*" name="ub"/> <!DOCTYPE html> <html> <head> <meta http-equiv="Content-Type" content="text/html; charset=UTF-8"> <title>W3adda Process Page</title> </head> <body> Record:<br> <jsp:getProperty property="name" name="ub"/><br> <jsp:getProperty property="phone" name="ub"/><br> <jsp:getProperty property="email" name="ub" /><br> </body> </html> |
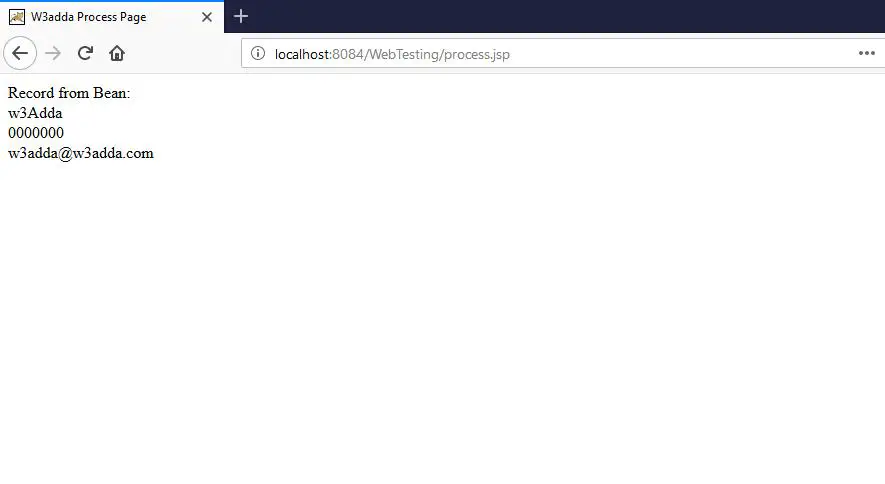
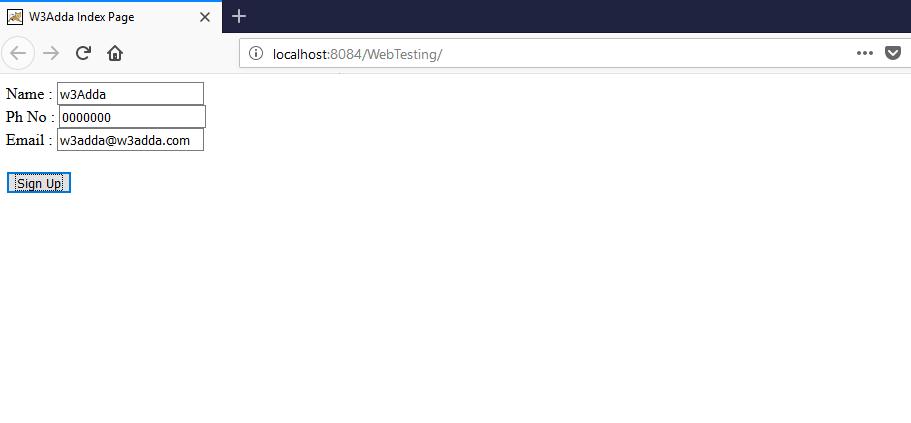
Output: So we are all set with jsp:useBean, jsp:setProperty, jsp:getProperty tags, now just run this project and you will output like below images.
When you will run this project the index page will appear, fill your details in the fields like below image.
- Click on Sign up button after filling details, you will get output like below image.