In this tutorial you will learn about the Kotlin TabLayout Example and its application with practical example.
Kotlin TabLayout Example
In Last Article we have briefly discussed about TabLayout and ViewPager. Now Let’s get understand this by below Example. Follow all the steps for creation of TabLayout with ViewPager with Kotlin.
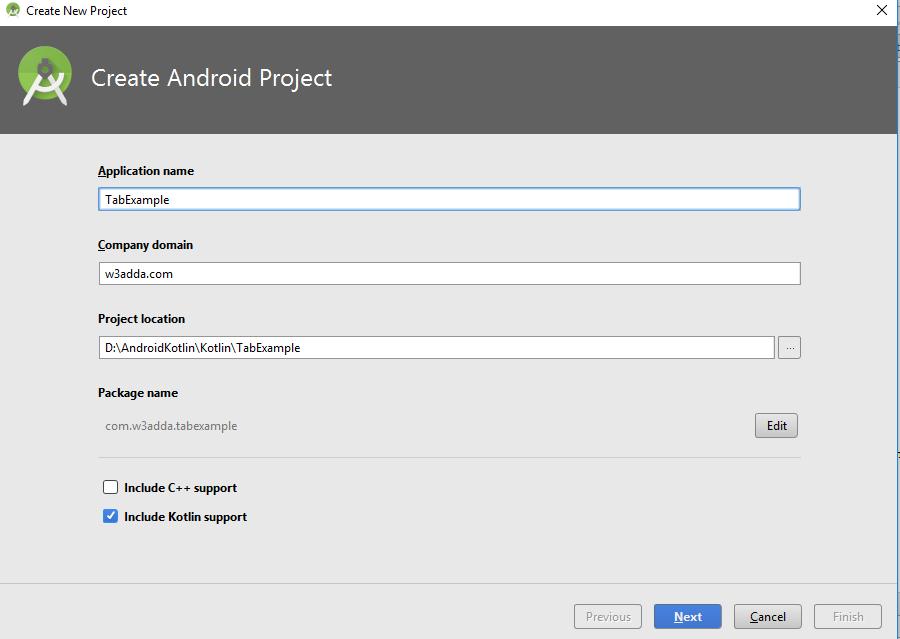
1st Step: Create Project: Create New Project on click of “File=>New=>New Project”, You will get Screen like below image. Please fill all details and do not forget to check on “Include Kotlin support” after that click on “Next” And Select Your Minimum and Maximum API Level then again Click on “Next”.
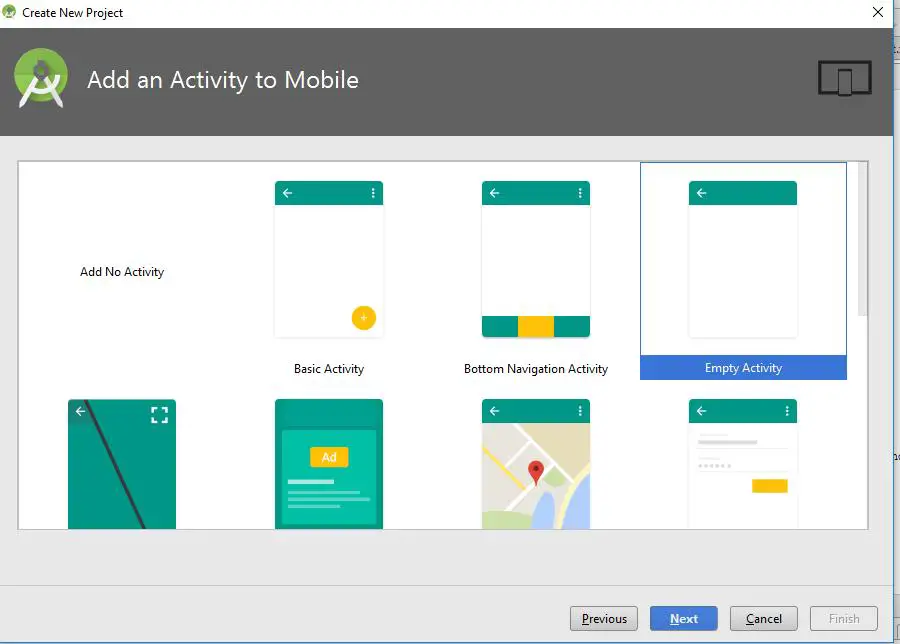
# After selection of API Level a new Screen will appear like below image, from here you can select your activity type.
#Simply click on Next and again new screen will appear like below image from here image you can change your Activity Name and also xml name.
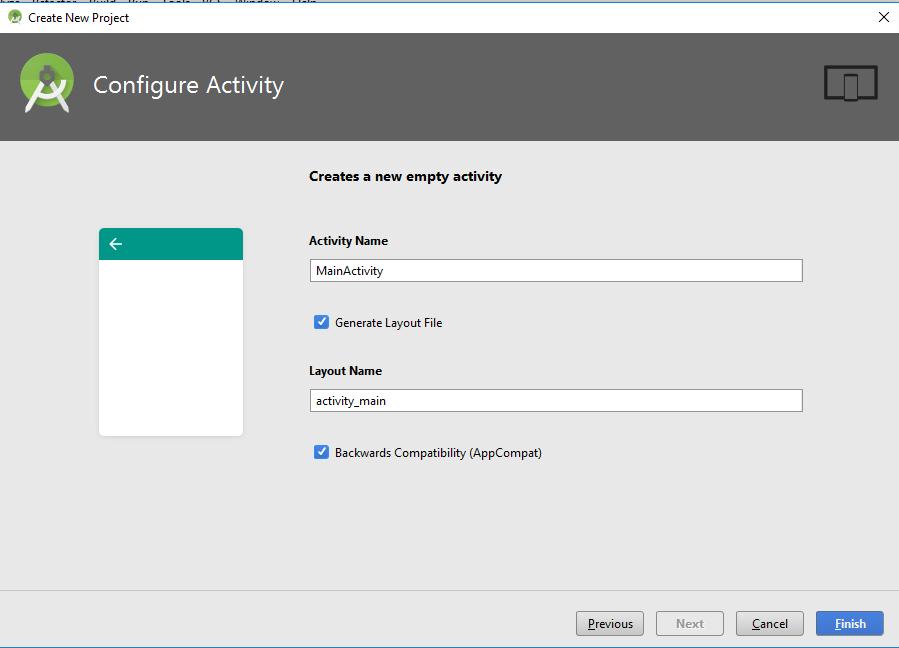
#Click on Finish button, you are all set with Project Creation. Now we have to move to the coding side.
2nd Step: Coding Implementation: We have to use some Fragments, class, adapter and XML for creation of TabLayout with ViewPager which are listed below.
- fragment_layout.xml
- FragmentOne
- FragmentTwo
- FragmentThree
- ViewPager Adapter
- activity_main.xml
- MainActivity
- AndroidManifest.xml
1.fragment_layout.xml: This xml will be associated with all three fragment. You can create different layout for different Fragment. Check below xml code.
|
1 2 3 4 5 6 7 8 9 10 11 12 13 14 15 16 17 |
<?xml version="1.0" encoding="utf-8"?> <RelativeLayout xmlns:android="http://schemas.android.com/apk/res/android" android:layout_width="match_parent" android:layout_height="match_parent" android:id="@+id/rel_main" > <TextView android:layout_width="wrap_content" android:layout_height="wrap_content" android:id="@+id/tv_name" android:layout_centerHorizontal="true" android:layout_centerVertical="true" /> </RelativeLayout> |
- FragmentOne.kt: This Kotlin fragment will be use in First Tab of TabLayout. Check below code.
|
1 2 3 4 5 6 7 8 9 10 11 12 13 14 15 16 17 18 19 20 21 22 23 24 25 26 27 28 29 30 |
package com.w3adda.tabexample import android.graphics.Color import android.os.Bundle import android.support.v4.app.Fragment import android.view.LayoutInflater import android.view.View import android.view.ViewGroup import android.widget.RelativeLayout import android.widget.TextView class FragmentOne : Fragment() { var tv_name: TextView? = null var rel_main: RelativeLayout? = null override fun onCreateView(inflater: LayoutInflater?, container: ViewGroup?, savedInstanceState: Bundle?): View? { var view: View? = inflater!!.inflate(R.layout.fragment_layout, container, false) rel_main=view?.findViewById<RelativeLayout>(R.id.rel_main) as RelativeLayout rel_main?.setBackgroundColor(Color.CYAN) tv_name = view?.findViewById<TextView>(R.id.tv_name) as TextView tv_name?.text = "W3Adda First Tab" return view } } |
- FragmentTwo.kt: This Kotlin fragment will be use in Second Tab of TabLayout. Check below code.
|
1 2 3 4 5 6 7 8 9 10 11 12 13 14 15 16 17 18 19 20 21 22 23 24 25 26 27 28 29 |
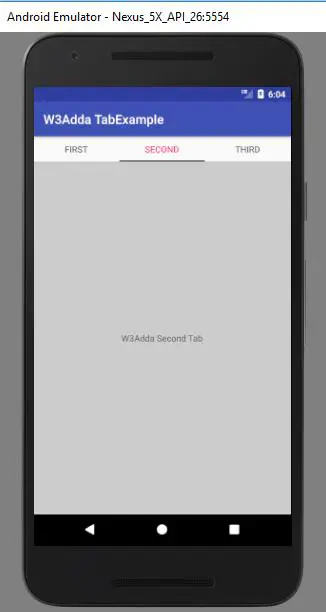
package com.w3adda.tabexample import android.annotation.SuppressLint import android.graphics.Color import android.os.Bundle import android.support.v4.app.Fragment import android.view.LayoutInflater import android.view.View import android.view.ViewGroup import android.widget.RelativeLayout import android.widget.TextView class FragmentTwo : Fragment() { var tv_name: TextView? = null var rel_main: RelativeLayout? = null override fun onCreateView(inflater: LayoutInflater?, container: ViewGroup?, savedInstanceState: Bundle?): View? { var view:View?=inflater!!.inflate(R.layout.fragment_layout,container,false) rel_main=view?.findViewById<RelativeLayout>(R.id.rel_main) as RelativeLayout rel_main?.setBackgroundColor(Color.LTGRAY) tv_name=view?.findViewById<TextView>(R.id.tv_name) as TextView tv_name?.text="W3Adda Second Tab" return view } } |
- FragmentThree.kt: This Kotlin fragment will be use in Third Tab of TabLayout. Check below code.
|
1 2 3 4 5 6 7 8 9 10 11 12 13 14 15 16 17 18 19 20 21 22 23 24 25 26 27 28 29 |
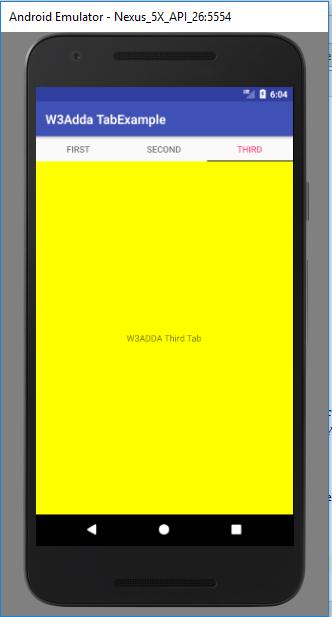
package com.w3adda.tabexample import android.annotation.SuppressLint import android.graphics.Color import android.os.Bundle import android.support.v4.app.Fragment import android.view.LayoutInflater import android.view.View import android.view.ViewGroup import android.widget.RelativeLayout import android.widget.TextView class FragmentThree : Fragment() { var tv_name: TextView? = null var rel_main: RelativeLayout? = null override fun onCreateView(inflater: LayoutInflater?, container: ViewGroup?, savedInstanceState: Bundle?): View? { var view:View?=inflater!!.inflate(R.layout.fragment_layout,container,false) rel_main=view?.findViewById<RelativeLayout>(R.id.rel_main) as RelativeLayout rel_main?.setBackgroundColor(Color.YELLOW) tv_name=view?.findViewById<TextView>(R.id.tv_name) as TextView tv_name?.text="W3Adda Third Tab" return view } } |
5.ViewPagerAdapter: It extends FragmentPagerAdapter Which is implementation of PagerAdapter that represent each page as a Fragment. Check below code for understand how It was used.
|
1 2 3 4 5 6 7 8 9 10 11 12 13 14 15 16 17 18 19 20 21 22 23 24 25 26 27 28 29 30 31 32 33 34 35 |
package com.w3adda.tabexample import android.support.v4.app.Fragment import android.support.v4.app.FragmentManager import android.support.v4.app.FragmentPagerAdapter class ViewPagerAdapter(fm: FragmentManager) : FragmentPagerAdapter(fm) { override fun getItem(position: Int): Fragment? { var fragment: Fragment? = null if (position == 0) { fragment = FragmentOne() } else if (position == 1) { fragment = FragmentTwo() } else if (position == 2) { fragment = FragmentThree() } return fragment } override fun getCount(): Int { return 3 } override fun getPageTitle(position: Int): CharSequence? { var title: String? = null if (position == 0) { title = "First" } else if (position == 1) { title = "Second" } else if (position == 2) { title = "Third" } return title } } |
- activity_main.xml: In this xml we kept our TabLayout and ViewPager. Check below XML code.
|
1 2 3 4 5 6 7 8 9 10 11 12 13 14 15 16 17 18 19 20 21 22 |
<?xml version="1.0" encoding="utf-8"?> <RelativeLayout xmlns:android="http://schemas.android.com/apk/res/android" android:layout_width="match_parent" android:layout_height="match_parent" xmlns:app="http://schemas.android.com/apk/res-auto"> <android.support.design.widget.TabLayout android:id="@+id/tab_layout" android:layout_width="match_parent" android:layout_height="40dp" app:tabGravity="fill" app:tabMode="fixed" app:tabSelectedTextColor="@color/colorAccent" app:tabIndicatorColor="#1c1c1d" /> <android.support.v4.view.ViewPager android:id="@+id/viewPager" android:layout_width="match_parent" android:layout_height="wrap_content" app:layout_behavior="@string/appbar_scrolling_view_behavior" android:layout_below="@+id/tab_layout"/> </RelativeLayout> |
- MainActivity.kt: So this will be final class of Kotlin from here we will bind our pager adapter with ViewPager and ViewPager with TabLayout. Check below code.
|
1 2 3 4 5 6 7 8 9 10 11 12 13 14 15 16 17 18 19 20 |
package com.w3adda.tabexample import android.support.v7.app.AppCompatActivity import android.os.Bundle import kotlinx.android.synthetic.main.activity_tab_layout.* class TabLayoutActivity : AppCompatActivity(){ internal lateinit var viewpageradapter:ViewPagerAdapter //Declare PagerAdapter override fun onCreate(savedInstanceState: Bundle?) { super.onCreate(savedInstanceState) setContentView(R.layout.activity_tab_layout) viewpageradapter= ViewPagerAdapter(supportFragmentManager) this.viewPager.adapter=viewpageradapter //Binding PagerAdapter with ViewPager this.tab_layout.setupWithViewPager(this.viewPager) //Binding ViewPager with TabLayout } } |
8.AndroidManifest.xml: As we know that this is very important file for Android Project, From here you can give permission and declare your activities. Also you can change your App icon and Label of App. Check Below code.
|
1 2 3 4 5 6 7 8 9 10 11 12 13 14 15 16 17 18 19 20 21 |
<?xml version="1.0" encoding="utf-8"?> <manifest xmlns:android="http://schemas.android.com/apk/res/android" package="com.w3adda.tabexample"> <application android:allowBackup="true" android:icon="@mipmap/ic_launcher" android:label="@string/app_name" android:roundIcon="@mipmap/ic_launcher_round" android:supportsRtl="true" android:theme="@style/AppTheme"> <activity android:name=".MainActivity"> <intent-filter> <action android:name="android.intent.action.MAIN" /> <category android:name="android.intent.category.LAUNCHER" /> </intent-filter> </activity> </application> </manifest> |
3rd Step: Run: Now you are all set with project so run this project on your device or Emulator. You will get output like below images.