Category Archives: React.js Tutorial

React.js Tutorial

ReactJS Router

ReactJS Routing

Routing is the process where user is directed to or rendered different pages based on user action/requests. In React, we can build Single Page Application (SPA) where web app loads a single page and dynamically updates that page as the user interacts with the web app.

ReactJS Router

ReactJS supports Single Page Application (SPA) using react router package. Router package helps directing users to different pages based on the url. When a user requests a specific url, the routing engine captures that url and renders the view based on the routes defined without reloading the entire application.

In this tutorial, we will building a single-page application to understand basic react routing concepts.

Step 1:- Lets create a new React project and switch to project directory using following command –

Step 2:- Let’s open the terminal again, change directory to your project folder and type the following command in order to run the server.

Step 3:- Now open the following URL in browser to view the output

http://localhost:3000

You will see the following screen.

Screenshot_1

React Router Installation

React Router comes into three different packages react-router, react-router-dom, and react-router-native with it. The react-router package enables the core routing components and functions for React Router applications, we never need to install it directly. The other two react-router-dom (browser specific) and react-router-native are environment specific. Since, we are building a web application, so we will install react-router-dom.

Step 4:- Install react-router-dom and save them as dependencies using following command –

Step 5:- Let’s open src/App.js, delete the existing code and put the following code in it and save it.

Here, in the above code following line of code –

Imports the following components in order to setup React Router –

BrowserRouter :- In React Router, for browser based projects there are two router components <BrowserRouter> and <HashRouter> are available. The <BrowserRouter> router is used for dynamic URL’s, while the <HashRouter> router is preferred for static websites.

Route :- The <Route> is one of the key component of React Router, it is used to define and render content based on the paths specified. It accepts component and render as props to define what should be rendered as the path defined.

Link :- The <Link>, component is used to create links, which allows user to navigate to different URL and to render its content without reloading the page.

Now open the following URL in browser again

http://localhost:3000

You will see the following screen.
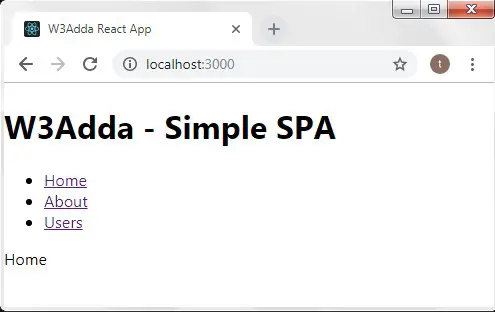
Here, we have simply added three component links, which allows you to navigate different URL and to render its content without reloading the page.

ReactJS Keys

ReactJS Keys

In React, keys are helpful when we are dealing with a collection of components or elements. Assigning key to an element or component allows React to uniquely identify it when it has changed, added, or removed. Keys can be assigned to individual elements inside the map() function.

Example:-

Step 1:- Let’s open src/App.js, delete the existing code and put the following code in it and save it.

Step 2:- Let’s open the terminal again, change directory to your project folder and type the following command in order to run the server.

Step 3:- Now open the following URL in browser to view the output

http://localhost:3000

Step 4:- You will see the following screen.

React Js Keys

ReactJS Refs

ReactJS Refs

In React, refs are similar to keys and can be added to an element as a attribute. Setting a refs to an element returns a reference to the actual element. The refs attribute is used to access and manipulate the DOM elements such as managing focus, text selection, or reset value etc. The refs can be used as in callbacks. However, overuse of the refs should be avoided.

Creating Refs

In React, a refs is created using React.createRef() function and then can be assigned to a React elements using the ref attribute.

Example:-

Accessing Refs

In React, when a ref is assigned to HTML element inside render method, a reference to the node is accessible via current attribute of the ref.

Example:-

Refs current Property

The refs behave differently as per the type of the element it is with. When a ref is assigned to HTML element inside render method, the ref object created in the constructor returns the underlying DOM element as its current property. While, when the ref attribute used with a custom class component, the ref object returns the current instance of the component as its current property.

Note:- The ref attribute can not be used with functional components as they don’t have instances.

Example:-

Step 1:- Let’s open src/App.js, delete the existing code and put the following code in it and save it.

Step 2:- Let’s open the terminal again, change directory to your project folder and type the following command in order to run the server.

Step 3:- Now open the following URL in browser to view the output

http://localhost:3000

Step 4:- You will see the following screen.

Output:-

ReactJS Refs

ReactJS Events

ReactJS Events

An event is an action that occurs as a result of the user action or system generated event, such as clicking mouse, pressing a key, loading of webpage, or file being created or modified etc. An event handler is a callback function which is invoked when specified event occurs. An event handler allows programmers to control the execution of the program when specified event occurs. In React, event handling is same as handling events on DOM elements, but there are following syntactic differences –

  • Function is passed as event handler instead of a string.
  • Events are named in camel case instead lowercase.
  • In React, we must call preventDefault explicitly to prevent default behavior instead of return false.

Example:-

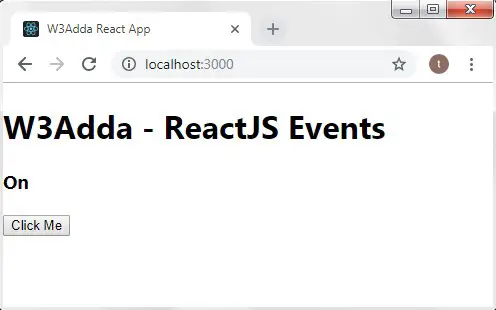
This is a simple example where we will only use one component. We are just adding onClick event that will trigger handleClick function when button is clicked, it will toggle the isToggle flag.

Step 1:- Let’s open src/App.js, delete the existing code and put the following code in it and save it.

Step 2:- Let’s open the terminal again, change directory to your project folder and type the following command in order to run the server.

Step 3:- Now open the following URL in browser to view the output

http://localhost:3000

Step 4:- You will see the following screen.

ReactJS Events

ReactJS Forms

ReactJS Forms

Forms are integral part of any modern website or application. The forms are mainly used to allow users to interact with the application and it gives application a way to gather information from its users. Forms can be used to perform many tasks depending upon the nature of your business requirement and logic such as – user authentication, searching and filtering of products, booking a product/service, order submission etc.

Creating a Form

When it comes to form-building, React offers a stateful, reactive approach for form building. In React, the form data is usually handled by the component rather than the DOM, and is usually implemented using controlled components.

Uncontrolled Component

The traditional HTML forms has the default HTML form behavior, the form data is usually stored in DOM. The HTML Elements like <input>, <select>, and <textarea> maintains their own state, which is updated when the input value changes. and input field value can be accessed using using a ref.

Example:-

Here, when form is submitted the form data being sent to another page request

Controlled Components

In controlled component the form data is usually handled by the component rather than the DOM, the container component is responsible to maintain the state.

In controlled component callback functions being used to handle form events and to maintain forms data using components local state. This way component have better control over the form elements and the form data.

Example:-

Step 1:- Let’s open src/App.js, delete the existing code and put the following code in it and save it.

Step 2:- Let’s open the terminal again, change directory to your project folder and type the following command in order to run the server.

Step 3:- Now open the following URL in browser to view the output

http://localhost:3000

Step 4:- You will see the following screen.

Screen 1:-

Screenshot_2

Screen 2:-

Screenshot_3

ReactJS Component Lifecycle

ReactJS Component’s Lifecycle

In React, every component created is goes through process that involves various lifecycle methods is termed as component’s lifecycle. The lifecycle methods are invoked at different phases of the lifecycle of a component. Component’s lifecyle methods are basically divided into following four phases –

  • Initialization
  • Mounting
  • Updating
  • Unmounting

Initialization :-

In this phase a component is provided with default props and initial states. This is done in the constructor of a Component Class.

Example:-

Mounting :-

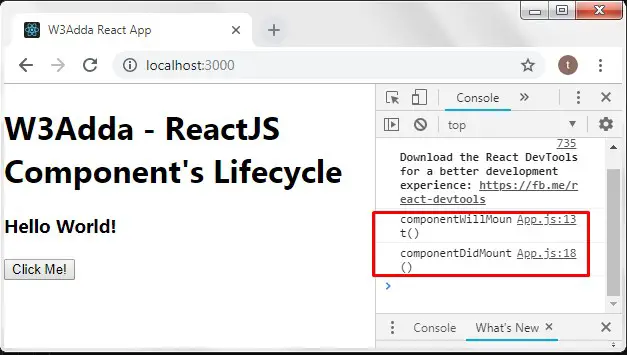
In this phase React component is created and mounted into the DOM. There are two methods gets called in this phase are –

componentWillMount() :- The componentWillMount() method is invoked once and just before the React Component is about to mount into the DOM. All the tasks that we want to do before a component is mounted are defined here.

componentDidMount() :- The componentDidMount() method is invoked once and just after the React Component is inserted into the DOM and render function is executed.

Updating :-

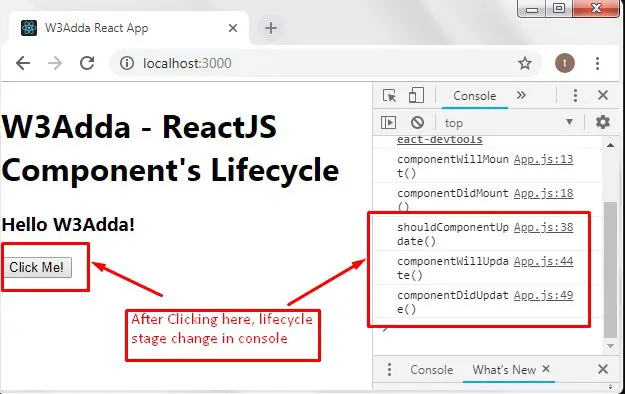
This is the phase where the state or props of a component is get updated. React component can be updated when sending new props or or when updating the state. Following methods are invoked in updating phase and are executed in following order –

componentWillRecieveProps() :- This method is invoked when a component is receiving new props.

shouldComponentUpdate() :- This method tells the React that should it re-render component or skip rendering. This method returns a boolean (TRUE or FALSE) value and accordingly the component would be re-rendered or skipped. By default it return TRUE.

componentWillUpdate() :- This method is executed just before rendering of component, when the shouldComponentUpdate method returns TRUE.
componentDidUpdate() :- This method is executed right after rendering of component, when the component has been updated.

Unmounting :-

In this phase, React component is get unmounted from the DOM. This is the final phase of the Component’s lifeycle. There is only one method is called in this phase –

componentWillUnmount() :- This method is called just before the component is unmounted from the DOM. This method can be used to perform any cleanup task such as – invalidating timers or cleaning up DOM elements.

Example:-

Step 1:- Let’s open src/App.js, delete the existing code and put the following code in it and save it.

Step 2:- Let’s open the terminal again, change directory to your project folder and type the following command in order to run the server.

Step 3:- Now open the following URL in browser to view the output

http://localhost:3000

Step 4:- You will see the following screen.

Screen 1:-

ReactJS Components Lifecycle

Screen 2:-

ReactJS Components Lifecycle Methods


ReactJS Component API

ReactJS Component API

In React, React Component is a top-level API. It is used to create completely individual, reusable UI elements. It is available on the React global and can be included as following –

Syntax:-

ES5

ES6

It includes various methods for-

  • Creating Elements
  • Transforming Elements
  • Fragments

Here we will discuss some of the important methods available in React component API.

Set State

The setState() method is used to update the state of the component.

Syntax:-

Example:-

Step 1:- Let’s open src/App.js, delete the existing code and put the following code in it and save it.

Step 2:- Let’s open the terminal again, change directory to your project folder and type the following command in order to run the server.

Step 3:- Now open the following URL in browser to view the output

http://localhost:3000

Step 4:- You will see the following screen.

reactjs-state-1

Step 5:- Now, click on the “Click me!” button, you will see the following screen.

reactjs-state-2 reactjs-state-3

Force Update

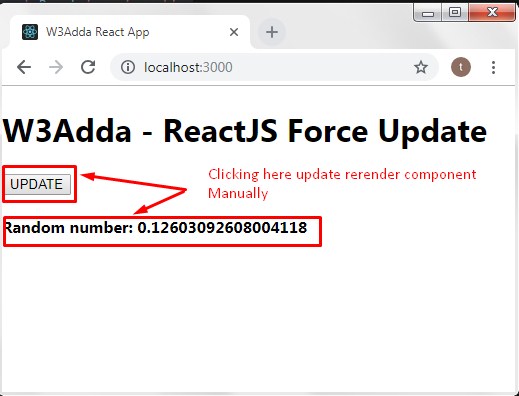
The forceUpdate() method is used to manually update the component.

Syntax:-

Example:-

Step 1:- Let’s open src/App.js, delete the existing code and put the following code in it and save it.

Step 2:- Let’s open the terminal again, change directory to your project folder and type the following command in order to run the server.

Step 3:- Now open the following URL in browser to view the output

http://localhost:3000

Step 4:- You will see the following screen.

ReactJS Force Update

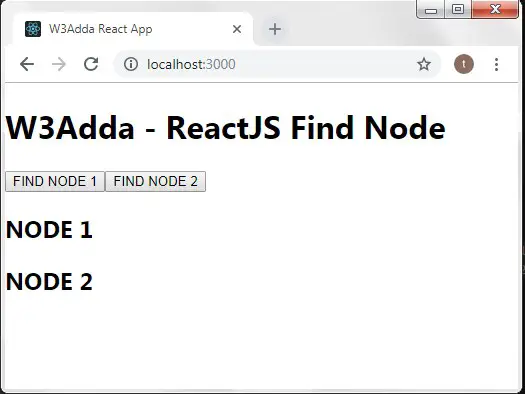
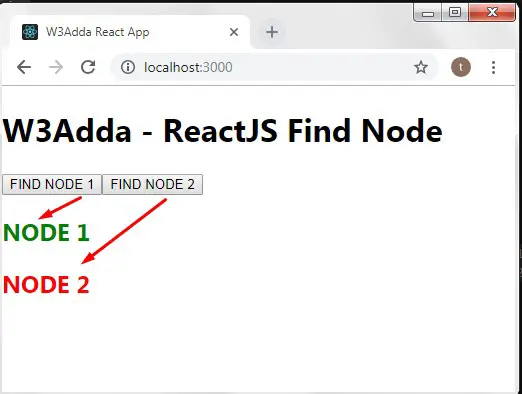
Find Dom Node

The ReactDOM.findDOMNode() method is used to find/access underlying DOM node.

Syntax:-

Example:-

Step 1:- Let’s open src/App.js, delete the existing code and put the following code in it and save it.

Step 2:- Let’s open the terminal again, change directory to your project folder and type the following command in order to run the server.

Step 3:- Now open the following URL in browser to view the output

http://localhost:3000

Step 4:- You will see the following screen.

Screen 1:-

reactjs-find-update-1

Screen 2:-

reactjs-find-update-2

ReactJS Props Validation

ReactJS Props Validation

React comes with an internal mechanism for validating props data type to make sure that values passed through props is valid. React components uses a special property called “propTypes” to setup data type validation. Although, we are allowed to define components without PropTypes. But, with PropTypes we can avoid unexpected bugs or glitches to the users. The PropTypes is provided with props and their respective PropTypes for type-checking. When a prop is passed in with an invalid type or fails the prop type, a warning is passed into the JavaScript console.

Syntax:-

ReactJS Props Validators

The React.PropTypes object contains a list of validators for basic data types –

PropTypes.any :- the prop can be of any data type
PropTypes.bool  :- the prop should be a boolean
PropTypes.number  :- the prop should be a number
PropTypes.string  :- the prop should be a string
PropTypes.func  :- the prop should be a function
PropTypes.array  :- the prop should be an array
PropTypes.object  :- the prop should be an object
PropTypes.symbol  :- the prop should be a symbol
PropTypes.instanceOf :- the prop should be an instance of a particular JavaScript class
PropTypes.isRequired :- the prop should be provided

Example:-

Step 1:- Let’s open src/App.js, delete the existing code and put the following code in it and save it.

Step 2:- Let’s open the terminal again, change directory to your project folder and type the following command in order to run the server.

Step 3:- Now open the following URL in browser to view the output

http://localhost:3000

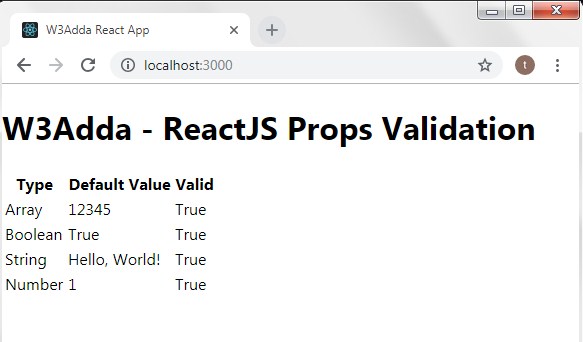
Step 4:- You will see the following screen.

ReactJS Props Validation

ReactJS Custom Validator

In React, we are allowed to create a custom validation function to perform custom validation as per our requirement. In order to create a custom validation function, we are required to create a function following arguments –

props :- The props passed to the component
propName :- The propName being validated
componentName :- The componentName we’re validating agains

Example:-

ReactJS State

ReactJS State

Most of the react components generally accepts props(similar to function parameters) and render it, but component with state allows to track component’s internal state which may change over time. Like props, state is also used to hold information about the react component. But, the kind of information it holds and the way how it is handled is different. State is a private feature that refers to the component’s local state or information, which can only be accessed and modified inside the component and directly by the component. It is basically an object of component class that holds some information about the component which may be modified over time as a result of some user actions or system events.

Defining ReactJS State

By default, a react component has no state, thus before we can use state we must have to first declare a default set of values to define component’s initial state.To define component’s initial state we must have to add a class constructor that assigns the initial state using this.state.

Example:-


Here, before we set the state we are required to call super() in the constructor, because this is uninitialized before super() has been called.

Changing the state

A component state can be changed later by simply using setState() function, passing new state object as the argument. Let’s add a new method updateMsg in above example as following –

Example:-

We also have to bind the this keyword to the updateMsg method, otherwise we won’t be able to access this inside the updateMsg method. To do so, we will add following line of code in constructor –

Now, our constructor will look like as following –

Next, we will add a button to the render() method, clicking on which will trigger the updateMsg() method. Now, our render() method will look like as below –

Here’s the our entire component class look like –

Step 1:- Let’s open src/app/index.js file that we created in myreact application.

Step 2:- Now, delete the existing code and put the following code in it and save it.

We are mounting our “Hello” component to a DOM Element that we have available in src/index.html file.

Step 3:- Let’s open src/index.html file that we created in myreact application.

Step 4:- Now, delete the existing code and put the following code in it and save it.

Step 5:- Let’s open the terminal again, change directory to your project folder and type the following command in order to run the server.

Step 6:- Now open the following URL in browser to view the output

http://localhost:1234

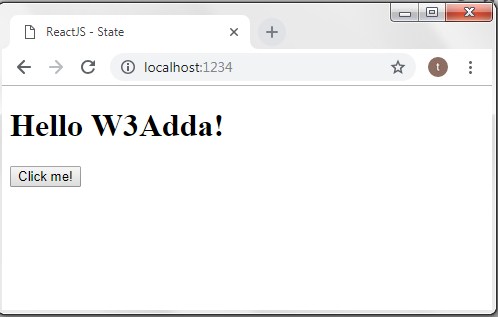
Step 7:- You will see the following screen.

reactjs-state-1

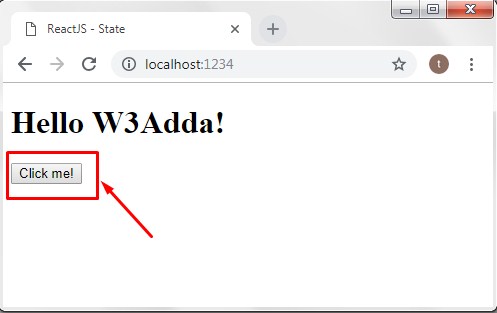
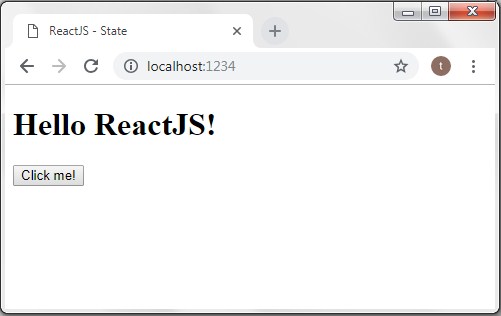
Step 8:- Now, click on the “Click me!” button, you will see the following screen.

reactjs-state-2 reactjs-state-3

Difference Between Props and State

  • Props are immutable, while state is an observable object that is to be used to hold data that may change over time.
  • Props are defined when components are created, while state is defined inside the component.
  • Props can be validated but there is no way to validate state.
  • Sate is a private feature and can only be accessed and modified inside the component.


ReactJS Props

ReactJS Props

In ReactJS, when we define a custom components we have option to pass dynamic data is termed as props. The props is used as short for properties, props gives you way to pass information from one component to other. Props are similar to function arguments, they are passed to the component same way as an argument is passed to a function.

The props are immutable and can not be modified from inside the component. Props are passed from parent components down and cannot be changed. Inside the component props are available as this.props and can be used to render dynamic data in our component’s render method.

Consider following example :

Example :-

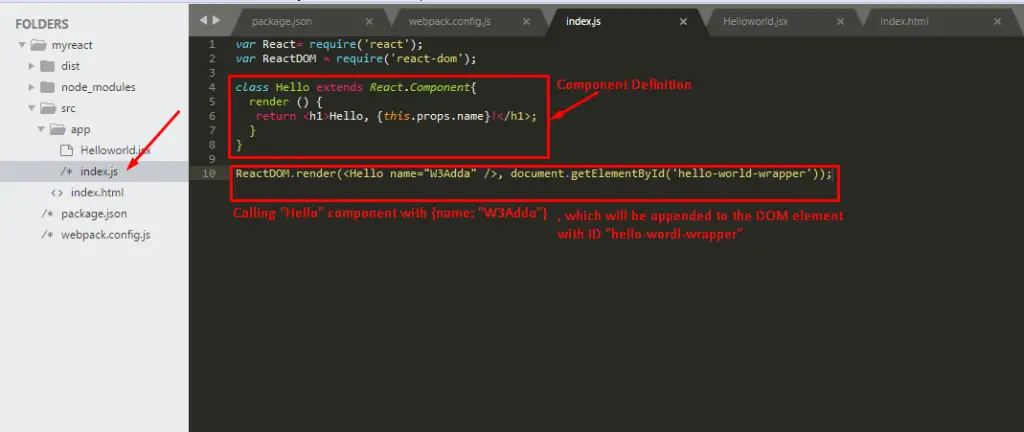
Here, we have called Hello component with {name: “W3Adda”} as its props, which can be accessed with this.props inside the component. Our Hello component returns a <h1>Hello W3Adda!</h1> element as the result which will be appended to document.getElementById(‘hello-world-wrapper’) .

Output :-

Screenshot_18


Default Props

In ReactJS, you can also setup default values for props, so if a prop is not passed when component is called it can still be set with default value.

Example :-

In the above code example , the Hello component has a default value for the name prop.

Output :-

Screenshot_20

ReactJS Components

ReactJS Components

Components are the basic building blocks of any ReactJS application. React Components are simply independent, reusable code block which usually contains HTML/Javascript code. This way you can split the application UI into independent reusable components/module. Component’s data is saved in its state, this state can be changed based upon the user action. As the component’s state changes the ReactJS re-renders the component on browser.

ReactJS Components Type

A ReactJS component can be one of following two types –

  • Functional Components (Stateless Components)
  • Class Components

Creating ReactJS Components

There are several ways you can create a components in React.

Functional Components (Stateless Components)

A functional component represents the simplest form of a ReactJS component. It can be easily defined by just writing a JavaScript function as following –

The above Javascript function represents a valid React component, because it receives a single object of properties (props) as function argument and returns DOM Element in special HTML like syntax called JSX.

Example :-

Class Components (ES6 class)

Class components are defined in much richer way than the functional components, let’s take a look on following Class component definition –

In comparison to functional components the class components comes with some additional capabilities. Class components receives props same as functional components, but in addition it also maintains a additional private input “State” that keeps the track of component’s internal state.

Example :-

Here, In order to create a class component you are require to create a javascript class that extend from React.Component class and define at least a render() method. React.Component is an abstract base class, so you must have to implement render() method when creating component. The render() method inside a component is used to specify JSX that you want to be rendered when that component is called using RenderDOM.render method.

Rendering a ReactJS Component

The ReactDOM.render() method is used to call the reactJS components, it render JSX expressions to the DOM. It expects an component instance as first parameter, and a HTML element to which the DOM of the element object will be mounted.The ReactDOM.render() method can be used to call a component as following –

or

Here, we have called ReactDOM.render() method with the <Hello name=”W3Adda” /> element, it tells React to call the Hello component with {name: “W3Adda”} as its props. Our Hello component returns a <h1>Hello W3Adda!</h1> element as the result which will be appended to document.getElementById(‘hello-world-wrapper’) . Both the above code block represents the same result.

Example :- In this example we will be creating a Class Components using ES6 syntax, In this example we will use the same application that we created in ReatcJS Installation.

Step 1:- Let’s open src/app/index.js file that we created in myreact application.

Screenshot_14

Step 2:- Now, delete the existing code and put the following code in it and save it-

src/app/index.js will now look like this –

Here, we are creating a “Hello” Component by creating a “Hello” class that extends the React.Component class.

Inside of “Hello” class we have created a render method which is a part of React.Component class, it return a message enclosed in <h1></h1> tag.

here, we are calling ReactDOM.render method, it takes first argument as the component we want to render, and the second is the DOM element where the component is to be mounted. Here, we are mounting our “Hello” to a DOM Element that we have available in src/index.html file –

Screenshot_13

Step 3:- Let’s open the terminal again, change directory to your project folder and type the following command in order to run the server.

Step 4:- Now open the following URL in browser to view the output

http://localhost:1234

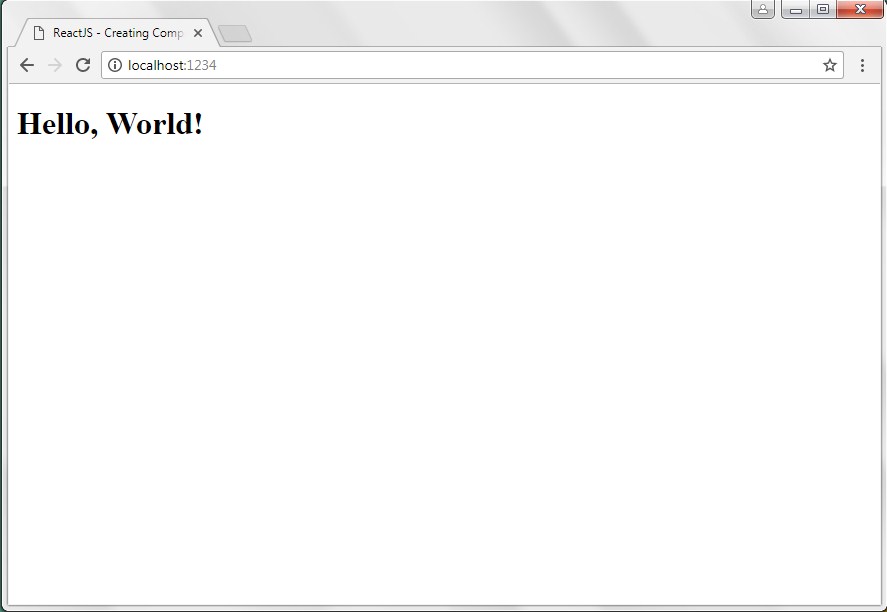
Step 5:- You will see the following screen.

Screenshot_18

ReactJS JSX

ReactJS JSX

JSX is basically a syntax extension of JavaScript which looks very similar to XML. JSX code looks similar to HTML but it is a mix of standard JavaScript and HTML. JSX is not implemented by engines or browsers, instead it is used by various preprocessors (transpilers) to be transformed into standard JavaScript. JSX tags can also have a tag name, attributes, and children similar to XML and HTML. In JSX, attribute value can be passed as simple string enclosed in quotes otherwise we need to wrap the value in braces enclosed as JavaScript expression.

JSX is basically a syntactic sugar for the React.createElement function, where JSX code is finally transpiled into pure JavaScript function calls with React.createElement.

Example:-

Here is simple JSX code, which is finally compiled into React code as following –

JSX

React Code


It is not mandatory to use JSX while working with React, we can definitely use the plain JavaScript code. But JSX makes React more elegant and JSX has its own advantages.

  • JSX is faster than standard JavaScript, because it optimize the source code while compiling it.
  • JSX code is much more readable than the plain Javascript.
  • JSX is easy to learn and write in comparison to JavaScript.

and then you transpile the JSX into pure JavaScript function calls with React.createElement.