JSP Pagination Example
Leave a reply

Here we will make an project of CRUD (Create, Read, Update and Delete) with JSP and also we are going to use Pagination in this project. If records are too many so on single page it takes time so it is better to break the page into parts so that loading time of page become reduce, The Pagination do work for this theory.
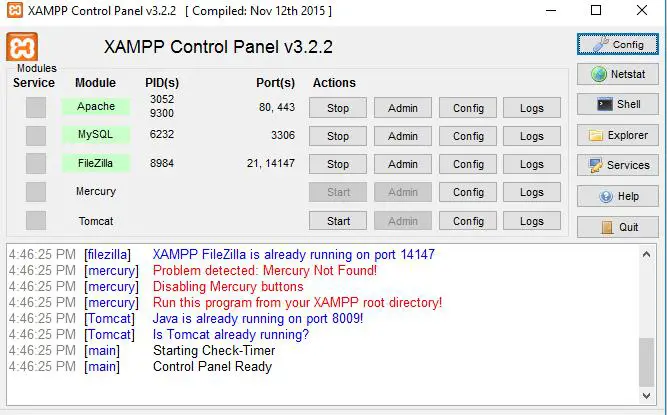
First we need to create a database for CRUD and Pagination. I have XAMPP in my system if you do not have please download it, Also you can use Oracle Database. Follow the steps for creation database.
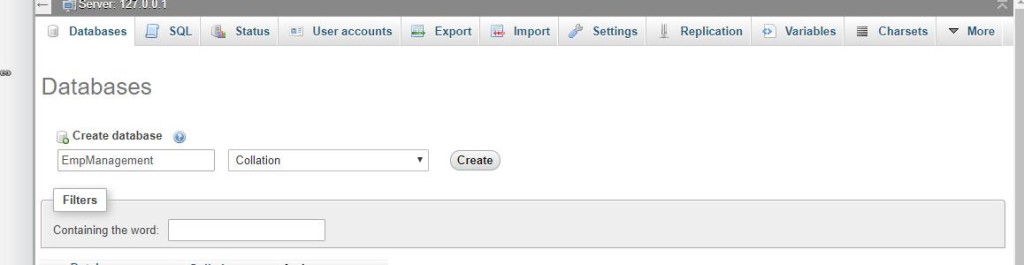
1.step: After starting your XAMPP server open this link in browser http://localhost/phpmyadmin/
Now we are all set with database creation. Now we have to create Java Web Project in which we are going to use this Database. Check below steps for this.
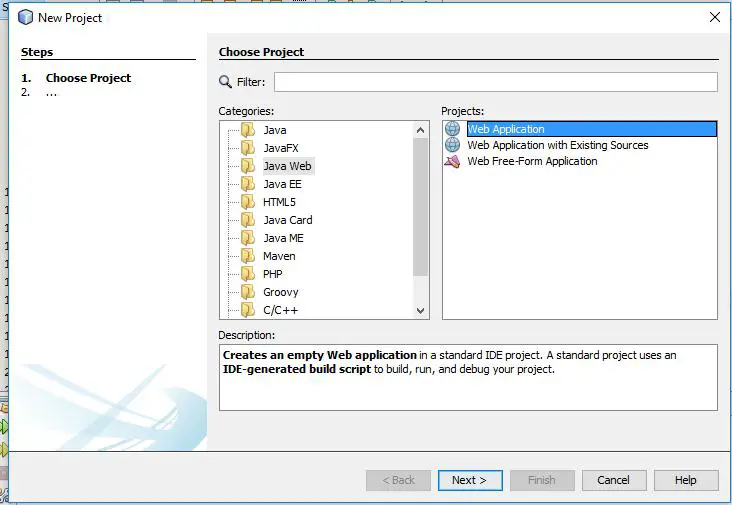
#Create Project: In this step we will create new project with netbeans, click on “File>New Project” You will get screen like below image.
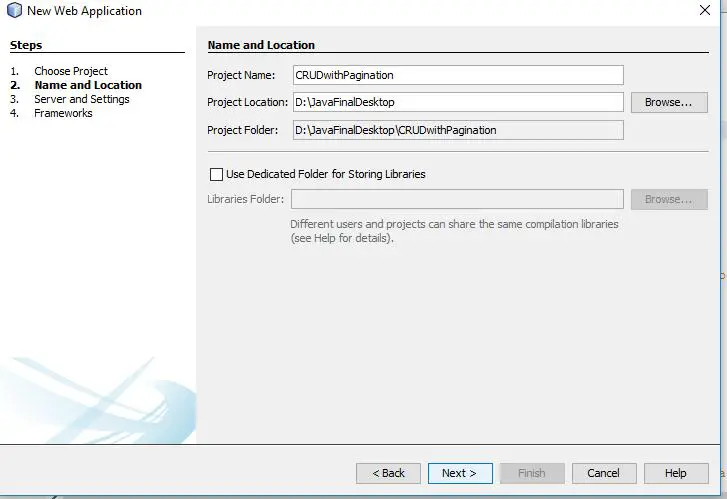
#click on “Next” button and then enter your project details like below image.
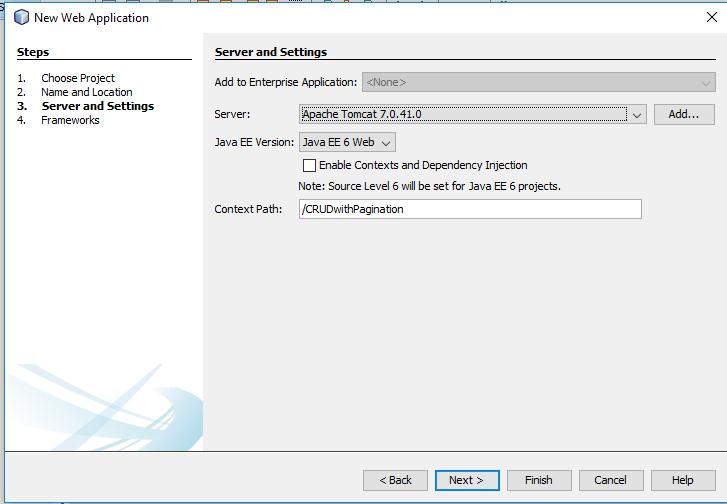
#Again we need to click on “Next” and then we will “Finish”.
#iAdd Library: so we are all set with project creation now let’s add some important library in our project ,which we are going to use in our project.
#jstl-1.2.jar: Let’s include JSTL(JSP Standard Tag Library) in your project
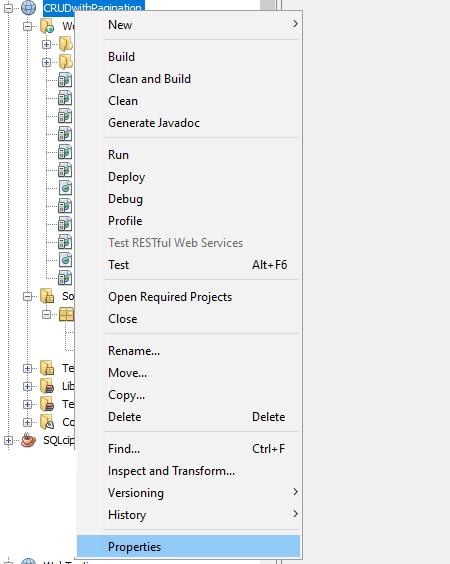
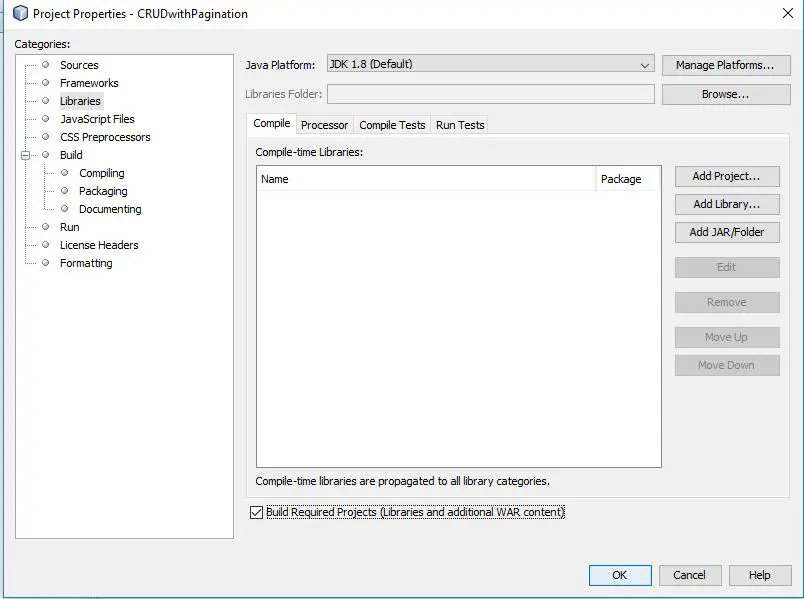
After downloading jar file, do right click on your project and then go to properties. Like below image.
Now go to libraries and then click on Add JAR/Folder Option.
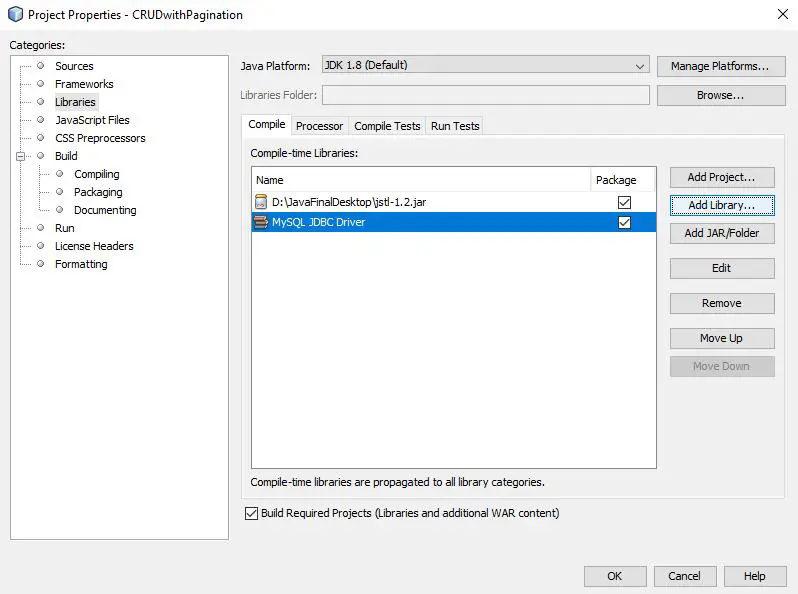
#Select your jstl-1.2.jar from your directory and after including jar file you will get image like below.

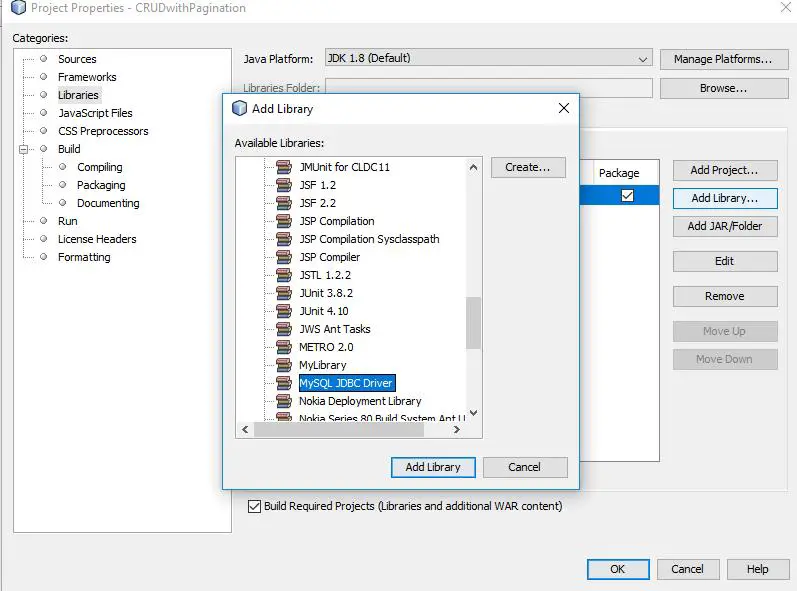
#now click on Add Library… option and select MySQL JDBC Driver library and then click on Add Library as i did like below image.
#Now you will get screen like below image, simple click on “OK” button and these libraries will be added in your project.
Now we are done with including libraries in our project, let’s move to coding side.
Project Structure: Let’s create one by one some jsp and java classes for this project.The project structure will look like below image so please make classes according to this structure.

#UserBean.java:Java Bean are classes that encapsulate many objects into a single object. It contains constructor, Getter, Setter Methods. With the help of Setter and Getter method user can set and get data. Check below code.
|
1 2 3 4 5 6 7 8 9 10 11 12 13 14 15 16 17 18 19 20 21 22 23 24 25 26 27 28 29 30 31 32 33 34 35 36 37 38 39 40 41 42 43 44 45 46 47 48 49 50 51 52 53 54 55 56 57 58 59 60 61 62 63 64 65 66 67 68 |
package w3adda; public class UserBean { private int id; private String name, password, email, sex, country; private float salary; public int getId() { return id; } public void setId(int id) { this.id = id; } public String getName() { return name; } public void setName(String name) { this.name = name; } public String getPassword() { return password; } public void setPassword(String password) { this.password = password; } public String getEmail() { return email; } public void setEmail(String email) { this.email = email; } public String getSex() { return sex; } public void setSex(String sex) { this.sex = sex; } public String getCountry() { return country; } public void setCountry(String country) { this.country = country; } public float getSalary() { return salary; } public void setSalary(float salary) { this.salary = salary; } } |
#UserDAO.java: So this is User Data Access Object, here we will write queries of connection, Creation, Reading, Updating and Deletion and also for Pagination. Check below code.
|
1 2 3 4 5 6 7 8 9 10 11 12 13 14 15 16 17 18 19 20 21 22 23 24 25 26 27 28 29 30 31 32 33 34 35 36 37 38 39 40 41 42 43 44 45 46 47 48 49 50 51 52 53 54 55 56 57 58 59 60 61 62 63 64 65 66 67 68 69 70 71 72 73 74 75 76 77 78 79 80 81 82 83 84 85 86 87 88 89 90 91 92 93 94 95 96 97 98 99 100 101 102 103 104 105 106 107 108 109 110 111 112 113 114 115 116 117 118 119 120 121 122 123 124 125 126 127 128 129 130 131 132 133 134 135 136 137 138 139 140 141 142 143 |
package w3adda; import java.sql.Connection; import java.sql.DriverManager; import java.sql.PreparedStatement; import java.sql.ResultSet; import java.util.ArrayList; import java.util.List; public class UserDAO { public static Connection getConnection() { Connection con = null; try { Class.forName("com.mysql.jdbc.Driver"); con = DriverManager.getConnection("jdbc:mysql://localhost:3306/empmanagement", "root", ""); } catch (Exception e) { System.out.println(e); } return con; } public static int save(UserBean u) { int status = 0; try { Connection con = getConnection(); PreparedStatement ps = con.prepareStatement("insert into Employees(name,password,email,gender,country,salary) values(?,?,?,?,?,?)"); ps.setString(1, u.getName()); ps.setString(2, u.getPassword()); ps.setString(3, u.getEmail()); ps.setString(4, u.getSex()); ps.setString(5, u.getCountry()); ps.setFloat(6, u.getSalary()); status = ps.executeUpdate(); } catch (Exception e) { System.out.println(e); } return status; } public static int update(UserBean u) { int status = 0; try { Connection con = getConnection(); PreparedStatement ps = con.prepareStatement("update Employees set name=?,password=?,email=?,gender=?,country=?,salary=? where id=?"); ps.setString(1, u.getName()); ps.setString(2, u.getPassword()); ps.setString(3, u.getEmail()); ps.setString(4, u.getSex()); ps.setString(5, u.getCountry()); ps.setFloat(6, u.getSalary()); ps.setInt(7, u.getId()); status = ps.executeUpdate(); } catch (Exception e) { System.out.println(e); } return status; } public static int delete(UserBean u) { int status = 0; try { Connection con = getConnection(); PreparedStatement ps = con.prepareStatement("delete from Employees where id=?"); ps.setInt(1, u.getId()); status = ps.executeUpdate(); } catch (Exception e) { System.out.println(e); } return status; } public static List<UserBean> getAllRecords() { List<UserBean> list = new ArrayList<UserBean>(); try { Connection con = getConnection(); PreparedStatement ps = con.prepareStatement("select * from Employees"); ResultSet rs = ps.executeQuery(); while (rs.next()) { UserBean u = new UserBean(); u.setId(rs.getInt("id")); u.setName(rs.getString("name")); u.setPassword(rs.getString("password")); u.setEmail(rs.getString("email")); u.setSex(rs.getString("gender")); u.setCountry(rs.getString("country")); u.setSalary(rs.getFloat("salary")); list.add(u); } } catch (Exception e) { System.out.println(e); } return list; } public static UserBean getRecordById(int id) { UserBean u = null; try { Connection con = getConnection(); PreparedStatement ps = con.prepareStatement("select * from Employees where id=?"); ps.setInt(1, id); ResultSet rs = ps.executeQuery(); while (rs.next()) { u = new UserBean(); u.setId(rs.getInt("id")); u.setName(rs.getString("name")); u.setPassword(rs.getString("password")); u.setEmail(rs.getString("email")); u.setSex(rs.getString("gender")); u.setCountry(rs.getString("country")); u.setSalary(rs.getFloat("salary")); } } catch (Exception e) { System.out.println(e); } return u; } public static List<UserBean> getRecords(int start, int total) { List<UserBean> list = new ArrayList<UserBean>(); try { Connection con = getConnection(); PreparedStatement ps = con.prepareStatement( "select * from Employees limit " + (start - 1) + "," + total); ResultSet rs = ps.executeQuery(); while (rs.next()) { UserBean e = new UserBean(); e.setId(rs.getInt(1)); e.setName(rs.getString(2)); e.setSalary(rs.getFloat(7)); list.add(e); } con.close(); } catch (Exception e) { System.out.println(e); } return list; } } |
#header.html: This will be our header which we will include in our jsp pages.
|
1 2 3 4 5 6 7 8 9 10 11 12 13 14 15 16 17 18 19 20 21 22 23 24 25 26 27 28 29 30 31 32 33 34 35 36 37 |
<html> <head> <meta http-equiv="Content-Type" content="text/html; charset=utf-8" /> <style> #navigation ul li{ display: inline-block; padding: 0px 5px; } #navigation ul li a{ color:#fff; text-decoration: none; } #navigation { background: #4062b7; padding: 3px } </style> </head> <body bgcolor="grey"> <div id="header"> <div class="shell"> <div id="navigation"> <ul> <li><a href="index.jsp" class="active">Home</a></li> <li><a href="paginationPage.jsp?page=1">Pagination</a></li> <li><a href="viewUsers.jsp">View Employees</a></li> <li><a href="addUserForm.jsp">Add Employees</a></li> </ul> </div> </div> </div> </body> </html> |
#index.jsp: This will be our launching page, do coding of this as I did, check below code.
|
1 2 3 4 5 6 7 8 9 10 11 12 13 |
<%@page language="java" contentType="text/html" pageEncoding="UTF-8"%> <!DOCTYPE html> <html> <head> <meta http-equiv="Content-Type" content="text/html; charset=UTF-8"> <title>W3Adda Welcome Page</title> </head> <body> <%@ include file="header.html" %> <br> <a href="addUserForm.jsp">Add User</a> <a href="viewUsers.jsp">View Users</a> </body> </html> |
#adduserForm.jsp: Here we have included userForm.html file , which will redirect to addUser.jsp page after submitting all details.Check below code.
|
1 2 3 4 5 6 7 8 9 10 11 12 13 14 15 |
<%@ page language="java" contentType="text/html; charset=ISO-8859-1" pageEncoding="ISO-8859-1"%> <!DOCTYPE html> <html> <head> <meta http-equiv="Content-Type" content="text/html; charset=ISO-8859-1"> <title>W3Adda Registration</title> </head> <body> <%@ include file="header.html" %> <br> <jsp:include page="userForm.html"></jsp:include> </body> </html> |
#userForm.html: This is the html file in which we create a form for registration and then it redirect to addUser.jsp. Check below code.
|
1 2 3 4 5 6 7 8 9 10 11 12 13 14 15 16 17 18 19 |
<h1>Add New Employee</h1> <form action="addUser.jsp" method="post"> <table> <tr><td>Name:</td><td><input type="text" name="name"/></td></tr> <tr><td>Password:</td><td><input type="password" name="password"/></td></tr> <tr><td>Email:</td><td><input type="email" name="email"/></td></tr> <tr><td>Salary:</td><td><input type="number" step="0.01" name="salary"/></td></tr> <tr><td>Sex:</td><td><input type="radio" name="sex" value="male"/>Male <input type="radio" name="sex" value="female"/>Female </td></tr> <tr><td>Country:</td><td> <select name="country" style="width:155px"> <option>India</option> <option>New Zealand</option> <option>Srilanka</option> <option>Other</option> </select> </td></tr> <tr><td colspan="2"><input type="submit" value="Add User"/></td></tr> </table> </form> |
#addUser.jsp: So from here we will add user. From this we have called save method of UserDAO class.
|
1 2 3 4 5 6 7 8 9 10 11 12 |
<%@page import="w3adda.UserDAO"%> <jsp:useBean id="u" class="w3adda.UserBean"></jsp:useBean> <jsp:setProperty property="*" name="u"/> <% int i=UserDAO.save(u); if(i>0){ response.sendRedirect("AddUserSuccess.jsp"); }else{ response.sendRedirect("errorPage.jsp"); } %> |
#AddUserSuccess.jsp: After successful registration this code will run.
|
1 2 3 4 5 6 7 8 9 10 11 12 13 14 |
<!DOCTYPE html> <html> <head> <meta http-equiv="Content-Type" content="text/html; charset=ISO-8859-1"> <title>Add User Success</title> </head> <body> <%@ include file="header.html" %> <p>Record successfully saved!</p> <jsp:include page="userForm.html"></jsp:include> </body> </html> |
#errorPage.jsp: If any exception or error occurred so this code will give error message.
|
1 2 3 4 5 6 7 8 9 10 11 12 13 14 |
<!DOCTYPE html> <html> <head> <meta http-equiv="Content-Type" content="text/html; charset=ISO-8859-1"> <title>Add User Success</title> </head> <body bgcolor> <%@ include file="header.html" %> <p>Sorry, an error occurred!</p> <jsp:include page="userForm.html"></jsp:include> </body> </html> |
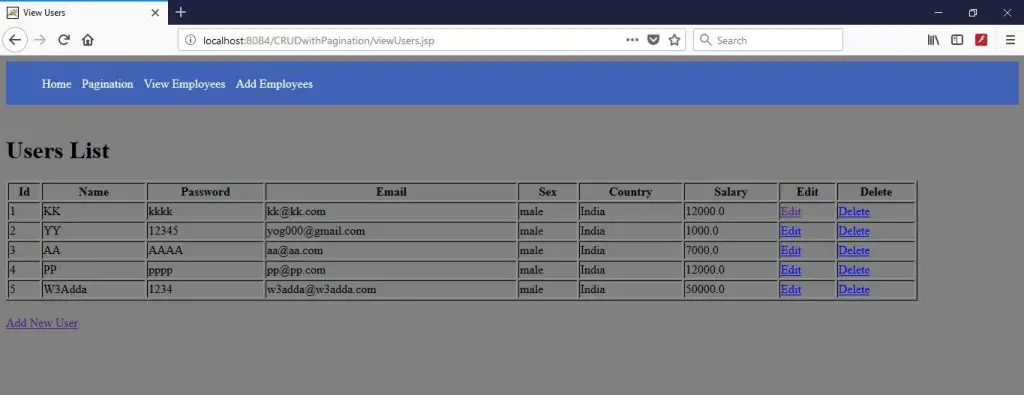
#viewUsers.jsp: With the help of this code you can view all data of employees.
|
1 2 3 4 5 6 7 8 9 10 11 12 13 14 15 16 17 18 19 20 21 22 23 24 25 26 27 28 29 30 31 |
<%@page import="w3adda.UserBean"%> <!DOCTYPE html> <html> <head> <meta http-equiv="Content-Type" content="text/html; charset=ISO-8859-1"> <title>View Users</title> </head> <body bgcolor="grey"> <%@ include file="header.html" %> <br> <%@page import="w3adda.UserDAO, w3adda.UserBean.*,java.util.*"%> <%@ taglib uri="http://java.sun.com/jsp/jstl/core" prefix="c"%> <h1>Users List</h1> <% List<UserBean> list = UserDAO.getAllRecords(); request.setAttribute("list", list); %> <table border="1" width="90%"> <tr><th>Id</th><th>Name</th><th>Password</th><th>Email</th><th>Sex</th><th>Country</th><th>Salary</th><th>Edit</th><th>Delete</th></tr> <c:forEach items="${list}" var="u"> <tr><td>${u.getId()}</td><td>${u.getName()}</td><td>${u.getPassword()}</td><td>${u.getEmail()}</td><td>${u.getSex()}</td><td>${u.getCountry()}</td><td>${u.getSalary()}</td><td><a href="updateForm.jsp?id=${u.getId()}">Edit</a></td><td><a href="DeleteUser.jsp?id=${u.getId()}">Delete</a></td></tr> </c:forEach> </table> <br/><a href="addUserForm.jsp">Add New User</a> </body> </html> |
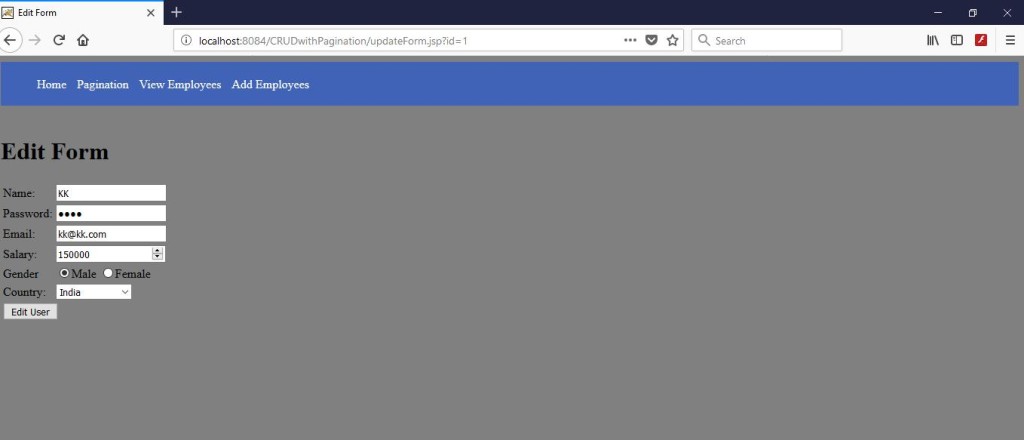
#updateForm.jsp: This will be our Update form, here you can update your details.
|
1 2 3 4 5 6 7 8 9 10 11 12 13 14 15 16 17 18 19 20 21 22 23 24 25 26 27 28 29 30 31 32 33 34 35 36 37 38 |
<!DOCTYPE html> <html> <head> <meta http-equiv="Content-Type" content="text/html; charset=ISO-8859-1"> <title>Edit Form</title> </head> <body> <%@ include file="header.html" %> <br> <%@page import="w3adda.*"%> <% String id = request.getParameter("id"); UserBean u = UserDAO.getRecordById(Integer.parseInt(id)); %> <h1>Edit Form</h1> <form action="UpdateUser.jsp" method="post"> <input type="hidden" name="id" value="<%=u.getId()%>"/> <table> <tr><td>Name:</td><td><input type="text" name="name" value="<%= u.getName()%>"/></td></tr> <tr><td>Password:</td><td><input type="password" name="password" value="<%= u.getPassword()%>"/></td></tr> <tr><td>Email:</td><td><input type="email" name="email" value="<%= u.getEmail()%>"/></td></tr> <tr><td>Salary:</td><td><input type="number" step="0.01" name="salary" value="<%= u.getSalary()%>"/></td></tr> <tr><td>Gender</td><td><input type="radio" name="sex" value="male"/>Male <input type="radio" name="sex" value="female"/>Female </td></tr> <tr><td>Country:</td><td> <select name="country"> <option>India</option> <option>New Zealand</option> <option>Srilanka</option> <option>Other</option> </select> </td></tr> <tr><td colspan="2"><input type="submit" value="Edit User"/></td></tr> </table> </form> </body> </html> |
#UpdateUser.jsp: This code will run when you were done with updation.
|
1 2 3 4 5 6 7 8 |
<%@page import="w3adda.UserDAO"%> <jsp:useBean id="u" class="w3adda.UserBean"></jsp:useBean> <jsp:setProperty property="*" name="u"/> <% int i=UserDAO.update(u); response.sendRedirect("viewUsers.jsp"); %> |
#DeleteUser.jsp: If you want to delete any employee so you can delete with this code.
|
1 2 3 4 5 6 7 8 |
<%@page import="w3adda.UserDAO"%> <jsp:useBean id="u" class="w3adda.UserBean"></jsp:useBean> <jsp:setProperty property="*" name="u"/> <% UserDAO.delete(u); response.sendRedirect("viewUsers.jsp"); %> |
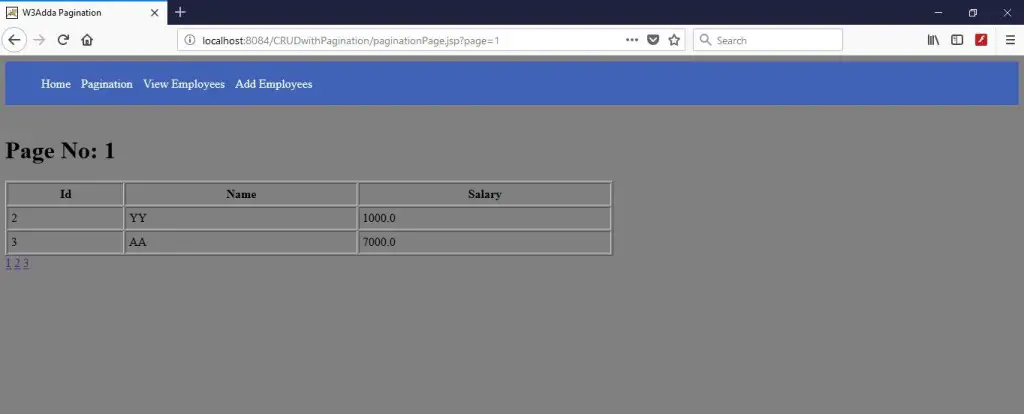
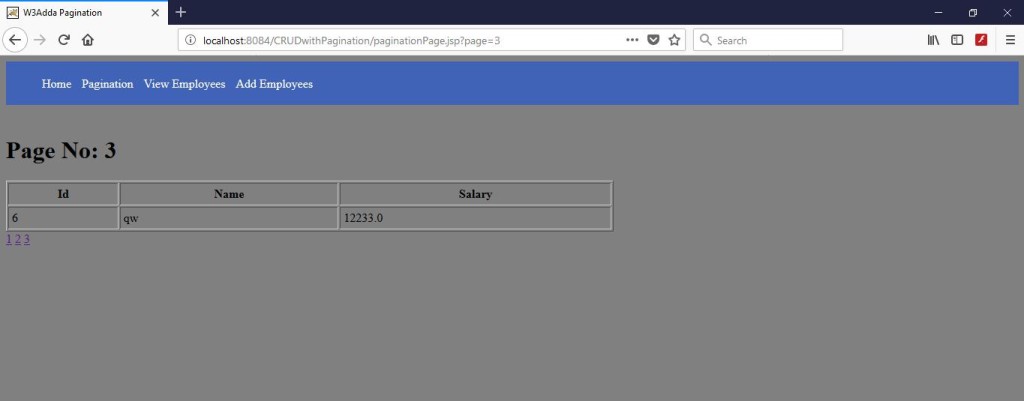
#paginationPage.jsp: So this code will work for pagination.
|
1 2 3 4 5 6 7 8 9 10 11 12 13 14 15 16 17 18 19 20 21 22 23 24 25 |
<%@ page import="java.util.*,w3adda.*"%> <%@ include file="header.html" %> <br> <% String spageid = request.getParameter("page"); int pageid = Integer.parseInt(spageid); int total = 2; if (pageid == 1) { } else { pageid = pageid - 1; pageid = pageid * total + 1; } List<UserBean> list = UserDAO.getRecords(pageid, total); out.print("<h1>Page No: " + spageid + "</h1>"); out.print("<table border='1' cellpadding='4' width='60%'>"); out.print("<tr><th>Id</th><th>Name</th><th>Salary</th>"); for (UserBean e : list) { out.print("<tr><td>"+e.getId()+"</td><td>"+e.getName() +"</td><td>"+e.getSalary ()+"</td></tr> "); } out.print("</table>"); %> <a href="paginationPage.jsp?page=1">1</a> <a href="paginationPage.jsp?page=2">2</a> <a href="paginationPage.jsp?page=3">3</a> |
Download: You can simply download this project by below link.
#Output: Let’s run this project you will get output like below images.
#Home: This will be our Home Screen.

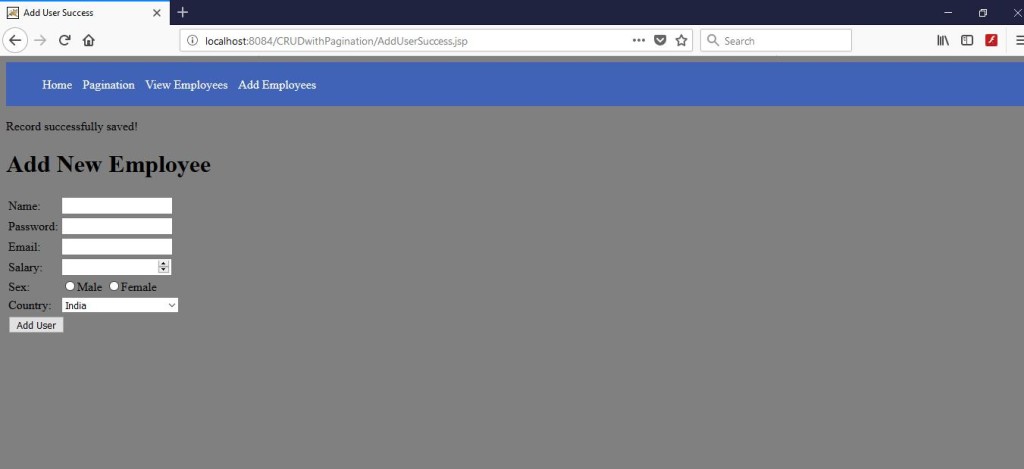
#Add Employee: This screen will appear when you click on “Add Employees” or “Add User”.

#AddUserSuccess: After successful registration this screen will appear.
#ViewUser: In this screen we can see all employees list.
#Edit: When you click on edit the below screen will appear. I have edit salary 12000 to 150000.
#After Update: After updation it will look like below image.

#Delete: When you click on delete so data will be removed from table, I have deleted user “KK”, So below screen will appear after deletion.

#Pagination: see pagination in below images.

So this was a simple example of CRUD with Pagination hopefully this will help you.
In this article we are going to send mail using JSP page. I have used simple format for creation your own mail API, which will based on two protocols SMTP and MIME. Follow the simple steps and you will get reach to your goal.
mail.jar:
activation.jar:
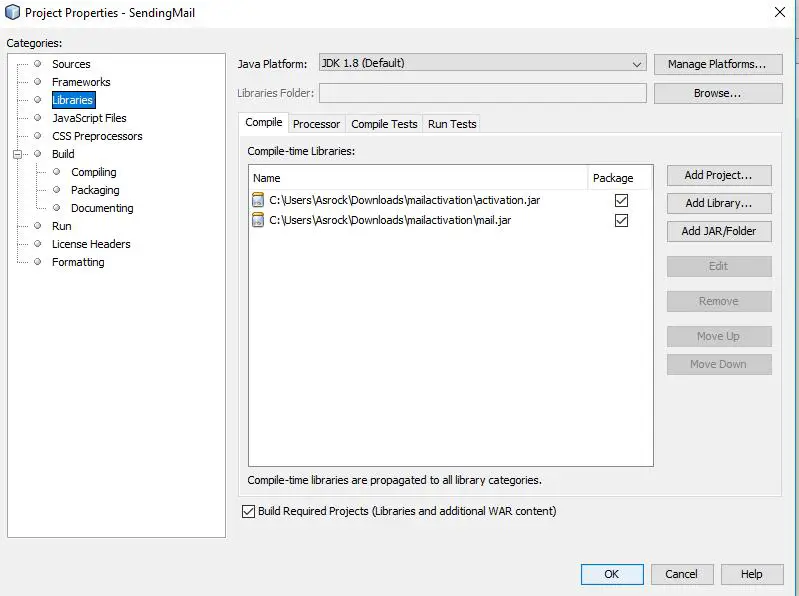
Simply add this jar files in your project library, If you do not how to add it just do right click on project and then go to Properties>Libraries, you will get screen like below image. Simply click on Add JAR/Folder Then click on “OK”, Your jar will be added to your project.
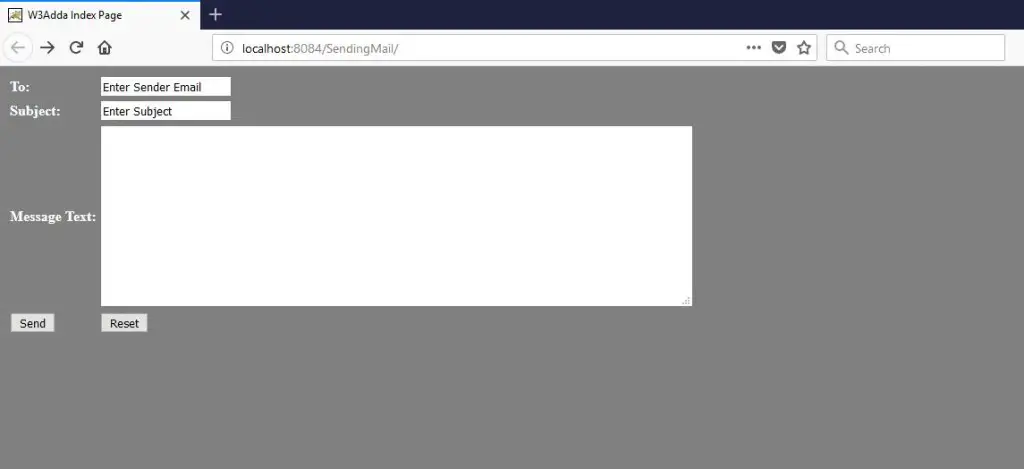
3.index.jsp: Now let’s do coding for our mail composer page. From here we will send details to mailProcess.jsp page through a form, check below code.
|
1 2 3 4 5 6 7 8 9 10 11 12 13 14 15 16 17 18 19 20 21 22 23 24 25 26 27 28 29 30 31 32 33 34 35 36 37 38 39 40 41 42 43 |
<!DOCTYPE html> <html> <head> <title>W3Adda Index Page</title> <meta http-equiv="Content-Type" content="text/html; charset=UTF-8"> <meta name="viewport" content="width=device-width"> </head> <body bgcolor="grey"> <form action="mailProcess.jsp"> <table> <tr><td><b><font color="White">To: </td> <td><b><b><input type="text" name="mail" value="Enter Sender Email"/><br/> </td> </tr> <tr> <td> <b><font color="white">Subject: </td> <td> <input type="text" name="sub" value="Enter Subject"><br/> </td> </tr> <tr> <td> <b><font color="white">Message Text: </td> <td> <textarea rows="12" cols="80" name="mess"></textarea><br/> </td> </tr> <tr> <td> <input type="submit" value="Send"> </td> <td> <input type="reset" value="Reset"> </td> </tr> </table> </form> </body> </html> |
Output: The below screen will be the output of above code.here you need to enter email id of sender, subject of your mail and content of mail.
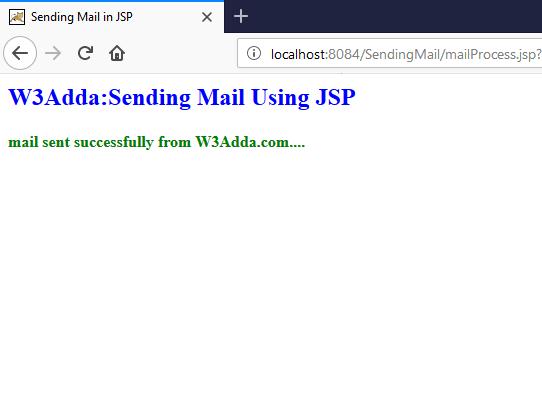
4.mailProcess.jsp: When you will click on “Send” button of above image after filling all details , so this page will do process of mail and will send to sender. Check below code.
|
1 2 3 4 5 6 7 8 9 10 11 12 13 14 15 16 17 18 19 20 21 22 23 24 25 26 27 28 29 30 31 32 33 34 35 36 37 38 39 40 41 42 43 44 45 46 47 48 49 50 51 52 53 54 55 56 57 58 59 60 61 |
<%@ page import="java.util.*,javax.mail.*"%> <%@ page import="javax.mail.internet.*" %> <% //Creating a result for getting status that messsage is delivered or not! String result; // Get recipient's email-ID, message & subject-line from index.html page final String to = request.getParameter("mail"); final String subject = request.getParameter("sub"); final String messg = request.getParameter("mess"); // Sender's email ID and password needs to be mentioned final String from = "Enter Your Emaild"; final String pass = "Enter Your Password"; // Defining the gmail host String host = "smtp.gmail.com"; // Creating Properties object Properties props = new Properties(); // Defining properties props.put("mail.smtp.host", host); props.put("mail.transport.protocol", "smtp"); props.put("mail.smtp.auth", "true"); props.put("mail.smtp.starttls.enable", "true"); props.put("mail.user", from); props.put("mail.password", pass); props.put("mail.port", "465"); // Authorized the Session object. Session mailSession = Session.getInstance(props, new javax.mail.Authenticator() { @Override protected PasswordAuthentication getPasswordAuthentication() { return new PasswordAuthentication(from, pass); } }); try { // Create a default MimeMessage object. MimeMessage message = new MimeMessage(mailSession); // Set From: header field of the header. message.setFrom(new InternetAddress(from)); // Set To: header field of the header. message.addRecipient(Message.RecipientType.TO, new InternetAddress(to)); // Set Subject: header field message.setSubject(subject); // Now set the actual message message.setText(messg); // Send message Transport.send(message); result = "mail sent successfully from W3Adda.com...."; } catch (MessagingException mex) { mex.printStackTrace(); result = "Error: unable to send mail...."; } %> <title>Sending Mail in JSP</title> <h2><font color="blue">W3Adda:Sending Mail Using JSP</font></h2> <b><font color="green"><% out.println(result);%></b> |
Output: After entering correct email id of sende, click on Send button and wait for while, the below screen will appear.
This action tag is used in jsp page when we want to use java bean class in our jsp page. This tag is used to locate or instantiate a bean class. Depending on the scope this tag does not create the bean if bean object of the Bean class is already created. If the bean’s object is not created so it instantiates the bean.
Syntax:
|
1 2 3 4 |
<jsp:useBean id= "instanceName" scope= "page | request | session | application" class= "packageName.className" type= "packageName.className" beanName="packageName.className | <%= expression >" > </jsp:useBean> |
After successful loading of bean class,we have to use jsp:setProperty and jsp:getProperty action tags to use the parameters of bean class.
jsp:setProperty: This action tag is used to sets a property value in bean.
Syntax:
|
1 |
<jsp:setProperty name="beanId" property="some Property" value="some value" /> |
jsp:getProperty: This tag is used to get the value from the bean object.
Syntax:
|
1 |
<jsp:setProperty name="beanId" property="some Property" .../> |
Attributes: Let’s get understand it’s attributes one by one.
#id:This attribute is used to identify the bean in the specified scope.
#scope: This attribute is used to represent the scope of bean that can be anything page,request,session,application. Let’s understand scope one by one.
#class: This attribute used to creates an object of bean class.
#type: If bean is already in scope so this attribute provides the bean a data type.
#beanName: This attribute is used to instantiates the bean with the help of java.beans.Beans.instantiate() method.
Example: In this example we will learn that how to use useBean, setProperty, getProperty action tags. Check below pages.
#userBean: First we need to create bean class, which will consist getter and setter method like below code.
|
1 2 3 4 5 6 7 8 9 10 11 12 13 14 15 16 17 18 19 20 21 22 23 24 25 26 27 28 29 30 31 32 33 |
package w3adda; public class userBean { private String name,phone,email; public String getName() { return name; } public void setName(String name) { this.name = name; } public String getPhone() { return phone; } public void setPhone(String phone) { this.phone = phone; } public String getEmail() { return email; } public void setEmail(String email) { this.email = email; } } |
#index.jsp: From here we will send some data to next jsp page, check below code.
|
1 2 3 4 5 6 7 8 9 10 11 12 13 14 15 16 17 18 19 20 21 |
<%@page contentType="text/html" pageEncoding="UTF-8"%> <!DOCTYPE html> <html> <head> <meta http-equiv="Content-Type" content="text/html; charset=UTF-8"> <title>W3Adda Index Page</title> </head> <body> <form action="process.jsp" method="post"> Name : <input type="text" name="name"><br> Ph No.: <input type="text" name="phone"><br> Email : <input type="text" name="email"><br><br> <input type="submit" value="Sign Up"> </body> </html> |
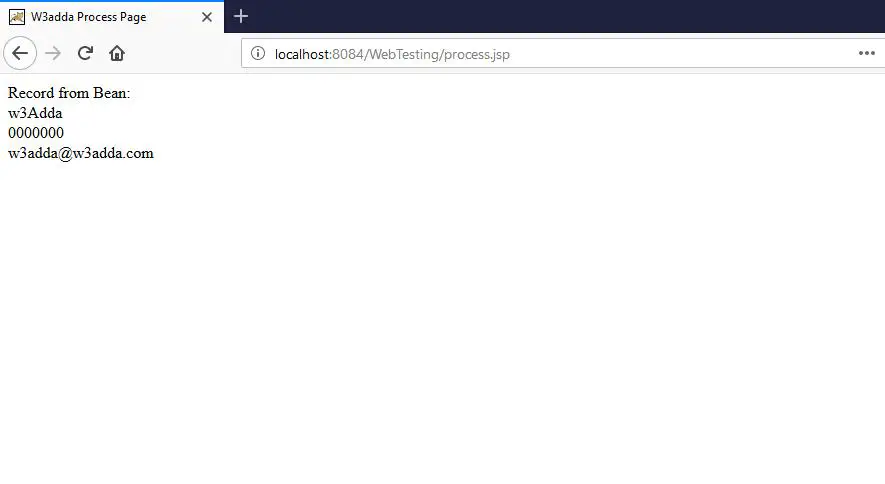
#process.jsp: On this page we will do process of setting and getting data. Here I have declared useBean , setProperty and getProperty Tag. Please check below code.
|
1 2 3 4 5 6 7 8 9 10 11 12 13 14 15 16 |
<%@page contentType="text/html" pageEncoding="UTF-8"%> <jsp:useBean id="ub" class="w3adda.userBean"/> <jsp:setProperty property="*" name="ub"/> <!DOCTYPE html> <html> <head> <meta http-equiv="Content-Type" content="text/html; charset=UTF-8"> <title>W3adda Process Page</title> </head> <body> Record:<br> <jsp:getProperty property="name" name="ub"/><br> <jsp:getProperty property="phone" name="ub"/><br> <jsp:getProperty property="email" name="ub" /><br> </body> </html> |
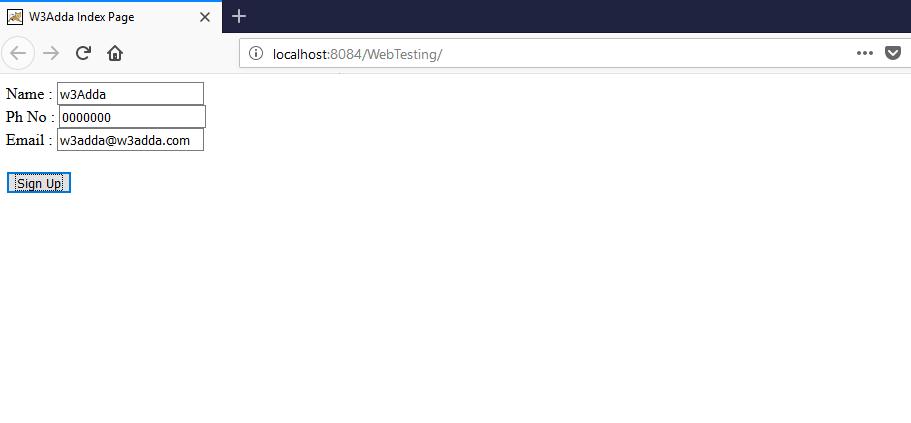
Output: So we are all set with jsp:useBean, jsp:setProperty, jsp:getProperty tags, now just run this project and you will output like below images.
When you will run this project the index page will appear, fill your details in the fields like below image.
This tag is used to include some external resources at runtime response. It may be JSP page, html file, or servlet. This tag includes resources at request time so it’s better for dynamic pages. It can be used to include both static or dynamic pages.
Now you will think that what is difference between JSP include directive and JSP include Action tag. Let ‘s see how they both are differ.
The main advantage of this Tag is Code Reusability which means we can use a page many times like i have created header so i can use it in many pages, it saves time.
Syntax:
|
1 |
<jsp:include page="Relative URL" /> |
Syntax with Parameter:
|
1 2 3 |
<jsp:include page="relativeURL | <%= expression %>"> <jsp:paramname="parametername"value="parametervalue|<%=expression%>" /> </jsp:include> |
Example: Let’s understand it by an simple example.
#header.html: Create a header html file so that we can include it in our JSP file.
|
1 2 3 4 5 6 7 8 9 10 11 12 13 14 15 16 17 18 19 20 21 22 23 24 25 26 27 28 29 30 31 32 33 34 35 36 37 |
<html> <head> <meta http-equiv="Content-Type" content="text/html; charset=utf-8" /> <style> #navigation ul li{ display: inline-block; padding: 0px 5px; } #navigation ul li a{ color:#fff; text-decoration: none; } #navigation { background: #4062b7; padding: 3px } </style> </head> <body> <div id="header"> <div class="shell"> <div id="navigation"> <ul> <li><a href="#" class="active">HOME</a></li> <li><a href="#">ABOUT</a></li> <li><a href="#">GALLERY</a></li> <li><a href="#">RESERVATION</a></li> <li><a href="#">LOCATION</a></li> <li><a href="#">CONTACT</a></li> </ul> </div> </div> </div> </body> </html> |
#index.jsp: here we will include above header file, check below code.
|
1 2 3 4 5 6 7 8 9 10 11 12 13 14 15 |
<%@page contentType="text/html" pageEncoding="UTF-8"%> <!DOCTYPE html> <html> <head> <meta http-equiv="Content-Type" content="text/html; charset=UTF-8"> <title>W3Adda Index Page</title> </head> <body> <jsp:include page="header.html" /> Today is: <%= java.util.Calendar.getInstance().getTime()%> </body> </html> |
Output: The output of this code will look like below image.

This tag is used to terminates the action of the current page and forwards the request to another page which is bind with forward tag, it may be static page, JSP page, or Java Servlet.
Syntax without parameter:
|
1 |
<jsp:forward page="Relative URL" /> |
As we discussed in our previous article that param action tag we can use with forward tag and include tag, so let’s see how it will use in forward action tag.
Syntax with param:
|
1 2 |
<jsp:forward page="relativeURL | <%= expression %>"> <jsp:param name="parameterName" value="parameterValue | <%=expression%>" />/> |
Example : Let’s get understand it with simple example, In this example I did not use parameter action , we will do in next example.
#index.jsp: In this jsp we will declare our jsp:forward action tag and will set the path in “page” attribute. Check below code of this jsp page.
|
1 2 3 4 5 6 7 8 9 10 11 12 |
<%@page contentType="text/html" pageEncoding="UTF-8"%> <!DOCTYPE html> <html> <head> <meta http-equiv="Content-Type" content="text/html; charset=UTF-8"> <title>W3Adda Index Page</title> </head> <body> <jsp:forward page="forwardedPage.jsp" /> </body> </html> |
#forwardedPage.jsp: This jsp page will be appear instead of index.jsp page because we put this page in forward tag, check below code.
|
1 2 3 4 5 6 7 8 9 10 11 12 13 |
<%@page contentType="text/html" pageEncoding="UTF-8"%> <!DOCTYPE html> <html> <head> <meta http-equiv="Content-Type" content="text/html; charset=UTF-8"> <title>W3Adda Page</title> </head> <body> <h2>Welcome to Forward Action Tag</h2> <% out.print("Today is:"+java.util.Calendar.getInstance().getTime()); %> </body> </html> |
Output: So output of above code will look like below image.

Example with param action tag : In the below example we will get understand about jsp:forward tag with jsp:param tag.
#index.jsp: The same page i have used, apply only jsp:param action tag, check below tag.
|
1 2 3 4 5 6 7 8 9 10 11 12 13 14 |
<%@page contentType="text/html" pageEncoding="UTF-8"%> <!DOCTYPE html> <html> <head> <meta http-equiv="Content-Type" content="text/html; charset=UTF-8"> <title>W3Adda Index Page</title> </head> <body> <jsp:forward page="forwardedPage.jsp" > <jsp:param name="siteName" value="w3adda.com" /> </jsp:forward> </body> </html> |
#forwardedPage.jsp: In this page we will get our parameter like below code.
|
1 2 3 4 5 6 7 8 9 10 11 12 13 14 |
<%@page contentType="text/html" pageEncoding="UTF-8"%> <!DOCTYPE html> <html> <head> <meta http-equiv="Content-Type" content="text/html; charset=UTF-8"> <title>W3Adda Page</title> </head> <body> <h2>Welcome to Forward Action Tag</h2> <% out.print("Today is:"+java.util.Calendar.getInstance().getTime()); %><br> <%= request.getParameter("siteName") %> </body> </html> |
Output: The output of the above code will look like below image.

JSP provides some Action Tags which we can use within JSP pages. It’s a bunch of standard action tag which are used for specific task. These all tags begin with jsp: prefix.
Syntax:
|
1 |
<jsp:action_tag_name attribute = "value" /> |
There are many Action Tags which are listed below and are used to perform some specific task.
1.jsp:forward: This tag is used to forward the request to new page.
Syntax:
|
1 |
<jsp:forward page="Relative URL" /> |
2.jsp:useBean: This tag is used to instantiates a Java Bean.
Syntax:
|
1 2 3 4 5 |
<jsp:useBean id= "instanceName" scope= "page | request | session | application" class= "packageName.className" type= "packageName.className" beanName="packageName.className | <%= expression >" /> |
4.jsp:setProperty: This tag is used to sets the value to the bean object.
Syntax:
|
1 |
<jsp:setProperty name="beanId" property="some Property" value="some value" /> |
5.jsp:getProperty: This tag is used to get the value from the bean object.
Syntax:
|
1 |
<jsp:setProperty name="beanId" property="some Property" .../> |
6.jsp:include: This tag is used to include some external resources at runtime response.
Syntax:
|
1 |
<jsp:include page="Relative URL" /> |
7.jsp:plugin: This tag is used to generates the browser specific code that makes an OBJECT or EMBED tag for the Java Plugin. In short it is used to insert Java component into JSP page.
Syntax:
|
1 |
<jsp:plugin type="applet|bean" code="name of class file" codebase="directory name of Class file" /> |
8.jsp:params: This tag is used to sets the parameter value to request object. Mostly it is used with include and forward tag.
Syntax:
|
1 |
<jsp:param name="parameter name" value="parameter value/> |
9.jsp:fallback: This tag can be used to print the message if plugin is working and also supplies alternate text if java plugin is unavailable. It is used in jsp:plugin Action Tag.
Syntax:
|
1 |
<jsp:fallback>Text Message For User</jsp:fallback> |
From next article we will discuss each tag briefly, It was simple overview of Action Tags.
Java Bean are classes that encapsulate many objects into a single object. It contains constructor, Getter, Setter Methods. With the help of Setter and Getter method user can set and get data. It also have zero argument constructor. Check out below code for more details.
Example: Let’s get understand it by an simple example.
#simpleBean.java: Create a java class for bean and do code as i did like below.
|
1 2 3 4 5 6 7 8 9 10 11 12 13 14 15 16 17 18 19 20 21 22 23 24 25 |
public class simpleBean { private int id; private String name; public simpleBean() { } public void setId(int id) { this.id = id; } public int getId() { return id; } public void setName(String name) { this.name = name; } public String getName() { return name; } } |
#testBean.java: This will be another java file from which we will set and get data from our bean class. Check below code.
|
1 2 3 4 5 6 7 8 9 10 11 12 |
public class testBean { public static void main(String args[]) { simpleBean sb = new simpleBean();//object is created sb.setName("w3addaa");//setting value to the object System.out.println(sb.getName());//getting and printing the output } } |
Output: The output of above code will look like below image.

So this was the overview of bean class, we will use in next article of jsp:useBean action tag.
The taglib directive is used to define a tag library in which we can defines many tags. The JSP allows us to define custom tag and with the help of Tag Library Descriptor(TLD) we can define our tags.
Syntax:
|
1 |
<%@taglib uri ="taglibURI" prefix="tag prefix"%> |
Example: :Let’s get understand it by an example, we need to follow some steps for creation our own tag, see below.
#Need to create TagHandler java class: With the help of this class we can perform action at the start and at the end of tag. Check below code.
MyTagHandler.java: This is the java file which I created for TagHandler.
|
1 2 3 4 5 6 7 8 9 10 11 12 13 14 15 16 17 18 19 20 |
package w3adda; import java.util.Calendar; import javax.servlet.jsp.JspException; import javax.servlet.jsp.JspWriter; import javax.servlet.jsp.tagext.TagSupport; public class MyTagHandler extends TagSupport { @Override public int doStartTag() throws JspException { JspWriter out = pageContext.getOut();//it will returns the instance of JspWriter try { out.print(Calendar.getInstance().getTime());//this will used to print date and time using JspWriter } catch (Exception e) { System.out.println(e); } return SKIP_BODY; } } |
#Need to create TLD(Tag Library Descriptor): Here we will define our tag.
1.step: do right click on your project and then “New>Tag Library Descriptor” like below image.

If you are unable to find here click on “Other” and then “Web>Tag Library Descriptor” like below image.

2.Step:Click on Next and define your tld file name,and then finish it, like below image

3.step: Define Tag: After creation tld file we have to define our tag here like i did, please check below code.
customtag.tld:
|
1 2 3 4 5 6 7 8 9 10 11 |
<?xml version="1.0" encoding="UTF-8"?> <taglib version="2.1" xmlns="http://java.sun.com/xml/ns/javaee" xmlns:xsi="http://www.w3.org/2001/XMLSchema-instance" xsi:schemaLocation="http://java.sun.com/xml/ns/javaee http://java.sun.com/xml/ns/javaee/web-jsptaglibrary_2_1.xsd"> <tlib-version>1.0</tlib-version> <short-name>customtag</short-name> <uri>/customtag</uri> <tag> <name>today</name> <tag-class>w3adda.MyTagHandler</tag-class> </tag> </taglib> |
#Create JSP file: In this file we will use our custom tag.create a jsp file and paste below code there.
Index.jsp:
|
1 2 3 4 5 6 7 8 9 10 11 12 13 14 |
<%@page contentType="text/html" pageEncoding="UTF-8"%> <%@ taglib uri="WEB-INF/customtag.tld" prefix="m" %> <!DOCTYPE html> <html> <head> <meta http-equiv="Content-Type" content="text/html; charset=UTF-8"> <title>W3Adda Page</title> </head> <body> Current Date and Time is: <m:today/> </form> </body> </html> |
#Run: So we all set with taglib directive, Simply run this project you will get output like below image.

Directives are elements that relay message to the JSP container and affect how it compiles the JSP page. The JSP directives gives direction to server that how to do process of a page.
#Syntax:
|
1 |
<%@ directive attribute=”value” %> |
There are three types of directives in JSP:
There are three types of directives in JSP:
Syntax:
|
1 |
<jsp:directive.page page-directive-attr-list /> |
Syntax:
|
1 |
<jsp:directive.include file="relativeURLspec" /> |
Syntax:
|
1 |
<%@ taglib uri="http://java.sun.com/jsp/jstl/core" prefix="c" %> |
Let’s get more understand about these directives.
# buffer
#import
#contentType
# errorPage
#isErrorPage
#extends
#info
#language
#isELIgnored
#isThreadSafe
#autoFlush
#session
#pageEncoding
1.buffer: This attributes is used to specify the buffer size in KB so that we can handle output generated by JSP page. The default value of buffer attribute is 8kb, we can change it according to our requirement.
Syntax is:
|
1 |
<%@ page buffer="value"%> |
if you want to change the value of buffer so just replace “value” as you want.
|
1 |
<%@ page buffer="16kb"%> |
Example: Let’s do it in JSP page, like below code.
|
1 2 3 4 5 6 7 8 9 10 11 12 |
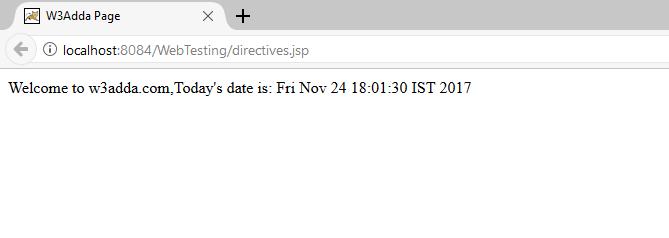
<%@page contentType="text/html" pageEncoding="UTF-8"%> <!DOCTYPE html> <html> <head> <meta http-equiv="Content-Type" content="text/html; charset=UTF-8"> <title>W3Adda Page</title> </head> <body> <%@ page buffer="16kb" %> Welcome to w3adda.com,Today's date is: <%= new java.util.Date()%> </body> </html> |
Output: The output will be look like below image.
2.import: This attribute is most useful attributes in Page Directives. By the name it can be understand that with the help of this attribute we can import other java classes, interface , packages etc.
Syntax:
|
1 |
<%@page import="value"%> |
So on place of value you can use anything which is valid and you want to important. Like if you want to import java.util.Date class so you can do it like below code.
|
1 |
<%@page import="java.util.Date"%> |
Example: Let’s understand it by an simple example like I did in jsp, check below code.
|
1 2 3 4 5 6 7 8 9 10 11 12 |
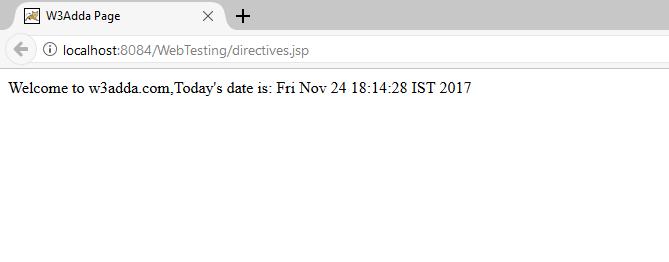
<%@page contentType="text/html" pageEncoding="UTF-8"%> <!DOCTYPE html> <html> <head> <meta http-equiv="Content-Type" content="text/html; charset=UTF-8"> <title>W3Adda Page</title> </head> <body> <%@ page import="java.util.Date" %> <!--here we import java.util.Date class--> Welcome to w3adda.com,Today's date is: <%= new Date()%> </body> </html> |
Output: The output of this attribute of page directive will look like below image.
3.contentType: This attribute is used to define contentType of JSP page, the default contentType is text/html.
Syntax:
|
1 |
<%@page contentType="value"%> |
Default value:
|
1 |
<%@page contentType="text/html"%> |
You can change it according to you like if you want to change it in xml so just enter the value like below code
|
1 |
<%@page contentType="text/xml"%> |
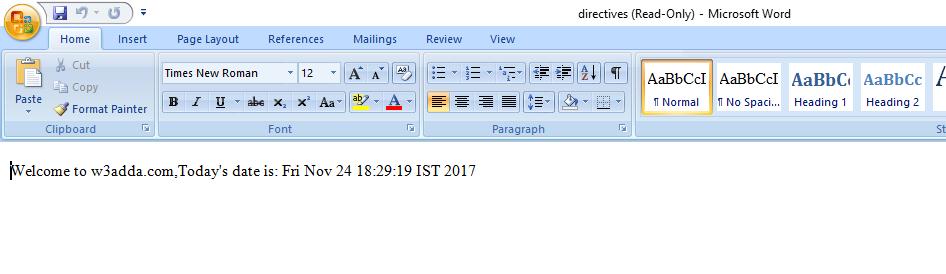
Example: In below example we have used contentType as “msword”, checkout how it will respond.
|
1 2 3 4 5 6 7 8 9 10 11 |
<%@page contentType="text/msword" pageEncoding="UTF-8"%> <!DOCTYPE html> <html> <head> <meta http-equiv="Content-Type" content="text/msword; charset=UTF-8"> <title>W3Adda Page</title> </head> <body> Welcome to w3adda.com,Today's date is: <%= new java.util.Date()%> </body> </html> |
Output: Simply run this code and the output will instruct you to download the ms word file and then you can open it. Check out below image.
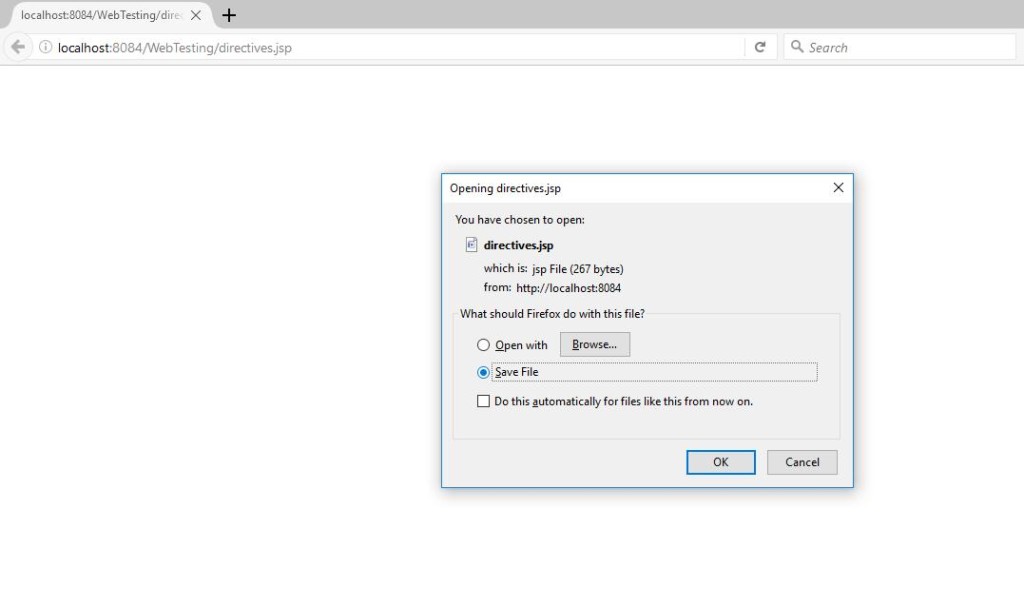
Simply “Save file” or “Open with” and you will get output like below image.
4.errorPage: The errorPage attribute is used to handle exception, if any error is occurred so we can simply use errorPage for this, the brief example of errorPage is briefly described in exception implicit object, here i have used an simple example so that we did not use to go back for it.
Example: You need to create an exception.jsp page, which will shown when an error occurred.
#exception.jsp:
|
1 2 3 4 5 6 7 8 9 10 11 12 13 14 15 |
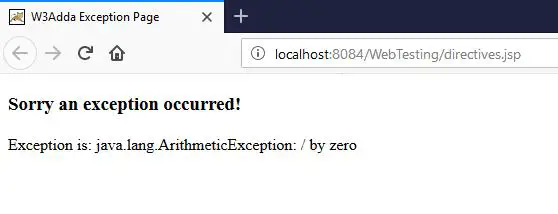
<%@page contentType="text/html" pageEncoding="UTF-8"%> <%@ page isErrorPage="true" %> <!DOCTYPE html> <html> <head> <meta http-equiv="Content-Type" content="text/html; charset=UTF-8"> <title>W3Adda Exception Page</title> </head> <body> <h3>Sorry an exception occurred!</h3> Exception is: <%= exception%> </body> </html> |
#directive.jsp: Include exception.jsp page in this jsp , which is called when an error occurred.
|
1 2 3 4 5 6 7 8 9 10 11 12 |
<%@page contentType="text/msword" pageEncoding="UTF-8"%> <!DOCTYPE html> <html> <head> <meta http-equiv="Content-Type" content="text/msword; charset=UTF-8"> <title>W3Adda Page</title> </head> <body> <%@ page errorPage="exception.jsp" %> <%= 1/0 %> </body> |
#Output: This two jsp files will give result like below image to us. Because 1 can not be divided by 0 so an exception will occurred.
5.isErrorPage: This attribute of page directive is used to specify that current page is used as an error page for other jsp page or not. The default value is “false”, If it is “true” means it will use when an exception will occurred else it will not use. As you can see I have used it in above attribute that is “errorPage” the line is
|
1 |
<%@ page isErrorPage="true" %> |
If I did it “false” so this will no more in use.
Syntax:
|
1 |
<%@ page isErrorPage="value"%> //value will be boolean true or false. |
Example: Check above example, that is related to this attribute also.
6.extends: The extends means you are inheriting parent class , means using inheritance in JSP page. This is rarely used and we can use it if we have extended HttpServlet and overridden some of it’s implementation.
Syntax:
|
1 |
<%@ page extends="w3adda.sampleclass"%> |
7.info : We can use this attribute to sets the information of the JSP page and later on we can retrieve it by using getServletInfo() method of servlet interface.
Syntax:
|
1 |
<%@ page info="value"%> |
Value can be your message like:
|
1 |
<%@ page info="Code written by W3Adda.com"%> |
Example: Need to do
8.language: This attribute specify the scripting language which is used in the page. The default value is “Java” and this is only language is supported by it.
Syntax:
|
1 |
<%@ page language="java"%> |
Syntax:
|
1 |
<%@ page isELIgnored="true"%> //It will Ignore EL. |
10.isThreadSafe: The Servlet and JSP page both are support multithreaded means more than one thread can execute simultaneously. This attribute is allows you to handle multithreading concept, If you do not want to use multithreading so just change the value as “false” and if you want to allow multithreading in your jsp page just do it “true”.
Syntax:
|
1 2 3 |
<%@ page isThreadSafe="true"%> //Allow multithreading. <%@ page isThreadSafe="false"%> //Not Allow multithreading. |
Syntax:
|
1 |
<%@ page autoFlush="true"%> //It will flush the buffer. |
12.session: By default JSP page creates a session, The default value for session is “True” , If we do not want that it creates default session so just do it “false”. Sometimes we do not need session in JSP page so in that case this attribute will use.
Syntax:
|
1 |
<%@ page session="false"%> //This will disable default session creation |
13.pageEncoding:This attribute is used to sets the response encoding type of our JSP page. The default value of this attribute is “ISO-8859-1”.
Syntax:
|
1 |
<%@ page pageEncoding="US-ASCII"%> |
The include directive is used to include external files during the translation phase. Translation phase is the phase when JSP page get converted into the equivalent servlet. We can directly add in jsp but we have to write code each JSP page, let’s get understand it by simple example: suppose we have 50 JSP file and we want to add header in each file so write code to each JSP page will be bad idea, we can simply create a header file and then we can include it in each jsp. If we don’t like header color so we will go to header file and simply change the color, it will change in each JSP page. The main purpose of include directive is code re-usability.
Syntax:
|
1 |
<%@ include file="path or Url of file" %> |
Example: Let’s get understand it by an simple example. Here I have created two files,
1.header.html
2.index.jsp
1.header.html: We will include this file in our index.jsp page. I have created some menus in header file, check below code.
|
1 2 3 4 5 6 7 8 9 10 11 12 13 14 15 16 17 18 19 20 21 22 23 24 25 26 27 28 29 30 31 32 33 34 35 36 37 |
<html> <head> <meta http-equiv="Content-Type" content="text/html; charset=utf-8" /> <style> #navigation ul li{ display: inline-block; padding: 0px 5px; } #navigation ul li a{ color:#fff; text-decoration: none; } #navigation { background: #4062b7; padding: 3px } </style> </head> <body> <div id="header"> <div class="shell"> <div id="navigation"> <ul> <li><a href="#" class="active">HOME</a></li> <li><a href="#">ABOUT</a></li> <li><a href="#">GALLERY</a></li> <li><a href="#">RESERVATION</a></li> <li><a href="#">LOCATION</a></li> <li><a href="#">CONTACT</a></li> </ul> </div> </div> </div> </body> </html> |
2.index.jsp: It will be our launching page for our Java Web Application and also we will include our header.html file in this jsp page. Check below code.
|
1 2 3 4 5 6 7 8 9 10 11 12 13 14 15 |
<%@page contentType="text/html" pageEncoding="UTF-8"%> <!DOCTYPE html> <html> <head> <meta http-equiv="Content-Type" content="text/html; charset=UTF-8"> <title>W3Adda Page</title> </head> <body> <%@ include file="header.html" %> <br> Today is: <%= java.util.Calendar.getInstance().getTime()%> </form> </body> </html> |
Output: So we are done with our Include directive coding, run this code you will find output like below image.

This is the instance of javax.servlet.http.HttpSession which provides a way to identify a user across more than one page request. It behaves like same as session in servlet. The session is used for Add, Remove attributes and also we can get session information of logged in user.
#Setting Attributes in Session: With the help of setAttribute(String name, Object value) Method we can set our data in session.
|
1 |
session.setAttribute("user", name); |
#Getting Attributes from Session: With the help of getAttribute(String name) Method we can get our data from session. It returns the object bound with the specified name in the session.
|
1 |
String name=(String)session.getAttribute("user"); |
Example:Let’s get understand it by an example. Create index.jsp file in your project like below
#index.jsp
|
1 2 3 4 5 6 7 8 9 10 11 12 13 14 15 16 17 18 19 |
<%@page contentType="text/html" pageEncoding="UTF-8"%> <!DOCTYPE html> <html> <head> <meta http-equiv="Content-Type" content="text/html; charset=UTF-8"> <title>JSP Page</title> </head> <body> <pre> <form action="session.jsp"> Name : <input type="text" name="uname"> Email : <input type="text" name="email"> <input type="submit" value="Click"><br/> </pre> </form> </body> </html> |
#Output: The output of this index.jsp file will look like below image.

#session.jsp: From here we will set attributes in our session, check below code.
|
1 2 3 4 5 6 7 8 9 10 11 12 13 14 15 16 17 18 19 20 21 22 23 |
<%@page contentType="text/html" pageEncoding="UTF-8"%> <!DOCTYPE html> <html> <head> <meta http-equiv="Content-Type" content="text/html; charset=UTF-8"> <title>JSP Page</title> </head> <body> <% String name = request.getParameter("uname"); String email=request.getParameter("email"); out.print("Welcome " + name+ " Email :"+email); session.setAttribute("user", name); //set attribute in session session.setAttribute("email", email); %> <a href = "session_second.jsp">Next Page</a> </body> </html> |
#Output: When you will click on index.jsp’s “click” button so this code will run and the output of this above code will look like below image and also we have set attributes in session from above code.

#session_second.jsp: When you will click on “Next Page” of “session.jsp” page, The below code will run. Here we will get session attributes which you have set from “session.jsp” page.
|
1 2 3 4 5 6 7 8 9 10 11 12 13 |
<%@page contentType="text/html" pageEncoding="UTF-8"%> <!DOCTYPE html> <html> <body> <% String name=(String)session.getAttribute("user"); //Getting Session Attribute String email=(String)session.getAttribute("email"); out.print("Welcome to Session Page: Name"+name+ " Email"+email); %> </body> </html> |
#Output: The output of this code will look like below image.
