Laravel 5.8 Create REST API with jwt Authentication
In one of my previous articles, we have learn How to Create REST API With Passport Authentication In Laravel using Laravel passport for REST API authentication. In this article, we will learn to create fully functional restful API with JWT Authentication in Laravel. In this tutorial, we will be creating fully functional CRUD APIs for Blog Posts along with JWT Authentication.
What is JWT?
JWT stands for JSON Web Tokens. JSON Web Token (JWT) is an authentication token which is used to securely transmit data between third-parties as a JSON object. The JSON Web token usually remains valid for 3600s or one hour. Nowdays API’s are mostly developed with JWT authentication.
Install Laravel 5.8
First of all we need to create a fresh laravel project, download and install Laravel 5.8 using the below command
|
|
composer create-project --prefer-dist laravel/laravel jwtauth |
Install JWT Auth Package Using Composer
In this step, we will install tymon jwt auth package via the composer dependency manager. Use the following command to install laravel jet authentication package.
If you are using Laravel version 5.5 or above, run the following command to install jwt package.
|
|
composer require tymon/jwt-auth:dev-develop --prefer-source |
If you are using the laravel version 5.4 or less, run the following command to install jwt package.
|
|
composer require tymon/jwt-auth |
After Installing tymon/jwt-auth package, we need to add service provider and alias in config/app.php file as following.
config/app.php
For versions less than 5.5, you are also required to set service provider and alias in config/app.php file.
|
|
'providers' => [ .... Tymon\JWTAuth\Providers\JWTAuthServiceProvider::class, .... ], 'aliases' => [ .... 'JWTAuth' => Tymon\JWTAuth\Facades\JWTAuth::class, 'JWTFactory' => 'Tymon\JWTAuth\Facades\JWTFactory', .... ], |
If you are using Laravel version 5.5 or above, laravel does it automatically using Package Auto-Discovery.
Publishing Configuration File
Publish the configuration file using the following command for versions 5.5 or above
|
|
php artisan vendor:publish --provider="Tymon\JWTAuth\Providers\LaravelServiceProvider" |
If you are using previous versions of laravel, run the following command to publish the configuration
|
|
php artisan vendor:publish --provider="Tymon\JWTAuth\Providers\JWTAuthServiceProvider" |
Above command will generate a config/jwt.php configuration file.
config/jwt.php
1 2 3 4 5 6 7 8 9 10 11 12 13 14 15 16 17 18 19 20 21 22 23 24 25 26 27 28 29 30 31 32 33 34 35 36 37 38 39 40 41 42 43 44 45 46 47 48 49 50 51 52 53 |
<?php return [ 'secret' => env('JWT_SECRET'), 'keys' => [ 'public' => env('JWT_PUBLIC_KEY'), 'private' => env('JWT_PRIVATE_KEY'), 'passphrase' => env('JWT_PASSPHRASE'), ], 'ttl' => env('JWT_TTL', 60), 'refresh_ttl' => env('JWT_REFRESH_TTL', 20160), 'algo' => env('JWT_ALGO', 'HS256'), 'required_claims' => [ 'iss', 'iat', 'exp', 'nbf', 'sub', 'jti', ], 'persistent_claims' => [ // 'foo', // 'bar', ], 'lock_subject' => true, 'leeway' => env('JWT_LEEWAY', 0), 'blacklist_enabled' => env('JWT_BLACKLIST_ENABLED', true), 'blacklist_grace_period' => env('JWT_BLACKLIST_GRACE_PERIOD', 0), 'decrypt_cookies' => false, 'providers' => [ 'jwt' => Tymon\JWTAuth\Providers\JWT\Lcobucci::class, 'auth' => Tymon\JWTAuth\Providers\Auth\Illuminate::class, 'storage' => Tymon\JWTAuth\Providers\Storage\Illuminate::class, ], ]; |
Generate JWT Key
Run the following command for laravel 5.5 or above to generate the secret key used to sign the tokens.
For versions below 5.5
Registering Middleware
Register auth.jwt middleware in app/Http/Kernel.php
app/Http/Kernel.php
|
|
protected $routeMiddleware = [ .... 'auth.jwt' => \Tymon\JWTAuth\Http\Middleware\Authenticate::class, 'jwt.refresh' => \Tymon\JWTAuth\Middleware\RefreshToken::class, ]; |
Update User Model
In this step we will require to implement JWTSubject interface in User model. It is mandatory to implement the Tymon\JWTAuth\Contracts\JWTSubject interface on the User model. This interface requires implementing two methods getJWTIdentifier and getJWTCustomClaims. Let’s update app/User.php model file with the following lines of code.
app/User.php
1 2 3 4 5 6 7 8 9 10 11 12 13 14 15 16 17 18 19 20 21 22 23 24 25 26 27 28 29 30 31 32 33 34 35 36 37 38 39 40 41 42 43 44 45 46 47 48 49 50 |
<?php namespace App; use Illuminate\Foundation\Auth\User as Authenticatable; use Illuminate\Notifications\Notifiable; use Tymon\JWTAuth\Contracts\JWTSubject; class User extends Authenticatable implements JWTSubject { use Notifiable; /** * The attributes that are mass assignable. * * @var array */ protected $fillable = [ 'name', 'email', 'password', ]; /** * The attributes that should be hidden for arrays. * * @var array */ protected $hidden = [ 'password', 'remember_token', ]; /** * Get the identifier that will be stored in the subject claim of the JWT. * * @return mixed */ public function getJWTIdentifier() { return $this->getKey(); } /** * Return a key value array, containing any custom claims to be added to the JWT. * * @return array */ public function getJWTCustomClaims() { return []; } } |
Create Authentication API Routes
In this step, We will setup authentication routes to register a new user, login with their user credentials and get the authenticated user details by using JWT token. So add the following route in routes/api.php
routes/api.php
|
|
Route::post('login', 'AuthController@login'); Route::post('register', 'AuthController@register'); Route::group(['middleware' => 'auth.jwt'], function () { Route::get('logout', 'AuthController@logout'); Route::get('user', 'AuthController@getAuthUser'); }); |
Create Authentication Controller
Now, create a Authentication Controller name AuthController. Use the below command to create controller.
|
|
php artisan make:controller AuthController |
Once the above command executed, it will create a resource controller file “AuthController.php” in “app/Http/Controllers/” directory. Go to “AuthController.php” and put the following code in it.
1 2 3 4 5 6 7 8 9 10 11 12 13 14 15 16 17 18 19 20 21 22 23 24 25 26 27 28 29 30 31 32 33 34 35 36 37 38 39 40 41 42 43 44 45 46 47 48 49 50 51 52 53 54 55 56 57 58 59 60 61 62 63 64 65 66 67 68 69 70 71 72 73 74 75 76 77 78 79 80 81 82 83 84 85 86 87 88 89 90 91 92 93 94 95 |
<?php namespace App\Http\Controllers; use App\Http\Requests\RegisterFormRequest; use App\User; use Illuminate\Http\Request; use JWTAuth; use Tymon\JWTAuth\Exceptions\JWTException; use Validator; class AuthController extends Controller { public function register(Request $request) { $validator = Validator::make($request->all(), [ 'email' => 'required|string|email|max:255|unique:users', 'name' => 'required', 'password'=> 'required' ]); if ($validator->fails()) { return response()->json($validator->errors()); } $user = new User(); $user->name = $request->name; $user->email = $request->email; $user->password = bcrypt($request->password); $user->save(); $user = User::first(); $token = JWTAuth::fromUser($user); return response()->json([ 'success' => true, 'token' => $token, ]); } public function login(Request $request) { $validator = Validator::make($request->all(), [ 'email' => 'required|string|email|max:255', 'password'=> 'required' ]); if ($validator->fails()) { return response()->json($validator->errors()); } $input = $request->only('email', 'password'); $jwt_token = null; if (!$jwt_token = JWTAuth::attempt($input)) { return response()->json([ 'success' => false, 'message' => 'Invalid Email or Password', ], 401); } return response()->json([ 'success' => true, 'token' => $jwt_token, ]); } public function logout(Request $request) { $this->validate($request, [ 'token' => 'required' ]); try { JWTAuth::invalidate($request->token); return response()->json([ 'success' => true, 'message' => 'User logged out successfully' ]); } catch (JWTException $exception) { return response()->json([ 'success' => false, 'message' => 'Sorry, the user cannot be logged out' ], 500); } } public function getAuthUser(Request $request) { $this->validate($request, [ 'token' => 'required' ]); $user = JWTAuth::authenticate($request->token); return response()->json(['user' => $user]); } } |
Building the Post CRUD API
Next, we will be creating a simple blog application with post table and implement CRUD (Create, Read, Update and Delete) APIs. To create the blog posts APIs we have to define table schema for posts table. Open terminal and use the following artisan command to generate <timestamp>create_posts_table.php migration.
|
|
php artisan make:migration create_posts_table --create=posts |
Once this command is executed you will find a migration file created under “database/migrations”. Lets open migration file and put following code in it –
1 2 3 4 5 6 7 8 9 10 11 12 13 14 15 16 17 18 19 20 21 22 23 24 25 26 27 28 29 30 31 32 33 34 35 |
<?php use Illuminate\Support\Facades\Schema; use Illuminate\Database\Schema\Blueprint; use Illuminate\Database\Migrations\Migration; class CreatePostsTable extends Migration { /** * Run the migrations. * * @return void */ public function up() { Schema::create('posts', function (Blueprint $table) { $table->bigIncrements('id'); $table->unsignedBigInteger('user_id'); $table->string('title'); $table->string('body'); $table->timestamps(); $table->foreign('user_id')->references('id')->on('users'); }); } /** * Reverse the migrations. * * @return void */ public function down() { Schema::dropIfExists('posts'); } } |
Now, run following command to migrate database schema.
After, the migration executed successfully the posts table will be created in database.
Create Model
In this step, we will use the following command to create post model –
|
|
php artisan make:model Post |
Once, the above command executed it will create a model file Post.php in app directory. Next, we have to assign fillable fields using fillable property inside Post.php file. Open app/Post.php file and put the following code in it –
app/Post.php
|
|
<?php namespace App; use Illuminate\Database\Eloquent\Model; class Post extends Model { // protected $fillable = ['title','body']; } |
Now, we have to add a relationship in the User model to retrieve the related posts. In app/User.php add the following method.
|
|
public function posts() { return $this->hasMany(Post::class); } |
Create Controller
In this step, we will use the following command to create post controller.
|
|
php artisan make:controller PostController |
Once the above command executed, it will create a controller file “PostController.php” in “app/Http/Controllers/” directory. Open the PostController.php file and put the following code in it.
app/Http/Controllers/PostController.php
1 2 3 4 5 6 7 8 9 10 11 12 13 14 15 16 17 18 19 20 21 22 23 24 25 26 27 28 29 30 31 32 33 34 35 36 37 38 39 40 41 42 43 44 45 46 47 48 49 50 51 52 53 54 55 56 57 58 59 60 61 62 63 64 65 66 67 68 69 70 71 72 73 74 75 76 77 78 79 80 81 82 83 84 85 86 87 88 89 90 91 92 93 94 95 96 97 98 99 100 101 102 103 104 105 106 107 108 |
<?php namespace App\Http\Controllers; use Illuminate\Http\Request; use App\Post; class PostController extends Controller { public function index() { $posts = auth()->user()->posts; return response()->json([ 'success' => true, 'data' => $posts ]); } public function show($id) { $post = auth()->user()->posts()->find($id); if (!$post) { return response()->json([ 'success' => false, 'message' => 'Post with id ' . $id . ' not found' ], 400); } return response()->json([ 'success' => true, 'data' => $post->toArray() ], 400); } public function store(Request $request) { $this->validate($request, [ 'title' => 'required', 'body' => 'required' ]); $post = new Post(); $post->title = $request->title; $post->body = $request->body; if (auth()->user()->posts()->save($post)) return response()->json([ 'success' => true, 'data' => $post->toArray() ]); else return response()->json([ 'success' => false, 'message' => 'Post could not be added' ], 500); } public function update(Request $request, $id) { $post = auth()->user()->posts()->find($id); if (!$post) { return response()->json([ 'success' => false, 'message' => 'Post with id ' . $id . ' not found' ], 400); } $updated = $post->fill($request->all())->save(); if ($updated) return response()->json([ 'success' => true ]); else return response()->json([ 'success' => false, 'message' => 'Post could not be updated' ], 500); } public function destroy($id) { $post = auth()->user()->posts()->find($id); if (!$post) { return response()->json([ 'success' => false, 'message' => 'Post with id ' . $id . ' not found' ], 400); } if ($post->delete()) { return response()->json([ 'success' => true ]); } else { return response()->json([ 'success' => false, 'message' => 'Post could not be deleted' ], 500); } } } |
Create Resource Route
After this, we need to add resource route for post controller. Lets open “routes/api.php” file and add following route in it.
|
|
Route::resource('posts', 'PostController'); |
our final route file looks as following –
routes/api.php
|
|
Route::post('login', 'AuthController@login'); Route::post('register', 'AuthController@register'); Route::group(['middleware' => 'auth.jwt'], function () { Route::get('logout', 'AuthController@logout'); Route::get('user', 'AuthController@getAuthUser'); Route::resource('posts', 'PostController'); }); |
Start Application Server
Lets start the development server using following artisan command –
Testing the REST API
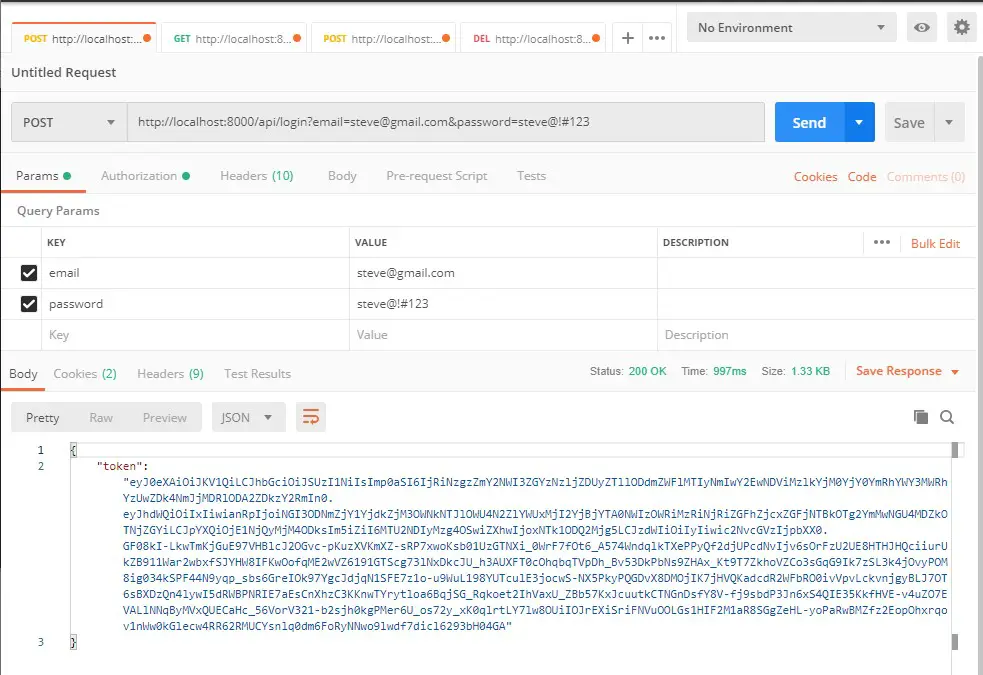
Our Authentication API is ready to test. I will use Postman to test the API.
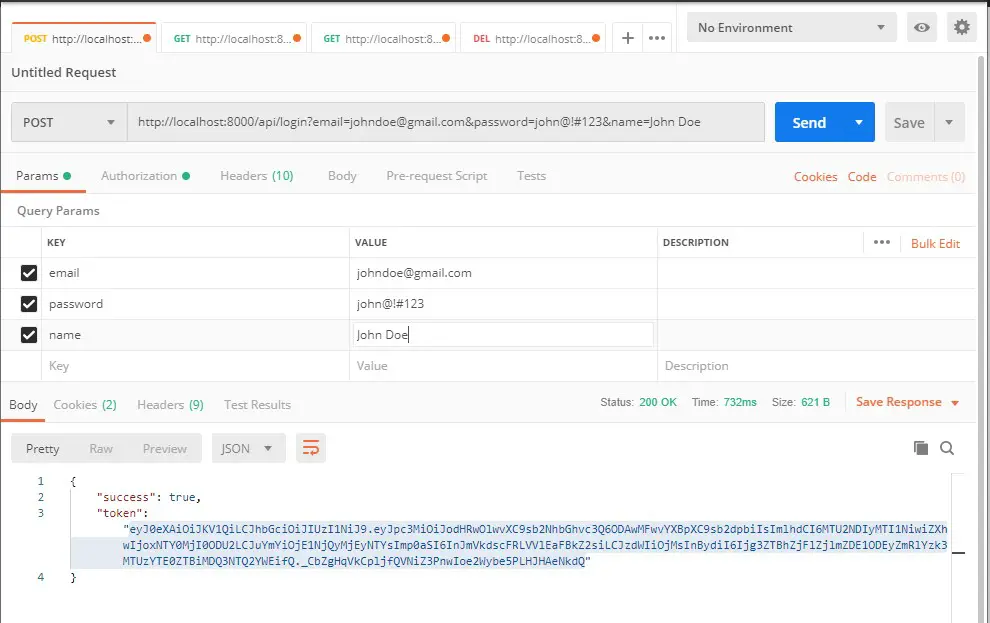
Register Api :-
Verb: POST
URL :http://localhost:8000/api/register
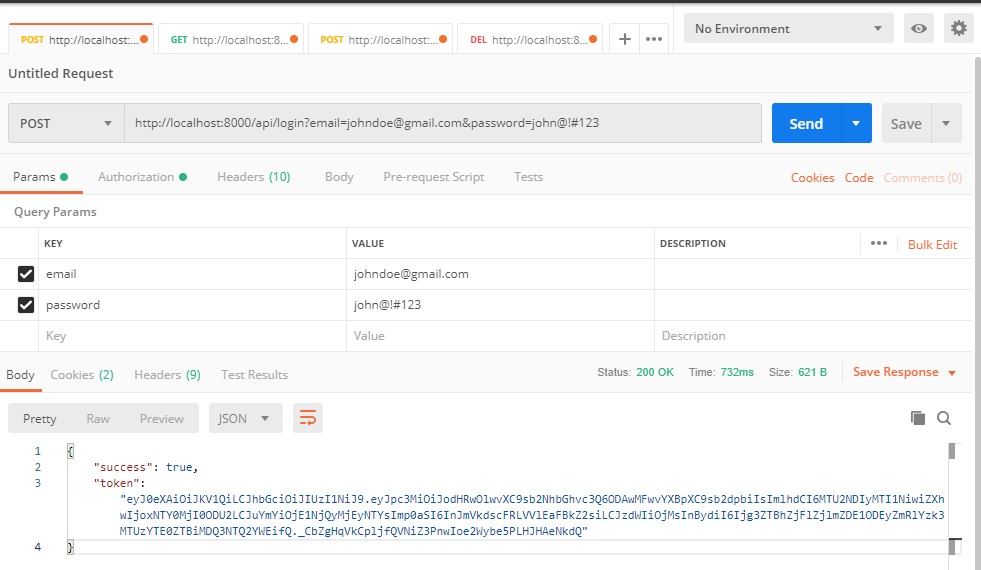
Login Api :-
Verb: POST
URL :http://localhost:8000/api/login
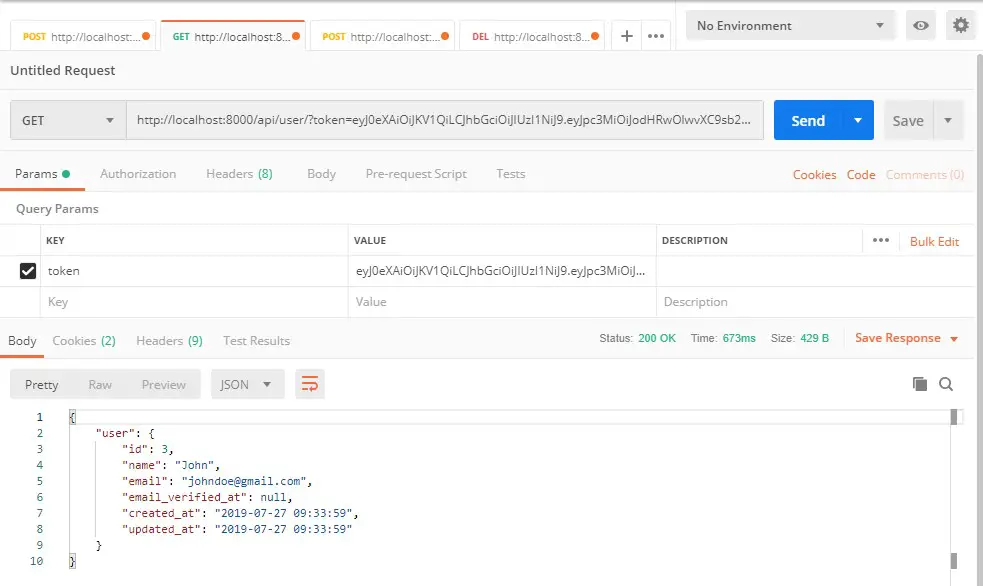
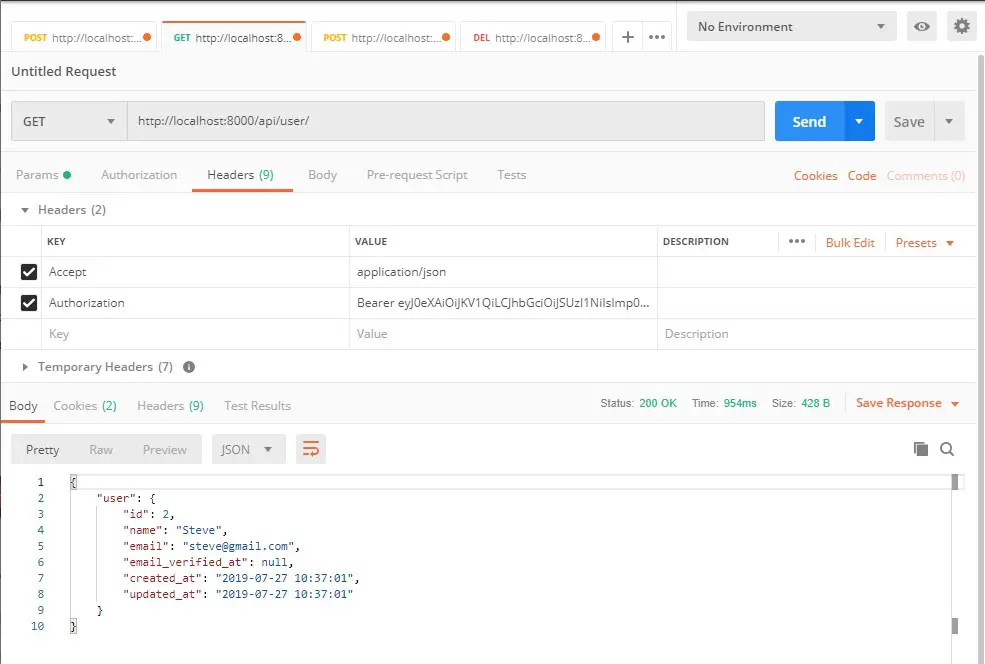
User Api :-
Verb: GET
URL: http://localhost:8000/api/user
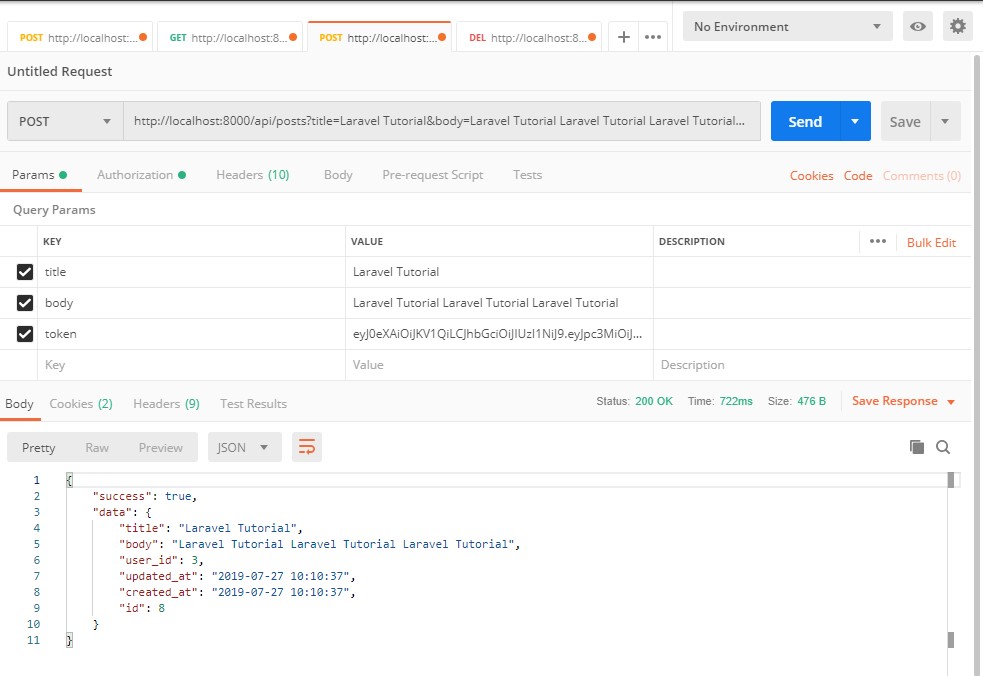
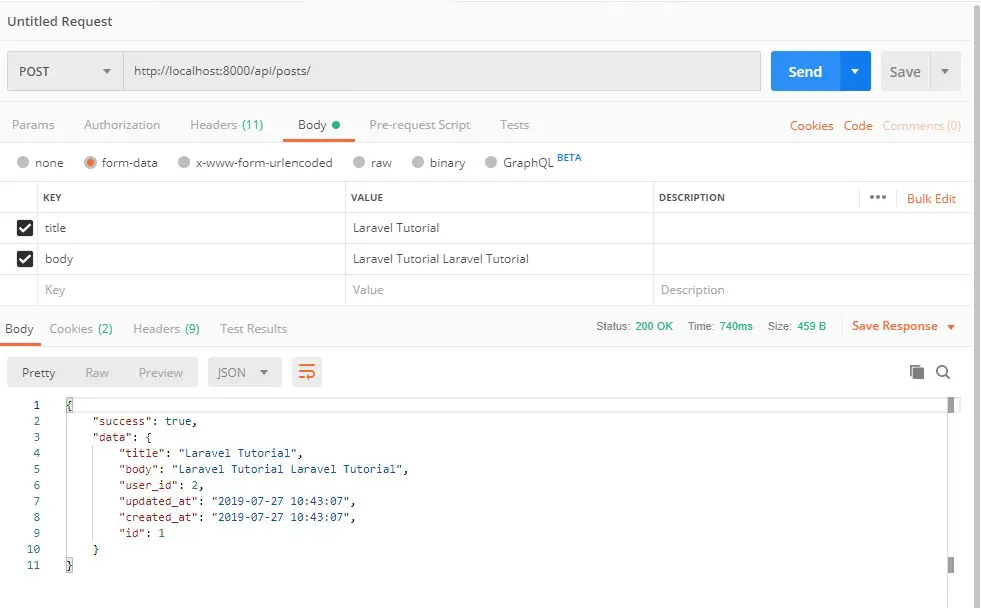
Add Post Api :-
Verb: POST
URL: http://localhost:8000/api/posts
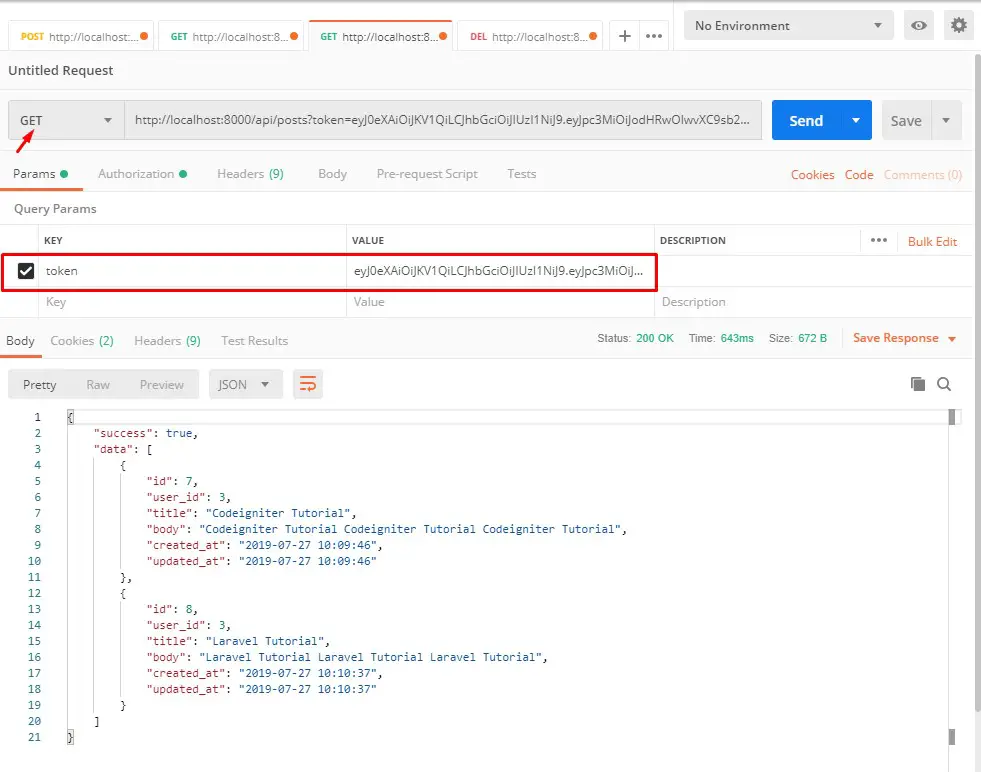
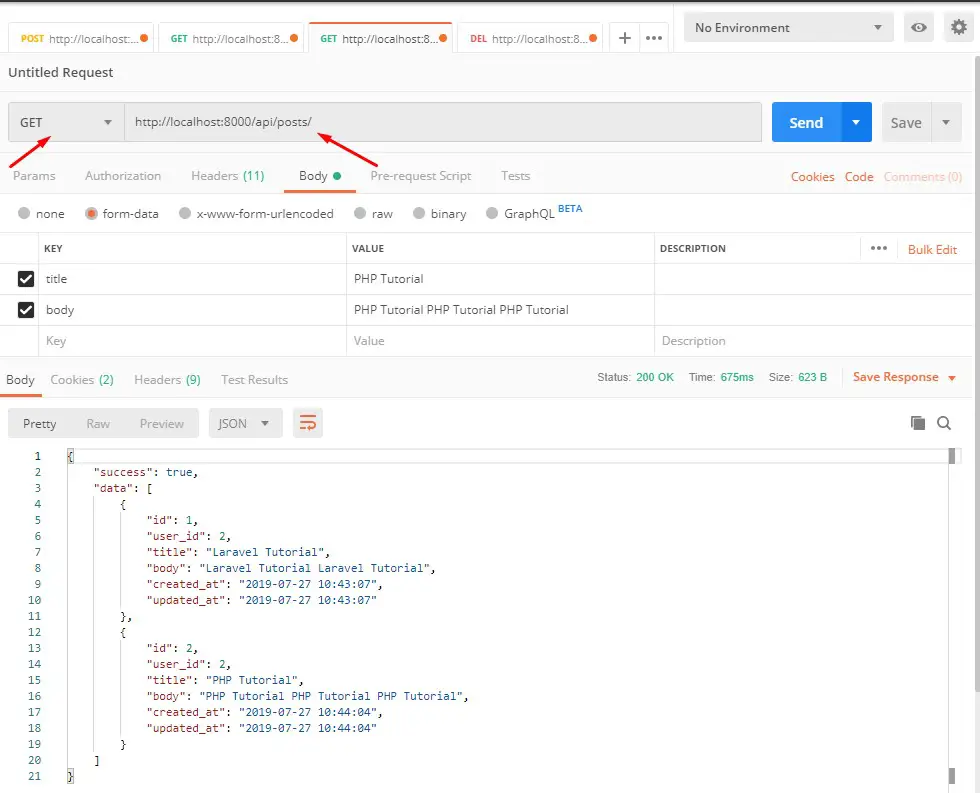
List Post Api :-
Verb: GET
URL: http://localhost:8000/api/posts
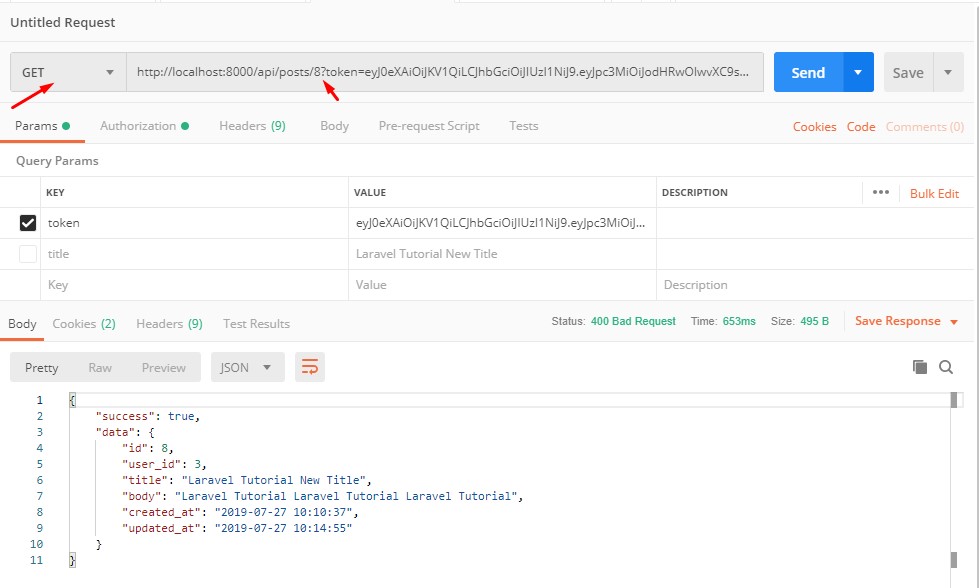
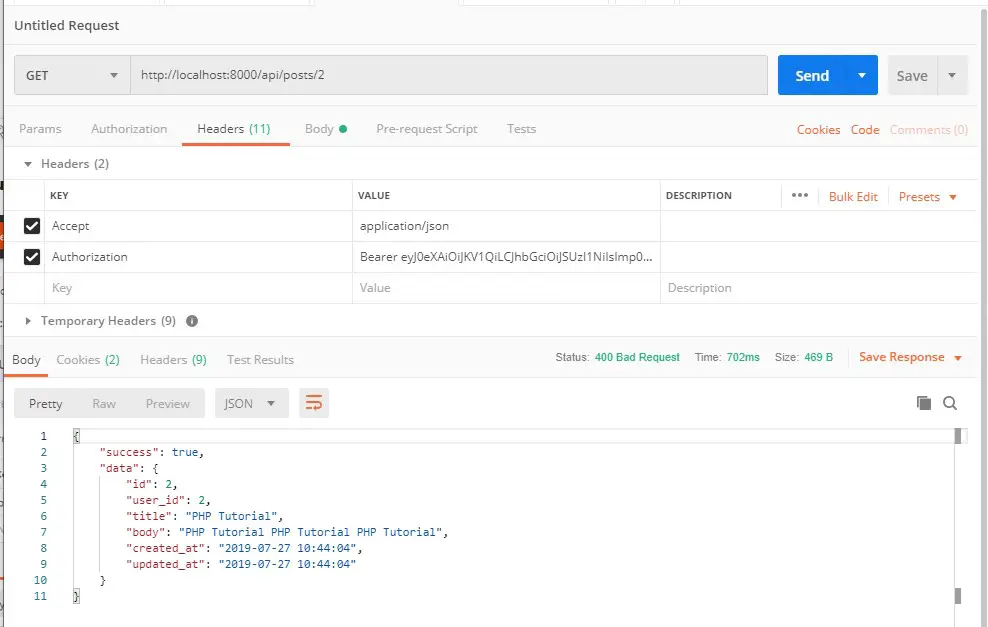
Single Post Api :-
Verb: GET
URL: http://localhost:8000/api/posts/{ID}
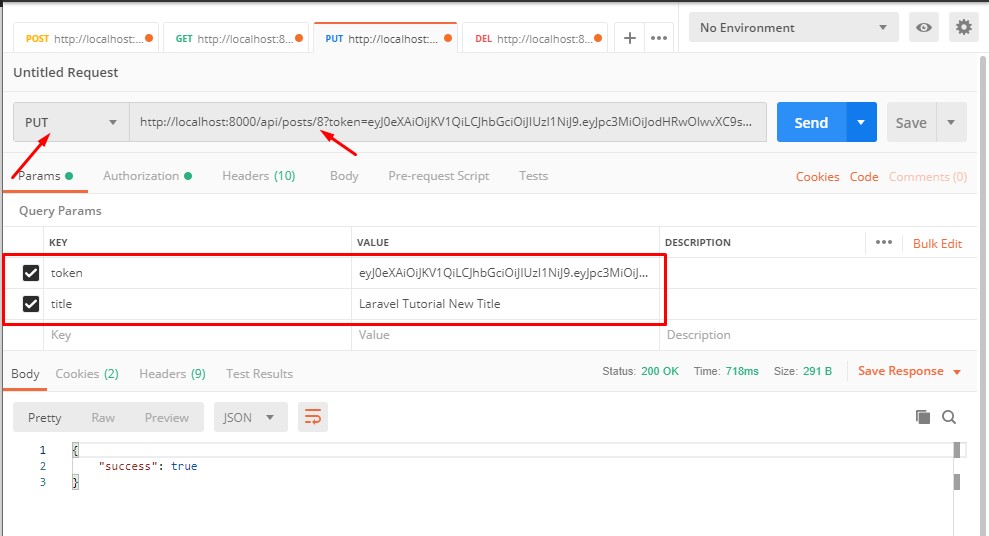
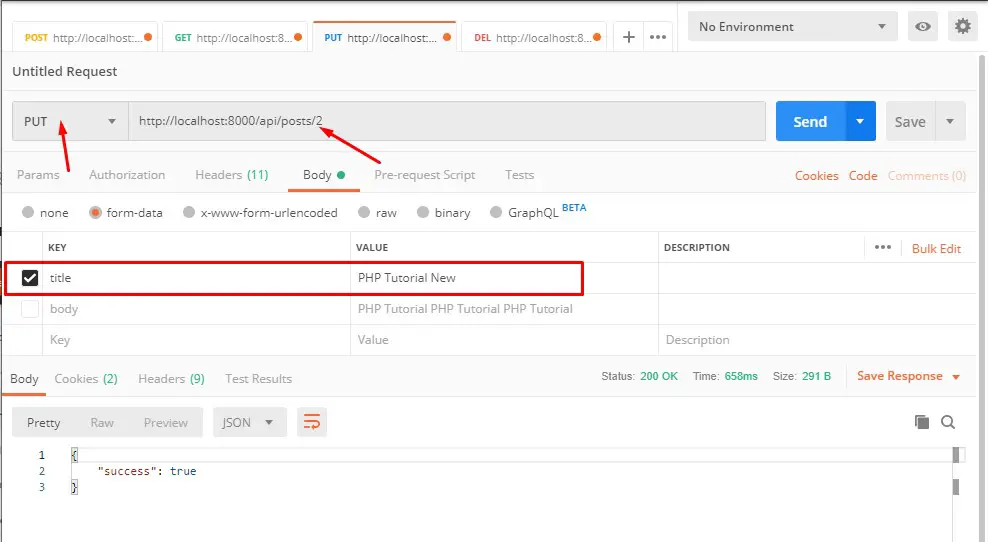
Update Post Api :-
Verb: PUT
URL: http://localhost:8000/api/posts/{ID}
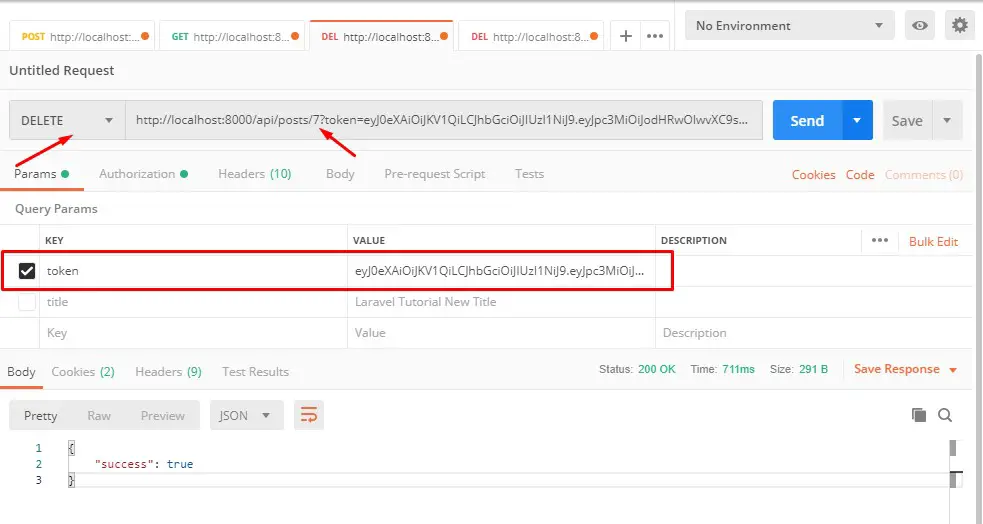
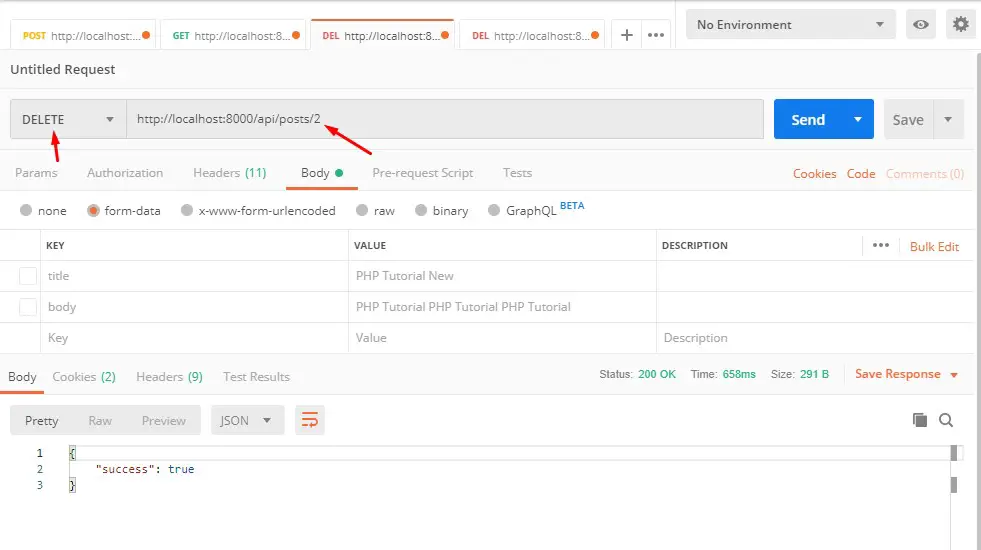
Delete Post Api :-
Verb: DELETE
URL: http://localhost:8000/api/posts/{ID}


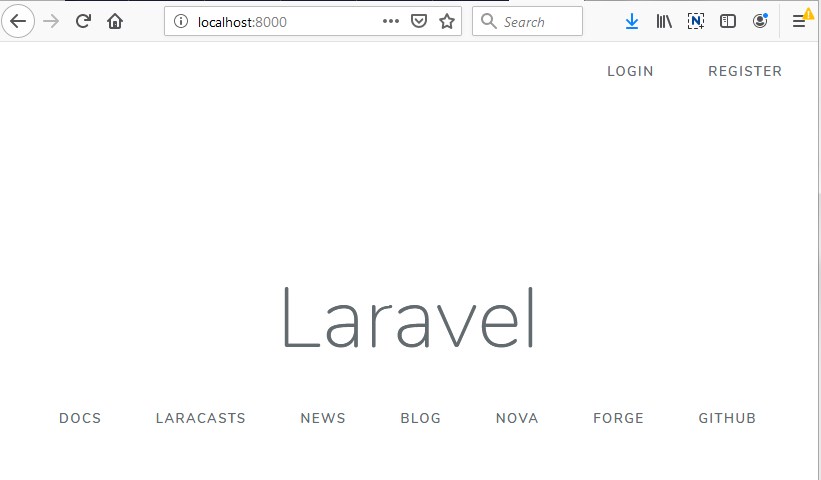 Test Laravel 5.8 Facebook Login