Category Archives: Laravel

Laravel Tutorials

Laravel 9 Backup Store On Google Drive Tutorial with Example

In this Laravel 9 Backup Store On Google Drive Tutorial with Example I will show you how to take laravel site backup in google drive. In this tutorial I will also show you how to integrate google drive in laravel 9 to store backup on google drive. In this example we will learn Google Drive integration in Laravel 8. In this example we will be using spatie/laravel-backup package to take backup in google drive.

Laravel 9 Backup Store On Google Drive Tutorial with Example

In this step by step Laravel 9 Backup Store On Google Drive Example I will demonstrate you how to integrate google drive in laravel site to take site backup. Please follow instructions given below:

  • Setup Google Drive Account
  • Install Laravel 9
  • Connecting App to Database
  • Install spatie/laravel-backup
  • Setup Google Drive as Filesystem in Laravel
  • Configure Google Drive Details
  • Execute Backup Command

Setup Google Drive Account

Before integrating Google Drive in laravel 9. that you have google client id and secret id,  refresh token and folder id. Please follow the instruction given below. You can create Google App in Google Developer Console by following the steps given below.

Step 1 – Visit the link given below and create a new project:

Step 2 – Visit “Library” of google search console and search for “Google Drive API“:

Step 3 – Then enable the Google Drive API.

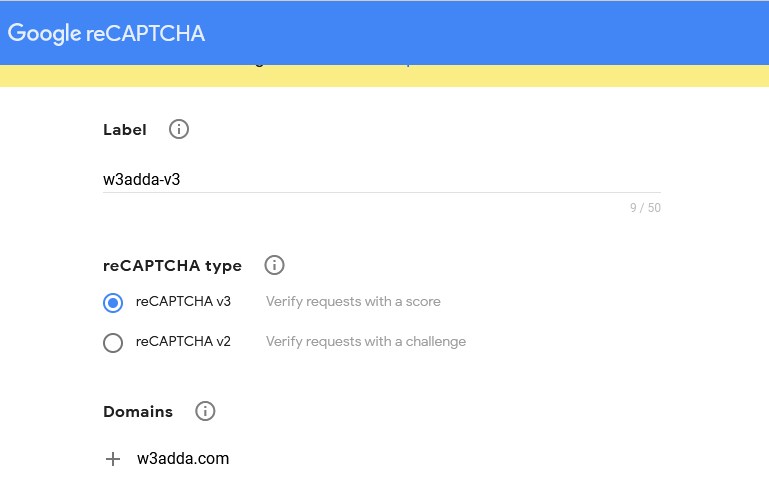
Step 4 – Now, Visit “Credentials” and click on the tab “OAuth Consent Screen”. Here you will get options to select user type, select “External” option, and click the “CREATE” button.

Step 5 – Please provide following details like “App Name“, “User support email” and “Email” in the Developer contact information and click Save And Continue button. For other forms “Scopes“, “Test Users” and “Summary” click on Save And Continue button and go to the dashboard. Don’t worry about the other fields.

Step 6 – Now, on OAuth consent screen, you will see that the App’s Publishing status is testing. Click the Publish App button and confirm.

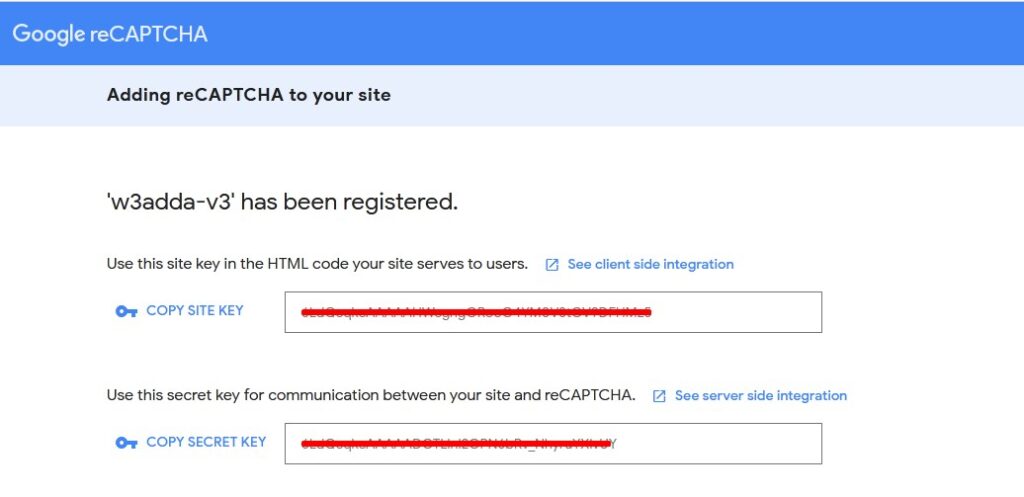
Step 7 – Now, visit Credentials and click the button that says “Create Credentials” and select “OAuth Client ID“.

Step 8 – For “Application type” choose “Web Application” and give it a name. You also need to provide your “Authorized redirect URIs”.

Step 9 – Now visit the below link:

In the top right corner, click the settings icon, check “Use your own OAuth credentials” and paste your Client ID and Client Secret.

Step 10 – on the left, scroll to “Drive API v3”, expand it, and check each of the scopes. Click “Authorize APIs” and allow access to your account when prompted.

Step 11 – You also need to check “Auto-refresh the token before it expires” and click “Exchange authorization code for tokens“.

Step 12 – Now, complete this step and click on step 1 again and you should see your refresh token.

Step 13 – Now you need folder ID that is optional. If you set folder ID to null, in that case, it is going to store backup files in the root path of Google Drive. You can get the folder ID from the URL.

Install Laravel 9

First of all we need to create a fresh laravel project, download and install Laravel 9 using the below command

Connecting App to Database

Now, lets create a MySQL database and connect it with laravel application. After creating database we need to set database credential in application’s .env file.

Install spatie/laravel-backup

In this step run the following command to install spatie/laravel-backup package in laravel 9

Now, run the following command to publish this installed package:

Now, you need to add google in the disk option in the config/backup.php.

Setup Google Drive as Filesystem in Laravel

Now, you need to run the following command to install a Filesystem adapter for Google drive:

Now, inside the boot() method add the Google driver for the Laravel filesystem:

app/Providers/GoogleDriveServiceProvider.php

Now, you need to register the service provider toproviders array of config/app.php.

Configure Google Drive Details

In this step, you need to configure Google drive app with this laravel app. Go to the config directory and open filesystem.php file and add the client id, secret and callback url:

You also you need to update .env file of laravel 8 app. Please add the following Google drive credentials:

Execute Backup Command

In this step we are ready to take backup run the following command to check the backup file is created or not:

Laravel 9 Multiple File Upload using jQuery Ajax

In this Laravel 9 Multiple File Upload using jQuery Ajax tutorial, I’ll show you how to upload multiple files using ajax in laravel 9. In this laravel 9 multiple file upload example, I’ll show you how to validate and upload multiple files into folder and then save it into database. In this tutorial before saving multiple image into database we will validate image and then save it into directory. Before uploading the image we will validate the image. After successfully uploading multiple images into the folder and saving it in database we will display success message on the screen.

Laravel 9 Multiple File Upload using jQuery Ajax

In this step by step tutorial I’ll demonstrate how to upload multiple files using ajax in laravel 9 with validation. I’ll also show you how to upload multiple pdf, txt, csv, excel, doc files in laravel 9 application. Please follow the steps to upload multiple files in laravel 9 given below:

  • Install Laravel 9
  • Database Configuration
  • Build File Model & Migration
  • Create Ajax Multiple File Upload Routes
  • Make Controller using Artisan Command
  • Create an Ajax Form to Upload Multiple File
  • Ajax Code to Upload Multiple File
  • Start Development Server

Install Laravel 9

First of all we need to create a fresh laravel project, download and install Laravel 9 using the below command

Database Configuration

Now, lets create a MySQL database and connect it with laravel application. After creating database we need to set database credential in application’s .env file.

Build File Model & Migration

Now, in this step we will create model and migration file. Please run the following command:

The above command will create two files:

  • blog/app/Models/File.php
  • blog/database/migrations/create_files_table.php

Open create_files_table.php file inside blog/database/migrations/ directory. Then open this file and add the following code into function up() on this file:

Now, in this step we will create model and migration file. Please run the following command:

Create Ajax Multiple File Upload Routes

After this, we need to define routes in “routes/web.php” file. Lets open “routes/web.php” file and add the following routes in it.

routes/web.php

Make Controller using Artisan Command

Now, lets create a controller named AjaxUploadMultipleImageController using command given below –

The above command will create AjaxUploadMultipleImageController.php file, which is located inside blog/app/Http/Controllers/ directory. Now, open UploadImagesController.php file and add the following code into it:

Create an Ajax Form to Upload Multiple File

In step this we will create blade file. Go to resources/views directory. And then create a new blade view file named multi-file-ajax-upload.blade.php inside this directory. Open multi-file-ajax-upload.blade.php file and put the following code into it:

Ajax Code to Upload Multiple File

Start Development Server

Now we are ready to run our example so lets start the development server using following artisan command –

Now, open the following URL in browser to see the output –

Laravel 9 JWT Rest API Authentication Example Tutorial

In this Laravel 9 JWT Rest API Authentication Example Tutorial I’ll show you how to build the rest APIs with jwt (JSON web token) authentication in laravel 9. In this example I’ll also show you how to install jwt auth and configure jwt auth in laravel 9.

In one of my previous articles, we have learn How to Create REST API With Passport Authentication In Laravel 9 using Laravel passport for REST API authentication. In this article, we will learn to create fully functional restful API with JWT Authentication in Laravel 9. In this tutorial, we will be creating fully functional REST API along with JWT Authentication.

Laravel 9 JWT Rest API Authentication Example Tutorial

In this laravel step by step tutorial you will learn how to create REST API with Laravel 9 using JWT Token (JSON Web Token). Please follow the step given bellow:

  • Install Laravel 9
  • Database Configuration
  • Install JWT Auth
  • Registering Middleware
  • Run Migration
  • Create APIs Route
  • Create JWT Auth Controller
  • Now Test Laravel REST API in Postman

Install Laravel 9

First of all we need to create a fresh laravel project, download and install Laravel 9 using the below command

Configure Database

Now, lets create a MySQL database and connect it with laravel application. After creating database we need to set database credential in application’s .env file.

.env

Install JWT Auth

In this step, we will install tymon jwt auth package via the composer dependency manager. Use the following command to install laravel jwt authentication package.

After Installing tymon/jwt-auth package, we need to add service provider and alias in config/app.php file as following.

config/app.php

Now, you need to generate jwt encryption keys. Use the following command to generate encryption keys needed to generate secure access tokens:

Now, open JWTGenerateCommand.php file and put the following code,

vendor/tymon/src/Commands/JWTGenerateCommand.php

Registering Middleware

Register auth.jwt middleware in app/Http/Kernel.php

app/Http/Kernel.php

Run Migration

Now, you need to run migration using the following command to create tables in the database :

Create APIs Route

Now we will create rest API auth routes. Go to the routes directory and open api.php. Then put the following routes into api.php file:

routes/api.php

Create JWT Auth Controller

In this step, we will create a controllers name JWTAuthController. Use the following command to create a controller :

After that, Create some authentication methods in JWTAuthController.php. So navigate to app/http/controllers/API directory and open JWTAuthController.php file. And, update the following methods into your JWTAuthController.php file:

Then open command prompt and run the following command to start development server:

Test Laravel 9 REST API with JWT Auth in Postman

Now, we will call above create crud and auth apis in postman app:

1 – Laravel Register Rest API :

Laravel 9 REST API with JWT Auth 1

2 – Login API :

Laravel 9 REST API with JWT Auth 2

Next Step, you will call getUser, create product, list product, edit product, and delete product APIs, In this apis need to pass the access token as headers:

Laravel 9 Google Autocomplete Address Tutorial

In this Laravel 9 Google Autocomplete Address Example Tutorial, I’ll show you how to integrate Address or location Autocomplete using Google Autocomplete in laravel 9. In this tutorial you will learn to implement google autocomplete in laravel 9. In this article I will guide you through the integration of google autocomplete in laravel 9.

Google Autocomplete

Google autocomplete widget is used to display suggestions for places, address and location as soon as the user starts typing in the given input box.

Laravel 9 Google Autocomplete Address Tutorial

In this laravel 9 google autocomplete tutorial I’ll demonstrate you step by step process to integrate google autocomplete in laravel 9. Please follow the instructions given below:

  • Install Laravel 9
  • Get Api Key From Google
  • Add Route
  • Generate Controller by Command
  • Create Blade View
  • Run Development Server
  • Test This App.

Install Laravel 9

First of all we need to create a fresh laravel project, download and install Laravel 9 using the below command

Get Api Key From Google

Now, we need to get Google API key to enable the communication between client and Google server. Now follow the instructions given below to get Google API Key:

  • Visit Google Cloud Platform.
  • Click on the project dropdown at the top to create the project.
  • Click APIs & Services > Credentials.
  • Now, click on Create Credentials > API key.
  • Copy google API and store in some text file.
  • Now we need to enable few services, so click on Credentials > “Enable APIs and Services”, additionally enable “Maps JavaScript API” and “Places API” services.

Add Route

After this, we need to define routes in “routes/web.php” file. Lets open “routes/web.php” file and add the following routes in it.

routes/web.php

Generate Controller by Command

Now, lets create a controller named GoogleController using command given below –

After successfully create controller go to app/controllers/GoogleController.php and put the following code :

Create Blade view

Now, we will create a blade view file. Go to app/resources/views and create one file name auto-complete.blade.php :

Add Autocomplete Script.

Run Development Server

Now we are ready to run our example so lets start the development server using following artisan command –

Now, open the following URL in browser to see the output –

Laravel 9 Datatables Column Relationship Search Tutorial

In this Laravel 9 Datatables Column Relationship Search Tutorial I will show you how to display and search column in yajra dataTables with relationship in laravel 9. In this tutorial you will learn to display and filter column in yajra dataTables with relationship. In this article I will share example to display and filter column in yajra dataTables with relationship in laravel 9.

Let suppose you have two database tables first is posts and the other one is users and you have relationship in each table. Now you want to display and filter posts title and who write these posts (author name). This would require you to use laravel yajra dataTables columns with a relationship.

Laravel 9 Datatables Column Relationship Search Tutorial

In this step by step tutorial I’ll demonstrates you to how to use a filter on dataTables columns with relationships. Please follow the instruction given below:

  • Install Laravel 9
  • Connecting App to Database
  • Install Yajra DataTable
  • Create Migration and Modal
  • Add route
  • Create Controller by Artisan Command
  • Create Blade File
  • Run Development Server

Install Laravel 9

First of all we need to create a fresh laravel project, download and install Laravel 9 using the below command

Connecting App to database

Now, lets create a MySQL database and connect it with laravel application. After creating database we need to set database credential in application’s .env file.

Install Yajra DataTable

In this step, we will install Yajra Datatables Package via the composer dependency manager. Use the following command to install Yajra Datatables Package.

After Installing Yajra Datatables package, we need to add service provider and alias in config/app.php file as following.

config/app.php

Create Migration and Modal

Now let’s create post table migration and create Post Modal using following artisan command:

his will create migration, open migration file and put the following code in it:

database/migrations/2020_05_20_070104_create_posts_table.php


Now, run the migration to create database table using following artisan command:


Now update following code in your Post model file to create a posts table.

Add route

After this, we need to define routes in “routes/web.php” file. Lets open “routes/web.php” file and add the following routes in it.

routes/web.php

Create Controller by Artisan Command

Now, lets create a controller named PostController using command given below –

Once the above command executed, it will create a controller file PostController.php in app/Http/Controllers/ directory. Open the PostController.php file and put the following code in it.

app/Http/Controllers/PostController.php


Create Blade File

In this step we will create blade file. Go to resources/views directory and create new file users.blade.php. After that, put the following html and javascript code into your blade view file:

Run Development Server

Now we are ready to run our example so lets start the development server using following artisan command –

Now, open the following URL in browser to see the output –

Laravel 9 Custom Validation Error Messages Tutorial

In this Laravel 9 Custom Validation Error Messages Tutorial I will show you how to create custom validation message error in laravel 9 application. In this tutorial you will learn to customize default validation message and use custom validation error messages in laravel 9 forms. In this article I will share example on how to create and use validation error messages on laravel 9.

Custom Validation Error Messages In Laravel 9

In this step by step guide I will demonstrate you how to use custom validation error messages on laravel forms. Please follow the instruction given below:

  • Install Laravel 9
  • Connecting App to Database
  • Run Migration Command
  • Add Routes
  • Generate Controller By Command
  • Create the blade view
  • Run Development Server.

Install Laravel 9

First of all we need to create a fresh laravel project, download and install Laravel 9 using the below command

Connecting App to Database,

Now, lets create a MySQL database and connect it with laravel application. After creating database we need to set database credential in application’s .env file.

Run Migration Command

Now, in this step we will create model and migration file. Please run the following command:

Add Routes

After this, we need to define routes in “routes/web.php” file. Lets open “routes/web.php” file and add the following routes in it.

routes/web.php

Generate Controller By Command.

Now, lets create a controller named CustomErrorController using command given below –

Once the above command executed, it will create a controller file CustomErrorController.php in app/Http/Controllers/ directory. Open the CustomErrorController.php file and put the following code in it.

app/Http/Controllers/CustomErrorController.php

Create Blade View

In this step we will create blade view file. Go to resources/views folder and create a blade view file from.blade.php and update the following code into your file:

Run Development Server.

Now we are ready to run our example so lets start the development server using following artisan command –

Now, open the following URL in browser to see the output –

Laravel 9 Generate PDF File using DomPDF Tutorial

In this Laravel 9 Generate PDF File using DomPDF Tutorial I will show you how to generate pdf file using DomPDF in laravel 9. In this tutorial you will learn to generate or convert a pdf file using DomPDF in laravel 9. In this example we will be using DomPDF library to generate pdf file. In this article I will show you how to install and use DomPDF package to generate pdf file in laravel 9. You will also learn to install DomPDF with laravel. Before starting with this tutorial you are required to install DomPDF package in laravel.

Laravel 9 Generate PDF File using DomPDF Tutorial

In this step by step tutorial I will demonstrate you how to install DomPDF  package in laravel 9. As well as I will also show you how to generate pdf file using DomPDF package in laravel 9. Please follow the instruction given below:

  • Install Laravel 9
  • Install DomPDF Package
  • Register DOMPDF Package
  • Create PDF Routes
  • Create PDF Controller By Artisan Command
  • Create Blade View File
  • Run Development Server

Install Laravel 9

First of all we need to create a fresh laravel project, download and install Laravel 9 using the below command

Install domPDF Package

In this step, we will install dompdf Package via the composer dependency manager. Use the following command to install dompdf Package.

Register DOMPDF Package

Now we will register this package in laravel application. So, Open the providers/config/app.php file and register the DOMPDF provider and aliases.

Create PDF Routes

After this, we need to define routes in “routes/web.php” file. Lets open “routes/web.php” file and add the following routes in it.

routes/web.php

Create PDF Controller By Artisan Command

Now, lets create a controller named PDFController using command given below –

Now, go to app/http/controllers and open PDFController.php file. And put the following code into it:

Create Blade File

Now, create blade view file for generate pdf from view. So, Go to resources/views and create testPDF.blade.php and update the following code into it:

Run Development Server

Now we are ready to run our example so lets start the development server using following artisan command –

Now, open the following URL in browser to see the output –

Laravel 9 Flash Message Example Tutorial

In this Laravel 9 Flash Message Example Tutorial I will show you how to create or implement flash message in laravel 9 application. In this tutorial you will learn to implement flash message in laravel. While working with laravel application we come to situations where we want to show/display various flash success and error messages. In this example we will be using sweet alert js to display various type of flash messages or notifications.

Laravel 9 Flash Message Example Tutorial

In this step by step guide I will demonstrate you how you can implement success or error messages with sweet alert js in your laravel application.

Flash Messages in Laravel 9

In this tutorial we will learn to following types of flash messages

  • Success Flash Message
  • Error Flash Message
  • Warning Flash Message
  • Info Flash Message
  • Sweet Alert Flash Success Message
  • Sweet Alert Flash Error Message

1 – Success Flash Message

Below is example to display success flash message:

The second thing, When you send the success message. So you can use the below code in your controller:

The success flash message will look like:

2 – Error Flash Message

Below is example to display error flash message:

The second thing, add the below code in your controller, where you want to send the warning message:

3 – Warning Flash Message

Below is example to display warning flash message:

The second thing, add the below code in your controller, where you want to send the error message:

4 – Info Flash Message

Below is example to display info flash message:

The second thing, add the below code in your controller, where you want to send the info message:\

5 – Sweet Alert Flash Success Message

Below is example to sweet alert flash success message:

If you use the above code for a success message, this message automatically hides after 5 seconds.

6 – Sweet Alert Flash Error Message

Below is example to sweet alert flash error message:

If you use the above code for an error message, this message automatically hides after 5 seconds.

Laravel 9 Install Summernote Editor with Image Upload

In this Laravel 9 Install Summernote Editor with Image Upload Tutorial I will show you how to install and use Summernote with image upload in laravel 9. In this tutorial, you will learn to install Summernote with image upload in laravel 9. In this step by step guide you how to integrate Summernote editor with image upload in laravel 9. Integration of Summernote editor in laravel form is simple process. I will also show you how to integrate or enable image upload in Summernote editor.

Laravel 9 Install Summernote Editor with Image Upload

In this laravel 9 summernote with image upload integration example I will guide you through step by step to install and use summernote editor with image upload in laravel 9 application. Please follow the instruction given below:

  • Install Laravel 9
  • Connecting App to Database
  • Create Migration and Model File
  • Add Routes
  • Create Controller
  • Create Blade File
  • Run Development Server
  • Test This App

Install Laravel 9

First of all we need to create a fresh laravel project, download and install Laravel 9 using the below command

Connecting App to Database

Now, lets create a MySQL database and connect it with laravel application. After creating database we need to set database credential in application’s .env file.

Create Migration and Model File

Now, in this step we will create model and migration file. Please run the following command:

Next, go to database/migrations and open create_posts_table.php. Then put the following code into create_books_table.php file, as follow:


Now, run the migration to create database table using following artisan command:

Now go to App directory and open Post.php model file. Then put the following code into Post.php model file, as follow:

app/Post.php

Add Routes

After this, we need to define routes in “routes/web.php” file. Lets open “routes/web.php” file and add the following routes in it.

routes/web.php

Create Controller

Now, lets create a controller named PostController using command given below –

Then, go to app/http/controllers and open PostController.php file. And update the following code into your PostController.php file, as follow:

Create Blade File

In this step we will create blade file. Go to resources/views folder. And create a blade views  create.blade.php. Then open create.blade.php file and update the following code into create.blade.php file, as follow:

Run Development Server

Now we are ready to run our example so lets start the development server using following artisan command –

Now, open the following URL in browser to see the output –

Laravel 9 Google Recaptcha V3 Tutorial with Example

In this Laravel 9 Google Recaptcha V3 Tutorial with Example I will show you how to integrate google recaptcha v3 in laravel 9 application. I’ll guide you through step by step for integration of google recaptcha v3 in a laravel 9 application. We will be using ‘josiasmontag/laravel-recaptchav3’ package for laravel 9 google recaptcha v3 integration in laravel 9 application. In this tutorial, we will be creating a simple form with some basic fields along with the google recaptcha v3.

Laravel 9 Google Recaptcha V3 Integration

Google ReCaptcha is a one of the most popular captcha system that defends your site from bots to spam and abuse. The Google ReCaptcha is an open service that assures a computer user is a human. In order to integrate the reCaptcha, you must sign up for the Google API key & secret for your website.

Laravel 9 Google Recaptcha V3 Tutorial with Example

  • Install Laravel 8
  • Setup Database Credentials
  • Install Laravel Google Recaptcha V3 Package
  • Set Google Site Key and Secret Key
  • Define Route
  • Create Controller
  • Create Blade View
  • Start Development Server
  • Conclusion

Install Laravel 9

First of all we need to create a fresh laravel project, download and install Laravel 9 using the below command

Make sure you have composer installed.

Setup Database Credentials

Now, lets create a MySQL database and connect it with laravel application. After creating database we need to set database credential in application’s .env file.

Install Laravel Google Recaptcha V3 Package

We will be using ‘josiasmontag/laravel-recaptchav3’ package for google recaptcha v3 integration in laravel 9 application. In this step we will be installing “josiasmontag/laravel-recaptchav3” via following composer command, lets open your terminal and switch to the project directory and enter the following command –

After successfully installing package, we need to publish config file with bellow command:

Use the above command

Set Google Site Key and Secret Key

Now, we need to set Google Site Key and Secret Key in .env file. Let’s start by getting Google key & secret required to make ReCaptcha authorize with the Google servers. Visit the following link to register your site –

Here, you need to provide label to identify the site. Now choose the type of reCAPTCHA as reCAPTCHA V3. Now you need to add the list of domains, this captcha would work on.

Laravel 9 Google Recaptcha V3 Tutorial with Example

Laravel 9 Google Recaptcha V3 Tutorial with Example 2

Let’s open .env file and add this credential as following –

.env

Set the details as above

Create Controller

Now, lets create Recaptcha Controller using following command

Once the above command executed, it will create a controller file RecaptchaController.php in app/Http/Controllers/ directory. Open the RecaptchaController.php file and put the following code in it.

Controllers/RecaptchaController.php

Create View/Blade File

In this step, we will create view/blade file to render a register form with recaptcha field. Lets create a “index.blade.php” file in “resources/views/recaptcha/” directory and put the following code in it.

resources/views/recaptcha/index.blade.php

Set Routes

After this, we need to add following two routes in “routes/web.php” to display register form and to post the form data. Lets open “routes/web.php” file and add following route.

routes/web.php

Start Development Server

Now we are ready to run our example so lets start the development server using following artisan command –

Now, open the following URL in browser to see the output –

How to Install and Use Ckeditor in Laravel 9

In this How to Install Ckeditor in Laravel 9 tutorial I will show you how to install and use CKEditor in laravel. In this tutorial, you will learn to install CKEditor in laravel 9 using the command line. In this article I will guide you through how to install and upload images and files using CKEditor in laravel 9.

While creating forms we come to situation where we may text editor field so that we can insert and save html and other text into database. The CKEditor editor is feature rich wysiwyg html editor allows us to integrate text editor fields in html form.

How to Install Ckeditor in Laravel 9

In this step by step tutorial I will demonstrate you how to install and use CKEditor editor in laravel 9 application. Please follow the instruction given below:

  • Install Laravel 9
  • Connecting App to Database
  • Create Post Model & Migration
  • Add Fillable Property in Model
  • Make Route
  • Create Controller
  • Create Blade Views File
  • Start Development Server

Install Laravel 9

First of all we need to create a fresh laravel project, download and install Laravel 9 using the below command

Connecting App to Database

Now, lets create a MySQL database and connect it with laravel application. After creating database we need to set database credential in application’s .env file.

Create Post Model & Migration

Now, in this step we will create model and migration file. Please run the following command:

Now, open create_posts_table.php file inside /database/migrations/ directory. And the update the function up() with following code:

Now, run the migration to create database table using following artisan command:

Add Fillable Property in Model

In this step, add the fillable property in Post model, which is located inside app/models directory:

Make Route

After this, we need to define routes in “routes/web.php” file. Lets open “routes/web.php” file and add the following routes in it.

routes/web.php

Create Controller

Now, lets create a controller named PostController using command given below –

Once the above command executed, it will create a controller file PostController.php in app/Http/Controllers/ directory. Open the PostController.php file and put the following code in it.

app/Http/Controllers/PostController.php

Create Blade Views File

In this step we will create blade view file. Go to resource/views direcotry and create two files name posts.blade.php and create.blade.php file. Create a blade view file name posts.blade.php and put the following code into it:

posts.blade.php


Now, create a blade view file name create.blade.php and put the following code into it:

create.blade.php


Note that, Don’t forget to add the following cdn file to your blade view file:

Start Development Server

Now we are ready to run our example so lets start the development server using following artisan command –

Now, open the following URL in browser to see the output –

Laravel 9 Resource Route Controller Example Tutorial

In this Laravel 9 resource route, controller example tutorial I will show you how to create a resource route, controller, API resource route, and API resource controller in laravel 9. In this tutorial you will learn to create resource route, controller, API resource route and API resource controller in laravel. You will also learn to use resource controller and routes in laravel 9. In this article I will also show you how to create resource routes and controllers using the PHP artisan make command in laravel 9.

Laravel Resource Route and Controller

With laravel resource controller and resource route you can quick and easily CRUD operation in laravel. In order to create CRUD operation for any resource you have to create resource routes and controller. First you need to create resource route and then need to create resource controller to generate method for insert, update, view and delete operation for any resource.

Laravel 9 Resource Route Controller Example Tutorial

  • Controller Using Artisan Command
    • Create a Simple Controller
    • Create a Resource Controller
    • Create a Resource Controller with Model
  • Routes
    • Create Simple Routes
    • Create Resource Routes
  • API Controller and Routes

1:- Controller Using Artisan Command

Use the following command to create simple and resource controller in laravel 9.

Create a Simple Controller

Use the following artisan command to create simple controller in laravel:

The above command will create a simple controller file inside app/http/controllers directory. When you open newly created controller file it will look like:

Create a Resource Controller

Use the following artisan command to create resource controller in laravel:

The above command will create a resource controller file inside app/http/controllers directory. When you open newly created resource controller file it will look like:


The resource controller contains by default index (), create (), edit (), update (), destroy () method inside it.

Create a Resource Controller with Model

Use the following artisan command to create a resource controller with model file in laravel:

The above command will create resource controller along with a model file. The controller file has located inside app/http/controllers directory. And Model file is located inside app/Models directory.

If you open Model file, you will look like:

2:- Routes

Lets open “routes/web.php” file and add the following routes in it.

Create Simple Routes

Create Resource Routes

Then open terminal and run the following command on it:

The following command will display resource routes methods:

3:- API Controller and Routes

Create Resource Controller

Use the following artisan command to create a API resource controller:

The above command will create a simple controller file inside app/http/controllers/API directory. When you open newly created resource controller file it will look like:

Define Resource API Route

Lets open “routes/api.php” file and add the following routes in it.

routes/api.php