Category Archives: Laravel

Laravel Tutorials

Laravel 9 Generate Dummy Data Using Factory Tutorial

In this Laravel 9 Generate Dummy Data Using Factory Tutorial, I will show you how to generate dummy data using factory, faker, tinker and seeder in laravel 9 application. In this tutorial you will learn to generate fake or dummy data in a database table using factory in laravel 9. While working with any web application using laravel we come situations where we need some dummy or test data to available in database. Laravel factory makes this job much easier using laravel factory we can generate dummy data into the database table.

Laravel 9 Generate Dummy Data Using Factory Tutorial

In this tutorial, you will learn how to generate dummy data into the database tables using factory in laravel 9 application. Please follow the instruction give below:

  • Install Laravel 9
  • Setup Database Credential
  • Create a Model & Migration File
  • Create New Factory File
  • Generate Fake Data Using Tinker

Install Laravel 9

First of all we need to create a fresh laravel project, download and install Laravel 9 using the below command

Configure Database

Now, lets create a MySQL database and connect it with laravel application. After creating database we need to set database credential in application’s .env file.

.env

Create Model & Migration

Now, we have to define table schema for posts table. Open terminal and let’s run the following command to generate a migration along with model file to create posts table in our database.

Once this command is executed you will find a migration file created under “database/migrations”. lets open migration file and put following code in it –

Next, go to app/Models/Post.php file and add the $fillable property in the Post model as following.

Now, run following command to migrate database schema.

After, the migration executed successfully the posts table will be created in database.

Create New Factory File

In this step, we will create a factory file. Run the following command to create factory class named PostFactory by using the following command:

Go to app/database/factories and open PostFactory.php and put the below code into your file.

Run the following command to auto load dependencies.

Generate Fake Data Using Tinker

Please use the following command to generate fake data using tinker:

Now, run following command to generate 100 rows of random Notes.

Laravel 9 Razorpay Payment Gateway Integration Tutorial with Example

In this Laravel 9 Razorpay Payment Gateway Integration Tutorial with Example tutorial, I’ll show you how to integrate Razorpay payment gateway in laravel 9. In this tutorial you will learn to integrate Razorpay in laravel 9. In this step by step tutorial I’ll share laravel 9 Razorpay integration example.

Razorpay Payment Gateway

Razorpay is one of the popular payment gateway, that allows us to accept payment from your customer. Razorpay is very simple, hassle free and easy to integrate payment gateway. Integrating Razorpay payment gateway in laravel 9 is a breeze.

Laravel 9 Razorpay Payment Gateway Integration Example

In this tutorial, you will learn to integrate Razorpay payment gateway in your laravel 9 application. Follow this step by step tutorial to learn Razorpay payment gateway integration in laravel 9.

  • Install Laravel 9
  • Connecting App to Database
  • Create Model & Migration
  • Make Routes
  • Create Controller & Methods
  • Create Blade View
  • Start Development Server
  • Run This App

Install Laravel 9

First of all we need to create a fresh laravel project, download and install Laravel 9 using the below command

Setup Database Credentials

Now, lets create a MySQL database and connect it with laravel application. After creating database we need to set database credential in application’s .env file.

Create Model & Migration

Now, we have to define table schema for payments table. Open terminal and let’s run the following command to generate a migration along with model file to create payments table in our database.

Once this command is executed you will find a migration file created under “database/migrations”. lets open migration file and put following code in it –

Now, run following command to migrate database schema.

After, the migration executed successfully the payments table will be created in database.

Create Routes

After this, we need to add following routes in “routes/web.php” file along with a resource route. Lets open “routes/web.php” file and add following route.

routes/web.php

Create Controller By Artisan Command

Now, lets create a controller for Razorpay Payments. Create a controller named RazorpayController using command given below –

Once the above command executed, it will create a controller file RazorpayController.php in app/Http/Controllers/ directory. Open the RazorpayController.php file and put the following code in it.

app/Http/Controllers/RazorpayController.php

Create Blade Views

In this step, we will create view/blade file razorpay payment processing. Lets create a blade file “razorpay.blade.php” in “resources/views/” directory and put the following code in it respectively.

resources/views/razorpay.blade.php

Get your secret key from razorpay payment gateway dashboard and put the key in script tag section like this => “key”: “rzp_test_ddgdfgdfgdg”,

Then visit resources/views and Create a new blade view file name thankyou.blade.php. Then put the following code into it:

Run Development Server

Now we are ready to run our example so lets start the development server using following artisan command –

Now, open the following URL in browser to see the output –

Laravel 9 Multiple Image Upload using jQuery Ajax Tutorial

In this Laravel 9 Multiple Image Upload using jQuery Ajax Tutorial, I’ll show you how to upload multiple image using jquery ajax with preview in laravel 9. In this laravel 9 multiple image upload example, I’ll show you how to validate upload image into folder and then save it into database. In this tutorial before saving image into database we will show preview of the images and then save it into directory. Before uploading the image we will display preview of the image. After successfully image upload into the database and folder we will display success message on the screen.

Laravel 9 Multiple Image Upload using jQuery Ajax Tutorial

In this step by step Laravel 9 Multiple Image Upload using jquery ajax tutorial I’ll demonstrate how to upload multiple image using jquery ajax in laravel 8 with preview. I’ll also show you how to upload multiple image in laravel 8 with preview. Please follow the steps given below:

  • Install Laravel 9
  • Database Configuration
  • Build Photo Model & Migration
  • Create Routes
  • Generate Controller using Artisan Command
  • Create Blade View
  • Start Development Server
  • Start App on Browser

Install Laravel 9

First of all we need to create a fresh laravel project, download and install Laravel 9 using the below command

Configure Database

Now, lets create a MySQL database and connect it with laravel application. After creating database we need to set database credential in application’s .env file.

.env

Create Model & Migration

Now, we have to define table schema for photos table. Open terminal and let’s run the following command to generate a migration along with model file to create photos table in our database.

Once this command is executed you will find a migration file created under “database/migrations”. lets open migration file and put following code in it –

Now, run following command to migrate database schema.

After, the migration executed successfully the photos table will be created in database.

Create Routes

After this, we need to add following routes in “routes/web.php” file along with a resource route. Lets open “routes/web.php” file and add following route.

routes/web.php

Create Controller By Artisan Command

Now, lets create a controller for simple image uploading. Create a controller named UploadMultipleImageController using command given below –

Once the above command executed, it will create a controller file UploadMultipleImageController.php in app/Http/Controllers/ directory. Open the UploadMultipleImageController.php file and put the following code in it.

app/Http/Controllers/UploadMultipleImageController.php

Create Blade View

In this step, we will create view/blade file to generate and display multiple Image Upload Form. Lets create a blade file “images-upload-form.blade.php” in “resources/views/” directory and put the following code in it respectively.

resources/views/images-upload-form.blade.php

Run Development Server

Now we are ready to run our example so lets start the development server using following artisan command –

Now, open the following URL in browser to see the output –

Laravel 9 Generator QR Code Tutorial with Example

Laravel 9 Generate QR Code Example

In this Laravel 9 Generator QR Code Tutorial with Example tutorial, we will learn to generate QR Code in laravel 9.  In this step by step tutorial I’ll show you how to generate qr codes with any text, size, color, background color, format like png, eps, svg. In this laravel 9 qr code example, we will be using simple-qrcode package to generate QR codes.The simple-qrcode package is used to generate qr code in your laravel application.

Laravel 9 simple qrcode package

The simple-qrcode package has many options for creating qr codes. You can also create qr code for geo, phone number, text message using simple qrcode package. The simple-qrcode package is very easy to install and use.

Generate QR Code In Laravel 9 Tutorial

In this step by step tutorial we generate qr codes using simple-qrcode package.

  • Install Laravel 9
  • Setup Database Credentials
  • Install simple-qrcode package
  • Define Route
  • Create Blade View
  • Start Development Server
  • Conclusion

Install Laravel 9

First of all we need to create a fresh laravel project, download and install Laravel 9 using the below command

Install Laravel 9 Simple qrcode Package

In this step, we will install simple-qrcode Package via the composer dependency manager. Use the following command to install simple-qrcode Package.

Register Package

After Installing simple-qrcode package, we need to add service provider and alias in config/app.php file as following.

config/app.php

How to use simple-qrcode Package In Laravel 9

Qr code with specified string can be generated as follows –

Syntax:-

Simple QR Code

Simple Qr code with specified string can be generated using generate() method. Add a simple-qr-code route to your routes/web.php file to return simple QR code as follows –

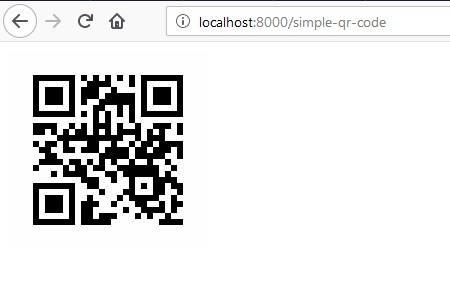
Here, size() function is used to specify the size of the QR Code. Visit (http://localhost:8000/simple-qr-code) to see the QR code. Scan the QR code and you will see the text. You can also display the QR code in Blade file as follows –

QR Code with Color

You can also set color for QR code pattern and the background using color(R, G, B) and backgroundColor(R, G, B) methods.

Add a color-qr-code route to your routes/web.php file to return colored QR code as follows –

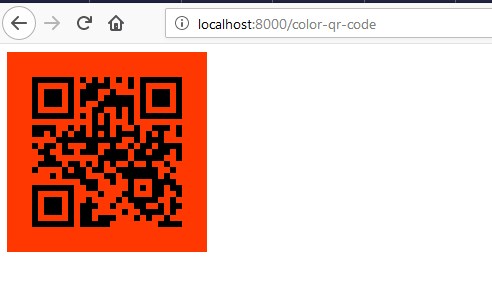
Visit (http://localhost:8000/color-qr-code) to see the colored QR code. Or you can simply display the colored QR code in Blade file as follows –

QR Code with Image

You can also place an image in QR code using the merge(“file_name.png”) method, this method only accept png files and you also need to format the response back to png.

Add a qr-code-with-image route to your routes/web.php file to return QR code with image as follows –

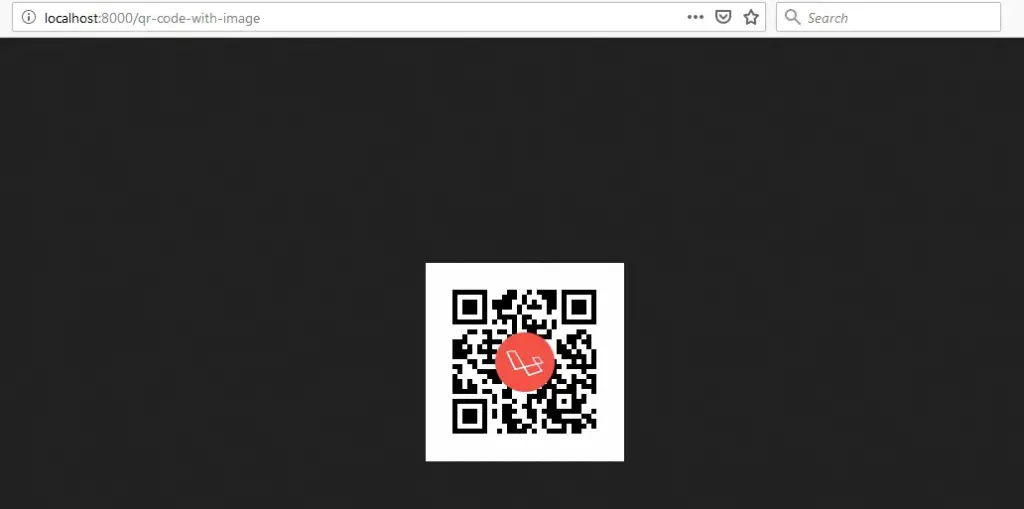
Visit (http://localhost:8000/qr-code-with-image) to see the QR code with Image merged. Or you can simply display the QR code with Image in Blade file using <img> tag as follows –

Email QR code

You can encode QR codes that automatically fill-in email address, subject and body of the email.

Syntax:-

Example:-

QR Code Phone Number

You can encode QR codes such that it automatically open up the phone dialer and dial the phone number.

Syntax:-

Example:-

QR Code Text Message

You can encode QR codes such that it automatically open up the phone messenger and fill-in phone number or the message body.

Syntax:-

Example:-

QR Code Geo co-ordinates

You can encode QR codes such that it automatically open up map application with the specified location.

Syntax:-

Example:-

Create Blade / View Files

In this step, we will create view/blade file to generate and display QR Codes. Lets create a blade file “index.blade.php” in “resources/views/qrcode/” directory and put the following code in it respectively.

resources/views/qrcode/index.blade.php

Create Routes

After this, we need to add following routes in “routes/web.php” file along with a resource route. Lets open “routes/web.php” file and add following route.

routes/web.php

Now we are ready to run our example so lets start the development server using following artisan command –

Now, open the following URL in browser to see the output –

Output:-

Laravel 8 Generate QR Code Example

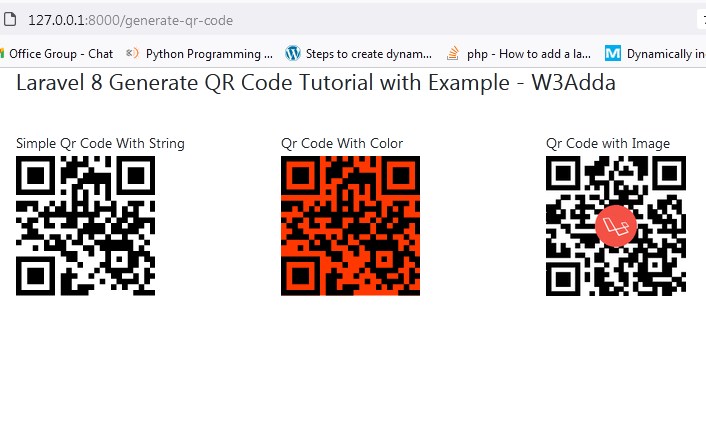
Laravel 9 Generate Simple QR Code

Below is an example of generating simple qr code in laravel 8 using simple qr code package. We have added following route in the web.php file to generate simple qr code in laravel.

Now, visit the following url in browser to view the simple qr code generated laravel.

Output:-

How to Generate QR Code In Laravel 9

Laravel 9 Generate QR Code With Background Color

Below is an example of generating qr code with background color in laravel 8 using simple qr code package. We have added following route in the web.php file to generate qr code with background color.

Now, visit the following url in browser to view the qr code with background color in laravel.

Output:-

Laravel 9 Generate QR Code with background color

Laravel 9 Generate QR Code With Image

Below is an example of generating qr code with image in laravel 8 using simple qr code package. We have added following route in the web.php file to generate qr code with image.

Now, visit the following url in browser to view the qr code with image generated in laravel.

Output:-

laravel-9-generate-qr-code-with-image

In this tutorial we have learned how to generate qr code in laravel 9. I have also shown you how to implement a laravel 9 qr code example.

Laravel 9 Autocomplete Search using Typeahead JS Tutorial

In this Laravel 9 Autocomplete Search using Typeahead JS Tutorial, I will show you how to create a dynamic database driven ajax jquery autocomplete using typeahead js in Laravel 9. In this tutorial we will create a dynamic search dropdown autocomplete which will fetch options from database table using bootstrap typeahead js.

Laravel jQuery Typeahead JS

The Typeahead JS is a jquery plugin, it is used to create dynamic autocomplete input with several options. In this example you will learn how to implement typeahead autocomplete in laravel 9.

Laravel 9 Autocomplete Search using Typeahead JS Tutorial

In this step by step tutorial I will demonstrate how to create a dynamic database driven ajax jquery autocomplete using typeahead js in Laravel 9. Please follow the instruction given below:

  • Install Laravel 9
  • Connecting App to Database
  • Generate Fake Records
  • Add Routes
  • Create Controller & Methods
  • Create Blade View
  • Start Development Server
  • Test This App

Install Laravel 9

First of all we need to create a fresh laravel project, download and install Laravel using the below command

Connecting App to Database

Now, lets create a MySQL database and connect it with laravel application. After creating database we need to set database credential in application’s .env file.

Generate Fake Records

In this step we will insert dummy data into database

Now we will add fake records in our database. use the below command and add 100 fake records in database :

Add Routes

After this, we need to define routes in “routes/web.php” file. Lets open “routes/web.php” file and add the following routes in it.

routes/web.php

Create Controller & Methods

Now, lets create a controller named AutoCompleteController using command given below –

After successfully create controller go to app/controllers/AutoCompleteController.php and put the below code :

Create Blade View

In this step we need to create blade view file. Go to app/resources/views and create one file name search.blade.php . After create blade file put the below html code here with jquery ui and css library file :

Start Development Server

Now we are ready to run our example so lets start the development server using following artisan command –

Now, open the following URL in browser to see the output –

Laravel 9 CKeditor Image Upload Tutorial Example

In this Laravel 9 CKeditor Image Upload Tutorial I will show you how to install and use CKeditor with image upload in laravel 9. In this tutorial, you will learn to install CKeditor with image upload in laravel 9. In this step by step guide you how to integrate CKeditor editor with image upload in laravel 9. Integration of CKeditor editor in laravel form is simple process. I will also show you how to integrate or enable image upload in CKeditor editor.

While creating forms we come to situation where we may text editor field so that we can insert and save html and other text into database. The CKeditor editor is feature rich wysiwyg html editor allows us to integrate text editor fields in html form.

Laravel 9 CKeditor Image Upload Tutorial Example

In this laravel 9 CKeditor with image upload integration example I will guide you through step by step to install and use CKeditor editor with image upload in laravel 9 application. Please follow the instruction given below:

  • Install Laravel 9
  • Install CKEditor Package in Laravel
  • Register CKEditor package in Laravel
  • Publish the Ckeditor package by command
  • Add Route
  • Create Controller Using Artisan Command
  • Create Blade View
  • upload and Insert Image in laravel using CKEditor

Install Laravel 9

First of all we need to create a fresh laravel project, download and install Laravel 9 using the below command

Install CKEditor In Laravel

In this step, we will install CKEditor Package via the composer dependency manager. Use the following command to install CKEditor Package.

Register CKEditor package in Laravel

Now, we will register the package in laravel. Go to config/app.php and put the following line to the providers array.

Publish the Ckeditor package by command

Now run following command to copy some of the files and folders from ‘vendor\unisharp\laravel-ckeditor’ to ‘public\vendor\unisharp\laravel-ckeditor’.

Add Route

After this, we need to define routes in “routes/web.php” file. Lets open “routes/web.php” file and add the following routes in it.

routes/web.php

Create Controller Using Artisan Command

Now, lets create a controller named CkeditorController using command given below –

After successfully run the above command and create a controller file. Next open your controller and put the below code into your file.

Create Blade View

Now we go resource/views and create a file name ckeditor.blade.php. After this we will create a blade file now put the following code in it:


Upload and Insert Image in laravel using CKEditor

Now we have to enable image upload option in ckeditor as following:

Now we will create a route for upload the image in laravel using CKEditor. Open route/web.php file and add the following route into it:

Next, open your terminal and run the below command:

Next, we will put the below method in our controller. This method will store the image or files in the server and return the image URL.

Laravel 9 Import Export Excel & CSV File

In this Laravel 9 Import Export Excel & CSV File tutorial, I’ll show you how to import and export excel/csv file into and from database in laravel 9 using maatwebsite version 3 package with example. I’ll guide you through step by step with example of importing and exporting a csv or excel file using maatwebsite/excel version 3 composer package.

Laravel 9 Import Export Excel & CSV File

When we are developing laravel applications, there may situations where we require to import or export large amount of data into and from the application database. Importing and exporting data through excel or csv files seems a good solution here.

In laravel, maatwebsite/excel composer package made it easy to import or export excel or csv files. The maatwebsite/excel is a composer package used to import and export excel or csv files. The maatwebsite/excel provide number of features for excel or csv file import and exort in laravel.

Import and Export CSV and Excel File in Laravel 9

In this step by step Laravel 9 Import Export Excel & CSV File example I’ll demonstrate the import and export of csv file in laravel 9. Please follow the steps given below:

  • Install Laravel 9
  • Database Configuration
  • Install maatwebsite/excel Package
  • Configure maatwebsite/excel
  • Create Routes
  • Compose Import Export Class
  • Create ExcelCSV Controller By Artisan Command
  • Create Import Export Form
  • Run Development Server

Install Laravel 9

First of all we need to create a fresh laravel project, download and install Laravel 9 using the below command

Configure Database In .env file

Now, lets create a MySQL database and connect it with laravel application. After creating database we need to set database credential in application’s .env file.

.env

Install maatwebsite/excel Package

In this step we will install maatwebsite/excel Package. Use the following compose command to install maatwebsite/excel Package:

Configure Maatwebsite Package

After Installing Maatwebsite package, we need to add service provider and alias in config/app.php file as following.

config/app.php

Now, use following command to publish Maatwesite Package configuration file:

Create Routes

After this, we need to add following routes in “routes/web.php” file along with a resource route. Lets open “routes/web.php” file and add following route.

routes/web.php

Compose Import Export Class

Now, we need to create import and export excel csv class using the following commands:

Import class:-

Now, we have to update the UsersImport.php class file located at app/Imports directory. Let’s open UsersImport.php file and put the following code in it:

export class:-

Now, we have to update UsersExport.php class file located at app/Exports directory. Let’s open UsersExport.php file and put the following code in it:

Create Import Excel Controller

Next, we have to create a controller to display a form to upload excel file records. Lets Create a controller named ExcelCSVController using command given below –

Once the above command executed, it will create a controller file ExcelCSVController.php in app/Http/Controllers/ directory. Open the ExcelCSVController.php file and put the following code in it.

app/Http/Controllers/ExcelCSVController.php

Create Blade / View Files

In this step, we will create view/blade file to import export excel and csv file. Lets create a blade file “excel-csv-import.blade.php” in “resources/views/” directory and put the following code in it respectively.

resources/views/excel-csv-import.blade.php

Run Development Server

Now we are ready to run our example so lets start the development server using following artisan command –

Now, open the following URL in browser to see the output –

Laravel 9 Image Crop & Upload using jQuery and Ajax Example

In this Laravel 9 Image Crop & Upload using jQuery and Ajax Example tutorial I’ll show you how to upload and crop image using jquery ajax in laravel 9. In this tutorial you will learn to upload and crop image before upload using jquery ajax in laravel 9. In this step by step guide I will demonstrate you to upload and crop image in laravel 9 using jquery ajax.

Laravel 9 Image Crop & Upload using jQuery and Ajax Example

In this step by step tutorial I will demonstrate you how to upload and crop image using jQuery in laravel 9. Please follow the instruction given below:

  • Install Laravel 9
  • Connecting App to Database
  • Create Crop Image Migration & Model
  • Add Routes For Crop Image Upload
  • Create Crop Image Controller Using Command
  • Create Crop Image Upload Blade View
  • Make Upload Folder
  • Run Development Server
  • Test This App

Install Laravel 8 App

First of all we need to create a fresh laravel project, download and install Laravel using the below command

Connecting App to Database

Now, lets create a MySQL database and connect it with laravel application. After creating database we need to set database credential in application’s .env file.

Create Crop Image Migration & Model

Now, in this step we will create model and migration file. Please run the following command:

Now, go to database/migrations folder and open create_images_table.php. Then put the following code into create_images_table.php:

Now run the following command to migrate the table into your select database:

Add Routes For Crop Image Upload

After this, we need to define routes in “routes/web.php” file. Lets open “routes/web.php” file and add the following routes in it.

routes/web.php

Create Crop Image Controller Using Command

Now, lets create a controller named CropImageUploadController using command given below –

Now go to app/http/controllers/ folder and open CropImageUploadController.php. Then put the following file uploading methods into your CropImageUploadController.php file:

Create Crop Image Upload Blade View

In this step, create a blade view file named image-crop.blade.php. Go to /resources/views and create one file name image-crop.blade.php. Then put the following code into your image-crop.blade.php file:

Make Upload Folder

Now, create one folder name upload inside public directory.

Run Development Server

Now we are ready to run our example so lets start the development server using following artisan command –


Now, open the following URL in browser to see the output –

Laravel 9 Stripe Payment Gateway Integration Example

In this Laravel 9 stripe payment gateway integration example tutorial, I’ll show you how to integrate stripe payment gateway in laravel 9. In this tutorial you will learn to integrate stripe in laravel 9. In this step by step tutorial I’ll share laravel 9 stripe integration example.

Stripe Payment Gateway

Stripe is one of the most popular payment gateway, that allows us to accept payment worldwide. Stripe is very simple, hassle free and easy to integrate payment gateway. Integrating stripe payment gateway with laravel is a breeze. After integrating stripe in laravel you will be able to collect payment via simple payment form which allow customer to provide card information like card number, expiry date and a CVC code.

Laravel 9 Stripe Payment Gateway Integration Example

In this tutorial, you will learn to integrate stripe payment gateway in your laravel 9. Follow this step by step tutorial to learn stripe payment gateway integration in laravel 9.

  • Install Laravel 9
  • Install stripe Package
  • Stripe Configuration
  • Make Route
  • Create Controller
  • Create Blade View file
  • Run Development Server

Install Laravel 9

First of all we need to create a fresh laravel project, download and install Laravel 9 using the below command

Make sure you have composer installed.

Setup Database Credentials

Now, lets create a MySQL database and connect it with laravel application. After creating database we need to set database credential in application’s .env file.

Install Stripe package

Now, we need to install stripe-php package in our project. Open your terminal and switch to project directory and use the following composer command to install stripe-php package.

Stripe Configuration

Create Stripe account and generate key and secret key. Go to the official Stripe website and signup with basic details. Now, we need to set stripe key and secret key in our project’s .env file. In stripe dashboard switch to the test mode and get the stripe key and secret. Now, open .env file located in project’s root folder and set the stripe key and secret as following –

.env file

You will also need to set up the Stripe API key, Let’s open or create the config/services.php file, and add or update the 'stripe' array as following:

Create Route

After this, we need to add following two routes in “routes/web.php” to display barcode. Lets open “routes/web.php” file and add following route.

routes/web.php

Create Controller and Methods

Now, lets create a payment controller using following command

Once the above command executed, it will create a controller file StripeController.php in app/Http/Controllers/ directory. Open the StripeController.php file and put the following code in it.

Controllers/StripeController.php

Create View/Blade File

In this step, we will create view/blade file to accept stripe payment. Lets create astripe.blade.php” file in “resources/views/” directory and put the following code in it.

resources/views/stripe.blade.php

Start Development Server

Now we are ready to run our example so lets start the development server using following artisan command –

Now, open the following URL in browser to see the output –

Laravel 9 Instamojo Payment Gateway Integration Example

In this Laravel 9 Instamojo Payment Gateway Integration Example tutorial I will show you How to Integrate Instamojo Payment Gateway in Laravel 9. In this tutorial, we will learn how to integrate the instamojo payment gateway in php laravel 9 application via the instamojo PHP package.

Instamojo Payment Gateway

Instamojo is one of the popular payment gateway, that allows us to accept payment from your customer. Instamojo is very simple, hassle free and easy to integrate payment gateway.  Instamojo processes refund payments, collect a payment, create payment are very easy and simple.

Laravel 9 Instamojo Payment Gateway Integration Example

In this step by step tutorial I will demonstrate you to integrate instamojo payment gateway in the laravel 9 application without using curl APIs. We will simply install instamojo PHP package and integrate into our lastest laravel based application.

  • Install Laravel 9
  • Connecting App to Database
  • Install Instamojo PHP package
  • Configure Instamojo Package
  • Make Model and Migration
  • Create Controller
  • Make Routes
  • Create Blade View file
  • Start Development Server

Install Laravel 9

First of all we need to create a fresh laravel project, download and install Laravel 9 using the below command

Connecting App to Database

Now, lets create a MySQL database and connect it with laravel application. After creating database we need to set database credential in application’s .env file.

Install Instamojo PHP package

In this step, we will install Instamojo PHP package via the composer dependency manager. Use the following command to install Instamojo PHP package.

Configure Instamojo Package

Now, we will put following configuration detail in .env file:

Next, Go to the app/config/services.php and put the below code here.

Make Model & Migration

Now, in this step we will create model and migration file. Please run the following command:

Once above command is executed there will be a migration file created inside database/migrations/ directory, just open migration file and update the function up() method as following:

Now, in this step we will create model and migration file. Please run the following command:

Create Controller

Now, lets create a controller named PayController using command given below –

Go to app/Http/Controller/PayController.php and put the below code :

Make Routes

After this, we need to define routes in “routes/web.php” file. Lets open “routes/web.php” file and add the following routes in it.

routes/web.php

Create Blade View file

In this step we will create blade file. Go to resources/views directory and create blade view file name event.blade.php. Then put the following code into event.blade.php:

Start Development Server

Now we are ready to run our example so lets start the development server using following artisan command –

Now, open the following URL in browser to see the output –

Laravel 9 Restrict User Access From IP Address

In this Laravel 9 Restrict User Access From IP Address tutorial, I’ll show you how to restrict an IP address from accessing the website using middleware in laravel 9. In this tutorial you will learn to restrict user to access website using IP Address in laravel 9. You will also learn to create custom middleware. With this you will be able to restrict user with specified IP address from accessing the website, In this example we will be creating a middleware to restrict user with IP Address in laravel 9.

Laravel 9 Restrict User Access From IP Address

In this step by step tutorial I will demonstrate you how to restrict from accessing website with IP address. Please follow instruction given below:

  • Install Laravel 9
  • Connecting App to Database
  • Create a Middleware
  • Register the Middleware

Install Laravel 9

First of all we need to create a fresh laravel project, download and install Laravel 9 using the below command

Connecting App to Database

Now, lets create a MySQL database and connect it with laravel application. After creating database we need to set database credential in application’s .env file.

Create a Middleware

Next step, Run the following artisan command to create a middleware named class BlockIpMiddleware:

Now, Go to app/Http/Middleware folder and open BlockIpMiddleware.php file. Then put the following code in BlockIpMiddleware.php file:

Register the Middleware

Now, we need to register the middleware, so go to app/Http/ and open Kernel.php file. And register middleware as follow:

Laravel 9 Dynamic Dependent Dropdown Using jQuery Ajax

In this Laravel 9 Dynamic Dependent Dropdown Using jQuery Ajax tutorial I’ll show you how to implement dependent categories and subcategories dropdown in laravel 9 using jQuery ajax. In this tutorial you will learn to create categories and subcategories dropdown using jquery ajax in laravel 9. In this article I will share example to create Dynamic Dependent Dropdown Using jQuery Ajax In Laravel 9. We will be creating an example of categories and subcategories dropdown using jquery ajax in laravel 9.

Laravel 9 Dynamic Dependent Dropdown Using jQuery Ajax

In this step by step tutorial I will demonstrate you creating a Dynamic Dependent Dropdown using jquery ajax in laravel 9. Please follow the instruction given below:

  • Install Laravel 9
  • Connecting App to Database
  • Create Model and Migration
  • Add Routes
  • Create Controllers By Artisan
  • Create Blade Views
  • Run Development Server
  • Test This App

Install Laravel 8 App

First of all we need to create a fresh laravel project, download and install Laravel 9 using the below command

Connecting App to Database

Now, lets create a MySQL database and connect it with laravel application. After creating database we need to set database credential in application’s .env file.

Create Modal and Migration

Now, in this step we will create model and migration file. Please run the following command:

Now go to database/migrations/ and open create_categorys_table.php file. Then put  the following code into this file:

Now, run the migration to create database table using following artisan command:

Now, open Category.php model file and put the following code into it:

Add Routes

After this, we need to define routes in “routes/web.php” file. Lets open “routes/web.php” file and add the following routes in it.

routes/web.php

Create Controllers by Artisan

Now, lets create a controller named CategoryController using command given below –

Go to app/http/controller and open CategoryController.php.Then put the following code into your controller file:

Create Blade Views

In this step we will create ablade view file. Go to resources/views folder and create the blade view as following.

category.blade.php

Run Development Server

Now we are ready to run our example so lets start the development server using following artisan command –

Now, open the following URL in browser to see the output –