Struts 2 Configuration File
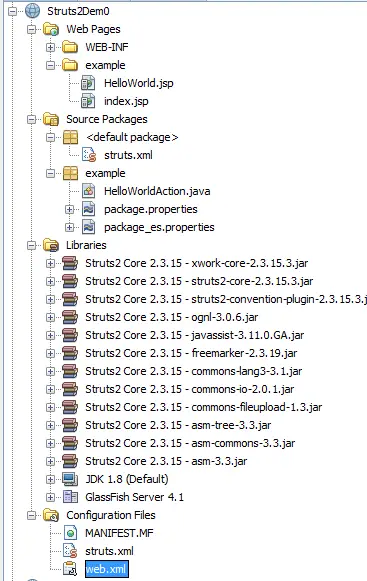
Struts2 Application contains some configuration files such as web.xml, struts.xml, strutsconfig.xml and struts.properties. Out of these files we can start working with web.xml and struts.xml files.Let’s understand about these files.
web.xml: This configuration file is from J2EE configuration file which is used to determines how elements of the HTTP will be processed by the container. This file is the standard deployment descriptor for the Web Application. It declares the filters and servlets used by the service. Below is the file example of web.xml, which we have used in our struts2 example.
|
1 2 3 4 5 6 7 8 9 10 11 12 13 14 15 16 17 18 19 |
<?xml version="1.0" encoding="UTF-8"?> <web-app version="3.1" xmlns="http://xmlns.jcp.org/xml/ns/javaee" xmlns:xsi="http://www.w3.org/2001/XMLSchema-instance" xsi:schemaLocation="http://xmlns.jcp.org/xml/ns/javaee http://xmlns.jcp.org/xml/ns/javaee/web-app_3_1.xsd"> <filter> <filter-name>struts2</filter-name> <filter-class>org.apache.struts2.dispatcher.FilterDispatcher</filter-class> </filter> <filter-mapping> <filter-name>struts2</filter-name> <url-pattern>/*</url-pattern> </filter-mapping> <session-config> <session-timeout> 30 </session-timeout> </session-config> <welcome-file-list> <welcome-file>example/index.jsp</welcome-file> </welcome-file-list> </web-app> |
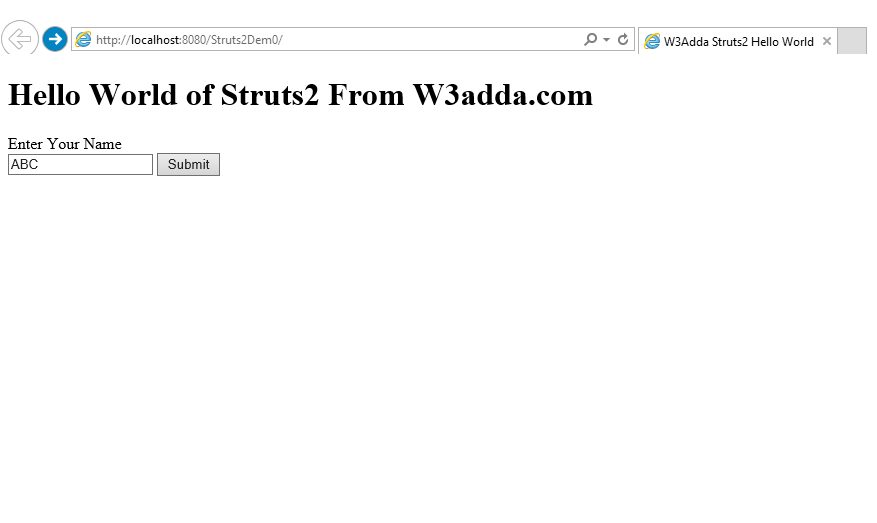
From here you can also define that which will be your welcome file.
struts.xml
This is core configuration file for the framework which can initialize its own resources such as interceptors, Action classes, Results that can prepare views etc. Below is the example of struts2.xml file.
|
1 2 3 4 5 6 7 8 9 10 11 12 13 14 15 |
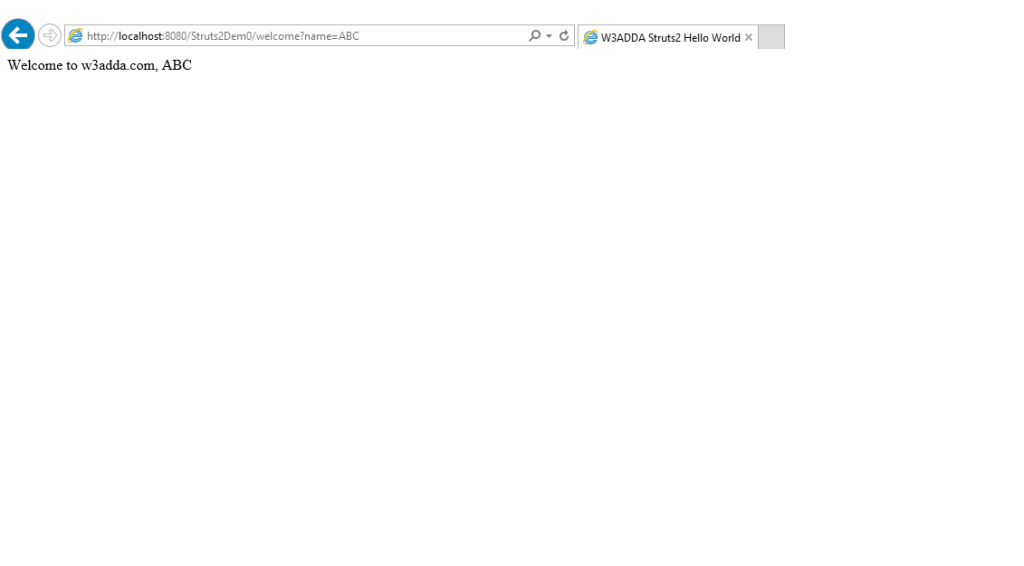
<!DOCTYPE struts PUBLIC "-//Apache Software Foundation//DTD Struts Configuration 2.0//EN" "http://struts.apache.org/dtds/struts-2.0.dtd"> <struts> <constant name = "struts.devMode" value = "true" /> <package name = "example" extends = "struts-default"> <action name = "welcome" class = "example.HelloWorldAction" method = "execute"> <result name = "success">/example/HelloWorld.jsp</result> </action> </package> </struts> |
Description: Let’s understand this file,
1. DOCTYPE : All struts configuration file needs to have correct doctype as shown in above code i.e. “DOCTYPE struts PUBLIC”.
2.<struts>: This is the root tag element in which we can declare different packages using “<package>” tag.
3.<constant>: This tag is used for overrides any of the following properties defined in default.properties, as like I did
<constant name = “struts.devMode” value = “true” />.
4.<package>: This tag specifies a module. This tag is very useful when large project divided into different modules. There are some important attributes of package tag, let’s understand them
Attribute & Description:
a) name: required field for this tag, This is unique identifier for the package.
- b) extends: By default we extends “struts-default”, extends keyword defines that which package does this package extend from.
- c) namespace: This attribute is an optional attribute of package. If there is no namespace is declare so by default it takes “/”.
- d) <action>: The action element is sub-element of Package. There some attributes defined in the action elements.
- name: This is required attributes for defining name of the action.
- class: This is an optional attribute of action tag. Here you can define your action class.
- method: This is also an optional attribute of action tag. If you don’t define any method so by default it takes execute
- <result>: This is sub-element of action tag, there are also some attributes are used in this element which are listed below.
- name: This is an optional attribute of result tag. If you are not using this attribute so by default it takes “success”.
- type: this is also an optional attribute of result tag. If not using this so dispatcher uses default result type.