<!DOCTYPE html>
<html>
<head>
<meta charset="UTF-8">
<meta name="viewport" content="width=device-width, initial-scale=1.0">
<meta http-equiv="X-UA-Compatible" content="ie=edge">
<meta name="csrf-token" content="{{ csrf_token() }}">
<title>Laravel 5.8 Ajax CRUD Application - W3Adda.com</title>
<link rel="stylesheet" href="https://cdnjs.cloudflare.com/ajax/libs/twitter-bootstrap/4.1.3/css/bootstrap.min.css" />
<script src="https://code.jquery.com/jquery-3.3.1.min.js"></script>
<script src="https://cdnjs.cloudflare.com/ajax/libs/jquery-validate/1.19.0/jquery.validate.js"></script>
<script src="https://cdnjs.cloudflare.com/ajax/libs/popper.js/1.14.3/umd/popper.min.js"></script>
<script src="https://stackpath.bootstrapcdn.com/bootstrap/4.1.3/js/bootstrap.min.js"></script>
<style>
.container{
padding: 0.5%;
}
</style>
</head>
<body>
<div class="container">
<h2 style="margin-top: 12px;" class="alert alert-success">Laravel 5.8 Ajax CRUD Application - W3Adda.com</h2><br>
<div class="row">
<div class="col-12">
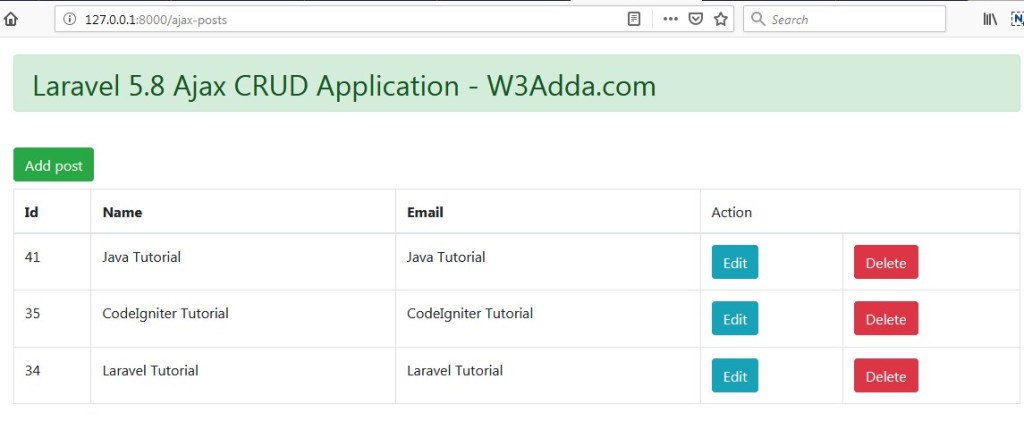
<a href="javascript:void(0)" class="btn btn-success mb-2" id="create-new-post">Add post</a>
<table class="table table-bordered" id="laravel_crud">
<thead>
<tr>
<th>Id</th>
<th>Name</th>
<th>Email</th>
<td colspan="2">Action</td>
</tr>
</thead>
<tbody id="posts-crud">
@foreach($posts as $post)
<tr id="post_id_{{ $post->id }}">
<td>{{ $post->id }}</td>
<td>{{ $post->title }}</td>
<td>{{ $post->body }}</td>
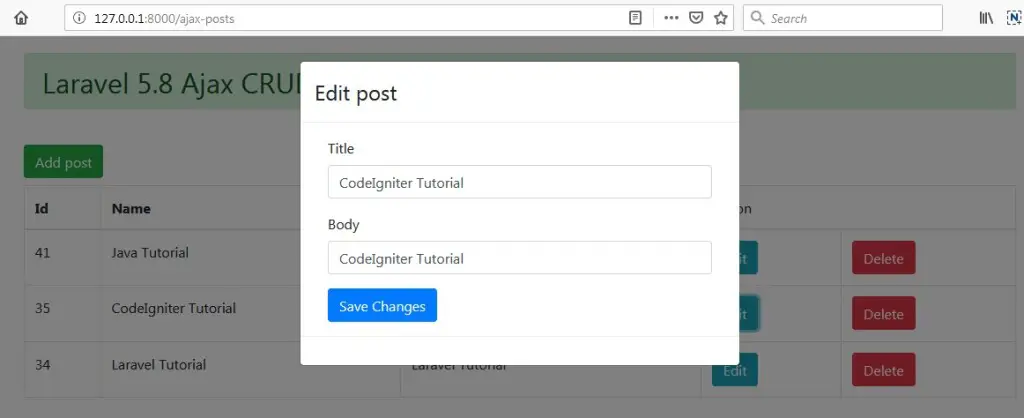
<td><a href="javascript:void(0)" id="edit-post" data-id="{{ $post->id }}" class="btn btn-info">Edit</a></td>
<td>
<a href="javascript:void(0)" id="delete-post" data-id="{{ $post->id }}" class="btn btn-danger delete-post">Delete</a></td>
</tr>
@endforeach
</tbody>
</table>
{{ $posts->links() }}
</div>
</div>
</div>
<div class="modal fade" id="ajax-crud-modal" aria-hidden="true">
<div class="modal-dialog">
<div class="modal-content">
<div class="modal-header">
<h4 class="modal-title" id="postCrudModal"></h4>
</div>
<div class="modal-body">
<form id="postForm" name="postForm" class="form-horizontal">
<input type="hidden" name="post_id" id="post_id">
<div class="form-group">
<label for="name" class="col-sm-2 control-label">Title</label>
<div class="col-sm-12">
<input type="text" class="form-control" id="title" name="title" value="" required="">
</div>
</div>
<div class="form-group">
<label class="col-sm-2 control-label">Body</label>
<div class="col-sm-12">
<input class="form-control" id="body" name="body" value="" required="">
</div>
</div>
<div class="col-sm-offset-2 col-sm-10">
<button type="submit" class="btn btn-primary" id="btn-save" value="create">Save
</button>
</div>
</form>
</div>
<div class="modal-footer">
</div>
</div>
</div>
</div>
</body>
</html>
<script>
$(document).ready(function () {
$.ajaxSetup({
headers: {
'X-CSRF-TOKEN': $('meta[name="csrf-token"]').attr('content')
}
});
$('#create-new-post').click(function () {
$('#btn-save').val("create-post");
$('#postForm').trigger("reset");
$('#postCrudModal').html("Add New post");
$('#ajax-crud-modal').modal('show');
});
$('body').on('click', '#edit-post', function () {
var post_id = $(this).data('id');
$.get('ajax-posts/'+post_id+'/edit', function (data) {
$('#postCrudModal').html("Edit post");
$('#btn-save').val("edit-post");
$('#ajax-crud-modal').modal('show');
$('#post_id').val(data.id);
$('#title').val(data.title);
$('#body').val(data.body);
})
});
$('body').on('click', '.delete-post', function () {
var post_id = $(this).data("id");
confirm("Are You sure want to delete !");
$.ajax({
type: "DELETE",
url: "{{ url('ajax-posts')}}"+'/'+post_id,
success: function (data) {
$("#post_id_" + post_id).remove();
},
error: function (data) {
console.log('Error:', data);
}
});
});
});
if ($("#postForm").length > 0) {
$("#postForm").validate({
submitHandler: function(form) {
var actionType = $('#btn-save').val();
$('#btn-save').html('Sending..');
$.ajax({
data: $('#postForm').serialize(),
url: "{{ route('ajax-posts.store') }}",
type: "POST",
dataType: 'json',
success: function (data) {
var post = '<tr id="post_id_' + data.id + '"><td>' + data.id + '</td><td>' + data.title + '</td><td>' + data.body + '</td>';
post += '<td><a href="javascript:void(0)" id="edit-post" data-id="' + data.id + '" class="btn btn-info">Edit</a></td>';
post += '<td><a href="javascript:void(0)" id="delete-post" data-id="' + data.id + '" class="btn btn-danger delete-post">Delete</a></td></tr>';
if (actionType == "create-post") {
$('#posts-crud').prepend(post);
} else {
$("#post_id_" + data.id).replaceWith(post);
}
$('#postForm').trigger("reset");
$('#ajax-crud-modal').modal('hide');
$('#btn-save').html('Save Changes');
},
error: function (data) {
console.log('Error:', data);
$('#btn-save').html('Save Changes');
}
});
}
})
}
</script>


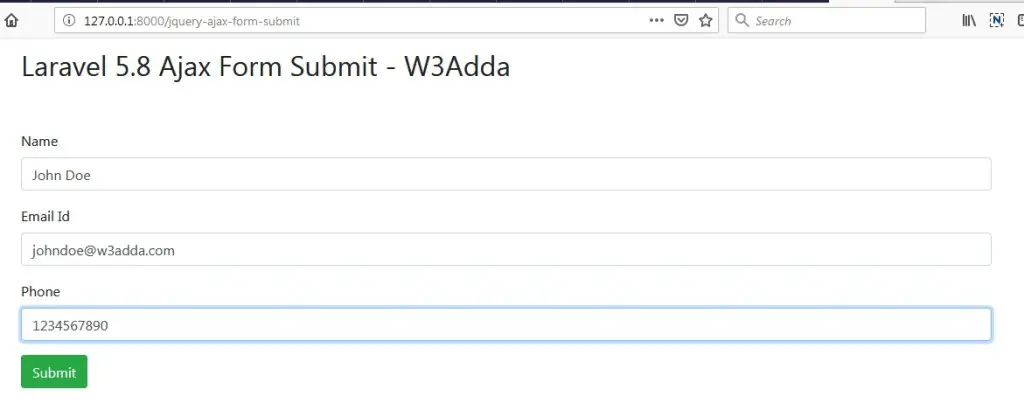


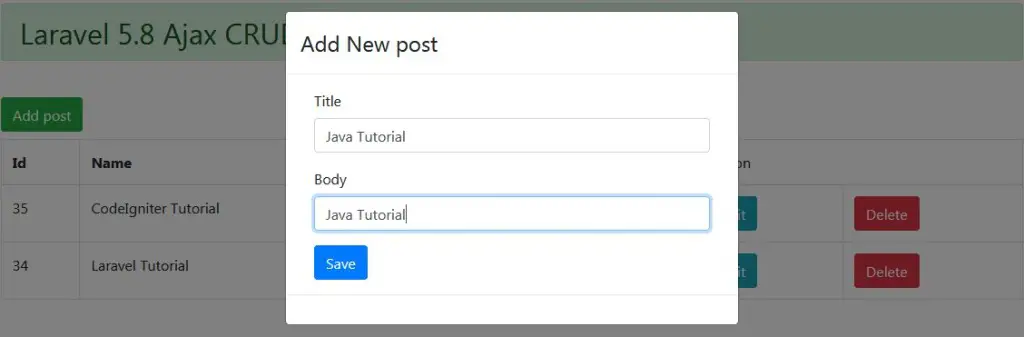
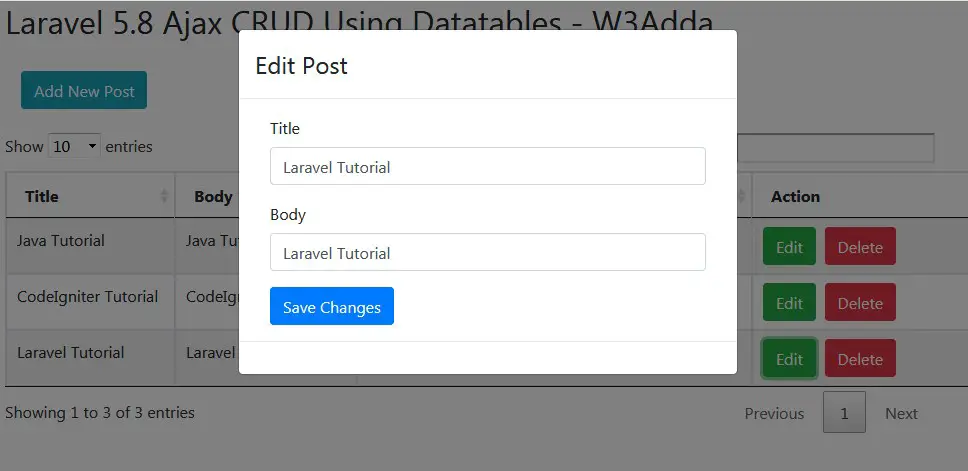
 Click “Add New Post” to submit new post.
 Click “Edit” button to edit corresponding post.