Laravel 5.8 Multiple Authentication Using Custom Guard
In this Laravel multi (auth) authentication tutorial we will learn how to create separate admin panel or login using custom guard. Laravel multi (auth) authentication system allows to create multiple users login in single application.
While developing a laravel application there comes situations where we want create separate user login or separate user/admin panel for users having different privileges or access rights in same application. In laravel this can be achieved in following ways –
1. Laravel multi (auth) authentication using middleware
2. Laravel multi (auth) authentication Using Guards
In one of my previous article we have created separate admin login using laravel multi (auth) authentication using MIddleware In this article we will creating separate admin login using laravel multi (auth) authentication system with guard.
Install Laravel 5.8
First of all we need to create a fresh laravel project, download and install Laravel 5.8 using the below command
|
1 |
composer create-project --prefer-dist laravel/laravel laraMultiAuth |
Configure Database In .env file
Now, lets create a MySQL database and connect it with laravel application. After creating database we need to set database credential in application’s .env file.
|
1 2 3 4 5 6 |
DB_CONNECTION=mysql DB_HOST=127.0.0.1 DB_PORT=3306 DB_DATABASE=laramultiauth DB_USERNAME=root DB_PASSWORD= |
Create User Authentication Scaffolding
Laravel comes with in-built user authentication system, use the below command to generate default authentication scaffolding for user –
|
1 |
php artisan make:auth |
This command will generate required authentication Controller files, views and add routes in our web.php routes file that are required for user authentication system.
Creat Admin Migration
Now, we have to define table schema for admins table. Open terminal and use the following artisan command to generate <timestamp>create_admins_table.php migration.
|
1 |
php artisan make:migration create_admins_table |
Once this command is executed you will find a migration file created under “database/migrations”. Open migration file created (<timestamp>create_admins_table.php) and modify up method as following –
|
1 2 3 4 5 6 7 8 9 10 11 |
public function up() { Schema::create('admins', function (Blueprint $table) { $table->bigIncrements('id'); $table->string('name'); $table->string('email')->unique(); $table->string('password'); $table->rememberToken(); $table->timestamps(); }); } |
Run Migration
Now, run following command to migrate database schema.
|
1 |
php artisan migrate |
After, the migration executed successfully the admins table will be created in database along with migrations, password_resets and users table.
Create Admin Model
Next we need to create a Admin model class. To make the model for the admins, run the following command:
|
1 |
php artisan make:model Admin |
Again our Admin model is really simple for now, this model will be like the user model and extends the Authenticable class. Open Admin model in app/Admin.php and add the following:
app/Admin.php
|
1 2 3 4 5 6 7 8 9 10 11 12 13 14 15 16 17 18 19 20 21 22 23 24 25 26 27 28 29 30 31 |
<?php namespace App; use Illuminate\Notifications\Notifiable; use Illuminate\Foundation\Auth\User as Authenticatable; class Admin extends Authenticatable { use Notifiable; protected $guard = "admin"; /** * The attributes that are mass assignable. * * @var array */ protected $fillable = [ 'name', 'email', 'password', ]; /** * The attributes that should be hidden for arrays. * * @var array */ protected $hidden = [ 'password', 'remember_token', ]; } |
A typical model in laravel extends eloquent model but as we will be using this model for authentication so we will extend it with authenticatable class which is an alias of User class used for laravel authentication. We are also using notifiable trait which is used for password reset notification.
Add admin guard
Next we need to add a new guard for admin. Laravel guards are used for authentication which manages multiple authenticated instances from multiple tables. Open config/auth.php file and add a Add admin guard in guards array as following:
|
1 2 3 4 5 6 7 8 9 10 11 12 13 14 15 16 17 18 |
'guards' => [ 'web' => [ 'driver' => 'session', 'provider' => 'users', ], 'api' => [ 'driver' => 'token', 'provider' => 'users', 'hash' => false, ], 'admin' => [ 'driver'=>'session', 'provider' => 'admins' ] ], |
Now we need to add a provider for admins in providers array as following:
|
1 2 3 4 5 6 7 8 9 10 11 12 13 14 15 16 17 |
'providers' => [ 'users' => [ 'driver' => 'eloquent', 'model' => App\User::class, ], 'admins' => [ 'driver' => 'eloquent', 'model' => App\Admin::class ] // 'users' => [ // 'driver' => 'database', // 'table' => 'users', // ], ], |
Add Auth routes for Admin
Next, we need to create the route for admin authentication. Open the routes/web.php file and add the following code in it.
|
1 2 3 4 5 6 7 8 |
Route::namespace("Admin")->prefix('admin')->group(function(){ Route::get('/', 'HomeController@index')->name('admin.home'); Route::namespace('Auth')->group(function(){ Route::get('/login', 'LoginController@showLoginForm')->name('admin.login'); Route::post('/login', 'LoginController@login'); Route::post('logout', 'LoginController@logout')->name('admin.logout'); }); }); |
Create Auth Controller for Admin
Now, we will create admin login and home/dashboard controller files. For simplicity we’ll copy user auth login controller file:
|
1 |
app/Http/Controllers/Auth/LoginController.php |
into app/Http/Controllers/Admin/Auth and fix the class namespaces and update Admin LoginController as following:
|
1 2 3 4 5 6 7 8 9 10 11 12 13 14 15 16 17 18 19 20 21 22 23 24 25 26 27 28 29 30 31 32 33 34 35 36 37 38 39 40 41 42 43 44 45 46 47 48 49 50 51 52 53 54 55 56 57 58 59 60 61 62 63 64 65 66 67 68 69 70 71 |
<?php namespace App\Http\Controllers\Admin\Auth; use App\Http\Controllers\Controller; use Illuminate\Foundation\Auth\AuthenticatesUsers; use Illuminate\Http\Request; use Illuminate\Support\Facades\Auth; class LoginController extends Controller { /* |-------------------------------------------------------------------------- | Login Controller |-------------------------------------------------------------------------- | | This controller handles authenticating users for the application and | redirecting them to your home screen. The controller uses a trait | to conveniently provide its functionality to your applications. | */ use AuthenticatesUsers; /** * Where to redirect users after login. * * @var string */ protected $redirectTo = '/admin'; /** * Create a new controller instance. * * @return void */ public function __construct() { $this->middleware('guest:admin')->except('logout'); } public function showLoginForm(){ return view('admin.auth.login'); } /** * Log the user out of the application. * * @param \Illuminate\Http\Request $request * @return \Illuminate\Http\Response */ public function logout(Request $request) { $this->guard()->logout(); $request->session()->invalidate(); return redirect()->route('admin.login'); } /** * Get the guard to be used during authentication. * * @return \Illuminate\Contracts\Auth\StatefulGuard */ protected function guard() { return Auth::guard('admin'); } } |
Create HomeController.php file into app/Http/Controllers/Admin directory and update it as following:
|
1 2 3 4 5 6 7 8 9 10 11 12 13 14 15 16 17 18 19 20 21 22 23 24 |
<?php namespace App\Http\Controllers\Admin; use App\Http\Controllers\Controller; class HomeController extends Controller { /** * Create a new controller instance. * * @return void */ public function __construct() { $this->middleware('auth:admin'); } /** * Show the application dashboard. * * @return \Illuminate\Http\Response */ public function index() { return view('admin.home'); } } |
Update Guest Middleware
Now we need to update the guest middleware RedirectIfAuthenticated for the admin auth guard. Open app/Http/Middleware/RedirectIfAuthenticated.php and add a check for the admin guard, so the handle method will now look something like this:
|
1 2 3 4 5 6 7 8 9 10 11 12 13 14 15 16 17 |
public function handle($request, Closure $next, $guard = null) { if (Auth::guard($guard)->check()) { if($guard == "admin"){ //user was authenticated with admin guard. return redirect()->route('admin.home'); } else { //default guard. return redirect()->route('home'); } } return $next($request); } |
Update Exception Handler
At the moment if an user is authenticated they will redirect back to the same place, no matter what the guard is. Open app/Exceptions/Handler.php and add the unauthenticated method as following:
app/Exceptions/Handler.php
Add following directives on top:
|
1 2 |
use Illuminate\Auth\AuthenticationException; use Auth; |
Add following method in handler class:
|
1 2 3 4 5 6 7 8 9 10 11 12 13 14 15 16 |
protected function unauthenticated($request, AuthenticationException $exception) { if (in_array('admin', $exception->guards())) { return $request->expectsJson() ? response()->json([ 'message' => $exception->getMessage() ], 401) : redirect()->guest(route('admin.login')); } return $request->expectsJson() ? response()->json([ 'message' => $exception->getMessage() ], 401) : redirect()->guest(route('login')); } |
This will override the parent handler method.
Add Admin Views
Next we we will create all relevant views files for admin.
Admin Layout:-
Create the following directory resources/views/admin/layouts and in it we’ll add a new file app.blade.php and put following code in it:
resources/views/admin/layouts/app.blade.php
|
1 2 3 4 5 6 7 8 9 10 11 12 13 14 15 16 17 18 19 20 21 22 23 24 25 26 27 28 29 30 31 32 33 34 35 36 37 38 39 40 41 42 43 44 45 46 47 48 49 50 51 52 53 54 55 56 57 58 59 60 61 62 63 64 65 66 67 68 69 70 71 72 |
<!DOCTYPE html> <html lang="{{ app()->getLocale() }}"> <head> <meta charset="utf-8"> <meta http-equiv="X-UA-Compatible" content="IE=edge"> <meta name="viewport" content="width=device-width, initial-scale=1"> <!-- CSRF Token --> <meta name="csrf-token" content="{{ csrf_token() }}"> <title>{{ $pageTitle ?? config('app.name', 'Admin') }}</title> <!-- Scripts --> <script src="{{ asset('js/app.js') }}" defer></script> <!-- Fonts --> <link rel="dns-prefetch" href="https://fonts.gstatic.com"> <link href="https://fonts.googleapis.com/css?family=Raleway:300,400,600" rel="stylesheet" type="text/css"> <!-- Styles --> <link href="{{ asset('css/app.css') }}" rel="stylesheet"> </head> <body> <div id="app"> <nav class="navbar navbar-expand-md navbar-light navbar-laravel"> <div class="container"> <a class="navbar-brand" href="{{ route('admin.home') }}"> Admin </a> <button class="navbar-toggler" type="button" data-toggle="collapse" data-target="#navbarSupportedContent" aria-controls="navbarSupportedContent" aria-expanded="false" aria-label="Toggle navigation"> <span class="navbar-toggler-icon"></span> </button> <div class="collapse navbar-collapse" id="navbarSupportedContent"> <!-- Left Side Of Navbar --> <!-- Right Side Of Navbar --> <ul class="navbar-nav ml-auto"> <!-- Authentication Links --> @guest('admin') <li><a class="nav-link" href="{{ route('admin.login') }}">{{ __('Admin Login') }}</a></li> @else <li class="nav-item dropdown"> <a id="navbarDropdown" class="nav-link dropdown-toggle" href="#" role="button" data-toggle="dropdown" aria-haspopup="true" aria-expanded="false" v-pre> {{ Auth::user()->name }} <span class="caret"></span> </a> <div class="dropdown-menu" aria-labelledby="navbarDropdown"> <a class="dropdown-item" href="{{ route('admin.logout') }}" onclick="event.preventDefault(); document.getElementById('logout-form').submit();"> {{ __('Logout') }} </a> <form id="logout-form" action="{{ route('admin.logout') }}" method="POST" style="display: none;"> @csrf </form> </div> </li> @endguest </ul> </div> </div> </nav> <main class="py-4"> @yield('content') </main> </div> </body> </html> |
Admin Login:-
Create the following directory resources/views/admin/auth and in it we’ll add a new file login.blade.php and put following code in it:
resources/views/admin/auth/login.blade.php
|
1 2 3 4 5 6 7 8 9 10 11 12 13 14 15 16 17 18 19 20 21 22 23 24 25 26 27 28 29 30 31 32 33 34 35 36 37 38 39 40 41 42 43 44 45 46 47 48 49 50 51 52 53 54 55 56 57 58 59 60 61 62 63 64 65 66 67 68 69 |
@extends('admin.layouts.app') @section('content') <div class="container"> <div class="row justify-content-center"> <div class="col-md-8"> <div class="card"> <div class="card-header">{{ __('Admin Login') }}</div> <div class="card-body"> <form method="POST" action="{{ route('admin.login') }}"> @csrf <div class="form-group row"> <label for="email" class="col-sm-4 col-form-label text-md-right">{{ __('E-Mail Address') }}</label> <div class="col-md-6"> <input id="email" type="email" class="form-control{{ $errors->has('email') ? ' is-invalid' : '' }}" name="email" value="{{ old('email') }}" required autofocus> @if ($errors->has('email')) <span class="invalid-feedback"> <strong>{{ $errors->first('email') }}</strong> </span> @endif </div> </div> <div class="form-group row"> <label for="password" class="col-md-4 col-form-label text-md-right">{{ __('Password') }}</label> <div class="col-md-6"> <input id="password" type="password" class="form-control{{ $errors->has('password') ? ' is-invalid' : '' }}" name="password" required> @if ($errors->has('password')) <span class="invalid-feedback"> <strong>{{ $errors->first('password') }}</strong> </span> @endif </div> </div> <div class="form-group row"> <div class="col-md-6 offset-md-4"> <div class="checkbox"> <label> <input type="checkbox" name="remember" {{ old('remember') ? 'checked' : '' }}> {{ __('Remember Me') }} </label> </div> </div> </div> <div class="form-group row mb-0"> <div class="col-md-8 offset-md-4"> <button type="submit" class="btn btn-primary"> {{ __('Login') }} </button> <a class="btn btn-link" href="{{ route('password.request') }}"> {{ __('Forgot Your Password?') }} </a> </div> </div> </form> </div> </div> </div> </div> </div> @endsection |
Admin Home/Dashboard:-
Create the following directory resources/views/admin/ and in it we’ll add a new file home.blade.php and put following code in it:
resources/views/admin/home.blade.php
|
1 2 3 4 5 6 7 8 9 10 11 12 13 14 15 16 17 18 19 20 21 22 23 |
@extends('admin.layouts.app') @section('content') <div class="container"> <div class="row justify-content-center"> <div class="col-md-12"> <div class="card"> <div class="card-header">Admin Dashboard</div> <div class="card-body"> @if (session('status')) <div class="alert alert-success"> {{ session('status') }} </div> @endif You are logged in! </div> </div> </div> </div> </div> @endsection |
Create Admin Seeder
Generate a admin seeder file with following artisan command:
|
1 |
php artisan make:seeder AdminsTableSeeder |
Lets open database/seeds/AdminsTableSeeder.php file created and populate admin user in it as following:
|
1 2 3 4 5 6 7 8 9 10 11 12 13 14 15 16 17 18 19 20 21 22 23 24 25 26 27 28 29 |
<?php use Illuminate\Database\Seeder; use Illuminate\Support\Facades\DB; class AdminsTableSeeder extends Seeder { /** * Run the database seeds. * * @return void */ public function run() { DB::table('admins')->insert(array( array( 'name' => "Steve", 'email' => 'steve@gmail.com', 'password' => bcrypt('secret'), ), array( 'name' => "Laura", 'email' => 'laura@gmail.com', 'password' => bcrypt('secret'), ) )); } } |
Call Admin Seeder
Lets open database/seeds/DatabaseSeeder.php and call AdminsTableSeeder in run method as following:
database/seeds/DatabaseSeeder.php
|
1 2 3 4 |
public function run() { $this->call(AdminsTableSeeder::class); } |
Run Admin Seeder
Lets open terminal and run seeder using following artisan command:
|
1 |
php artisan db:seed |
Start Application Server
Now we are ready to run our example so lets start the development server using following artisan command –
|
1 |
php artisan serve |
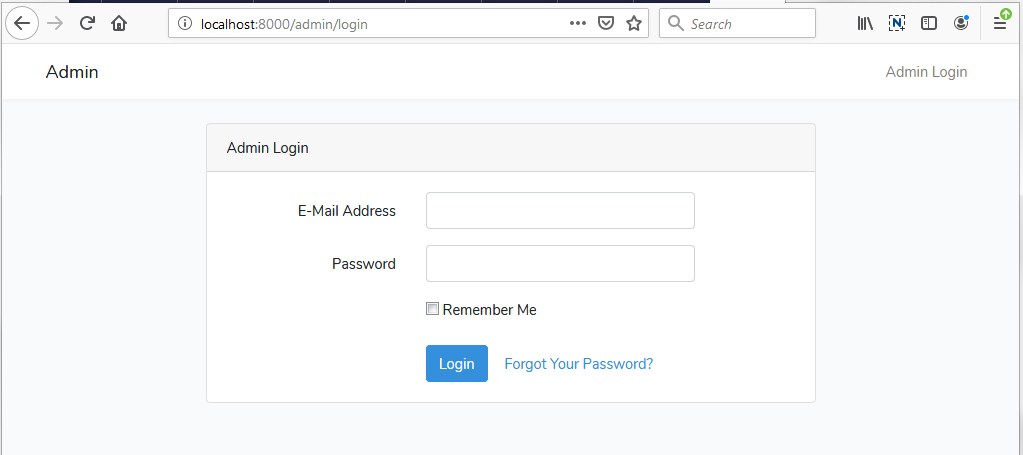
Now, open the following URL in browser to see the output –
http://localhost:8000/admin/login
Output:-
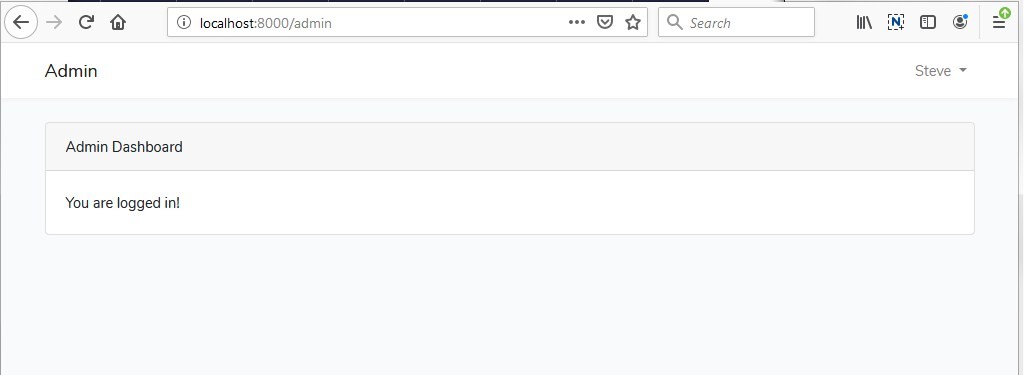
http://localhost:8000/admin/
Output:-
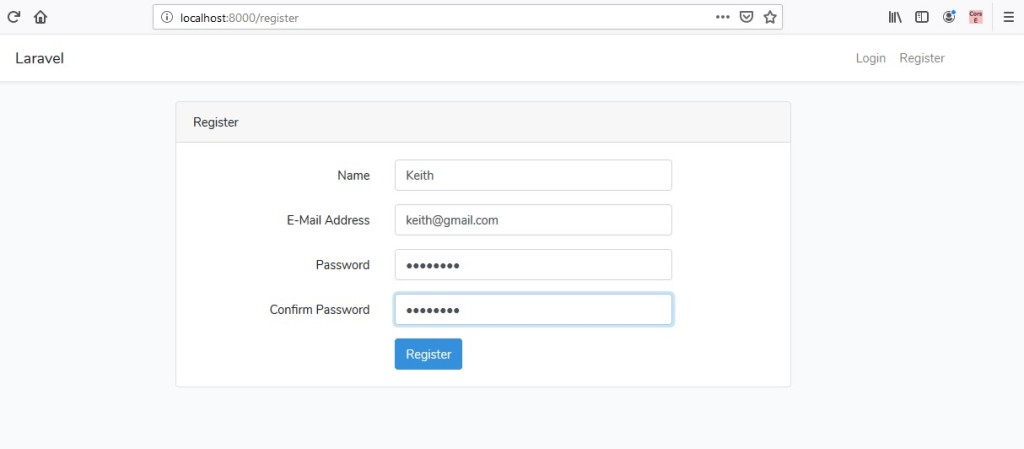
http://localhost:8000/register/
Output:-
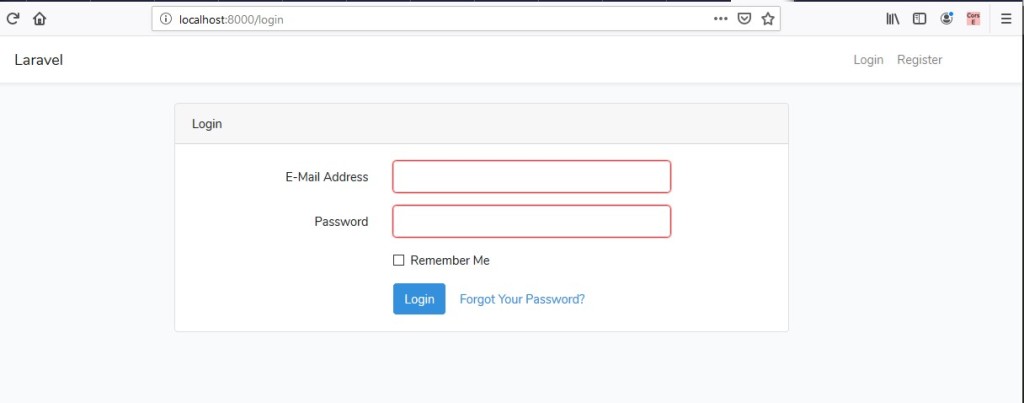
http://localhost:8000/login/
Output:-
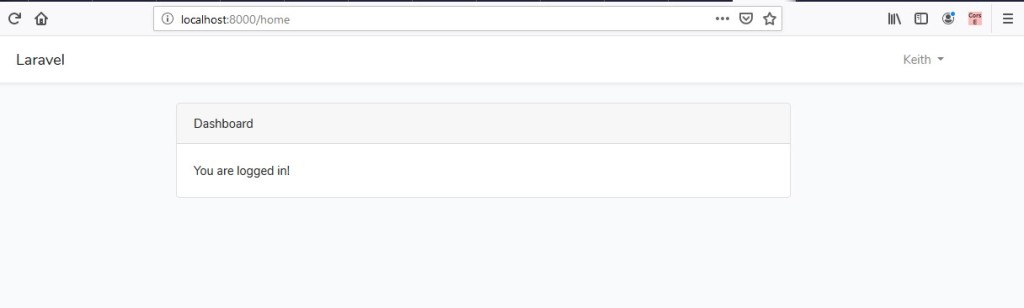
http://localhost:8000/home/
Output:-