Laravel 6 CRUD Application Tutorial With Example
In this Laravel 6 CRUD Example Tutorial, you will learn to create a simple CRUD (Create, Read, Update and Delete) application using Laravel 6. In this step by step guide, we will be creating a simple blog application with post table and implement CRUD operations.
Install Laravel 6
First of all we need to create a fresh laravel project, download and install Laravel 6 using the below command
|
|
composer create-project --prefer-dist laravel/laravel larablog |
Make sure you have composer installed.
Now, lets switch to the project directory and start the development server using following artisan command –
Now, open the following URL in browser to see the output –
http://localhost:8000/
Output:-
Configure Database In .env file
Now, lets create a MySQL database and connect it with laravel application. After creating database we need to set database credential in application’s .env file.
|
|
DB_CONNECTION=mysql DB_HOST=127.0.0.1 DB_PORT=3306 DB_DATABASE=lara6blog DB_USERNAME=root DB_PASSWORD= |
Create Database Table
Now, we have to define table schema for posts table. Open terminal and use the following artisan command to generate <timestamp>create_posts_table.php migration.
|
|
php artisan make:migration create_posts_table --create=posts |
Once this command is executed you will find a migration file created under “database/migrations”

lets open migration file and put following code in it –
1 2 3 4 5 6 7 8 9 10 11 12 13 14 15 16 17 18 19 20 21 22 23 24 25 26 27 28 29 30 31 32 33 |
<?php use Illuminate\Support\Facades\Schema; use Illuminate\Database\Schema\Blueprint; use Illuminate\Database\Migrations\Migration; class CreatePostsTable extends Migration { /** * Run the migrations. * * @return void */ public function up() { Schema::create('posts', function (Blueprint $table) { $table->increments('id'); $table->string('title'); $table->string('body'); $table->timestamps(); }); } /** * Reverse the migrations. * * @return void */ public function down() { Schema::dropIfExists('posts'); } } |
Run Migration
Now, run following command to migrate database schema.
After, the migration executed successfully the posts table will be created in database along with migrations, password_resets and users table.
Create Resource Controller and Model
In this step, we will use the following command to create post resource controller and model together
|
|
php artisan make:controller PostController --resource --model=Post |
Once the above command executed, it will create a resource controller file “PostController.php” in “app/Http/Controllers/” directory. Resource controller automatically creates a list of following methods together with their parameters –
Index()
Create()
Store()
Show()
Edit()
Update()
Destroy()
app/Http/Controllers/PostController.php
1 2 3 4 5 6 7 8 9 10 11 12 13 14 15 16 17 18 19 20 21 22 23 24 25 26 27 28 29 30 31 32 33 34 35 36 37 38 39 40 41 42 43 44 45 46 47 48 49 50 51 52 53 54 55 56 57 58 59 60 61 62 63 64 65 66 67 68 69 70 71 72 73 74 75 76 77 78 79 80 81 82 83 84 85 |
<?php namespace App\Http\Controllers; use App\Post; use Illuminate\Http\Request; class PostController extends Controller { /** * Display a listing of the resource. * * @return \Illuminate\Http\Response */ public function index() { // } /** * Show the form for creating a new resource. * * @return \Illuminate\Http\Response */ public function create() { // } /** * Store a newly created resource in storage. * * @param \Illuminate\Http\Request $request * @return \Illuminate\Http\Response */ public function store(Request $request) { // } /** * Display the specified resource. * * @param \App\Post $post * @return \Illuminate\Http\Response */ public function show(Post $post) { // } /** * Show the form for editing the specified resource. * * @param \App\Post $post * @return \Illuminate\Http\Response */ public function edit(Post $post) { // } /** * Update the specified resource in storage. * * @param \Illuminate\Http\Request $request * @param \App\Post $post * @return \Illuminate\Http\Response */ public function update(Request $request, Post $post) { // } /** * Remove the specified resource from storage. * * @param \App\Post $post * @return \Illuminate\Http\Response */ public function destroy(Post $post) { // } } |
Above command also creates model file “Post.php” in app directory
app/Post.php
|
|
<?php namespace App; use Illuminate\Database\Eloquent\Model; class Post extends Model { // } |
Next, we have to assign fillable fields using fillable property inside Post.php file. Update app/Post.php with following code –
|
|
<?php namespace App; use Illuminate\Database\Eloquent\Model; class Post extends Model { // protected $fillable = [ 'title', 'body' ]; } |
Create Resource Route
After this, we need to add resource route for post controller. Lets open “routes/web.php” file and add following route.
routes/web.php
|
|
Route::resource('posts','PostController'); |
we can use the following artisan command to list all the routes –
Output:-
Create Blade Files
In this step, we will create application view files for the first create following two directories for blade files inside “resources/views/” directory –
Next, create a main layout file “app.blade.php” in “resources/views/layouts/” directory and put the following code in it.
resources/views/layouts/app.blade.php
1 2 3 4 5 6 7 8 9 10 11 12 13 14 15 16 17 |
<!DOCTYPE html> <html lang="en"> <head> <meta charset="UTF-8"> <meta name="viewport" content="width=device-width, initial-scale=1.0"> <meta http-equiv="X-UA-Compatible" content="ie=edge"> <title>W3Adda - Laravel 6 CRUD Example Tutorial</title> <link href="{{ asset('css/app.css') }}" rel="stylesheet" type="text/css" /> </head> <body> <div class="container"> <h2>W3Adda - Laravel 6 CRUD Example</h2> @yield('content') </div> <script src="{{ asset('js/app.js') }}" type="text/js"></script> </body> </html> |
Now, we will create following blade files in “resources/views/posts” directory for CRUD (Create, Retrieve, Update, Delete) operations.
1) create.blade.php
2) edit.blade.php
3) index.blade.php
4) show.blade.php
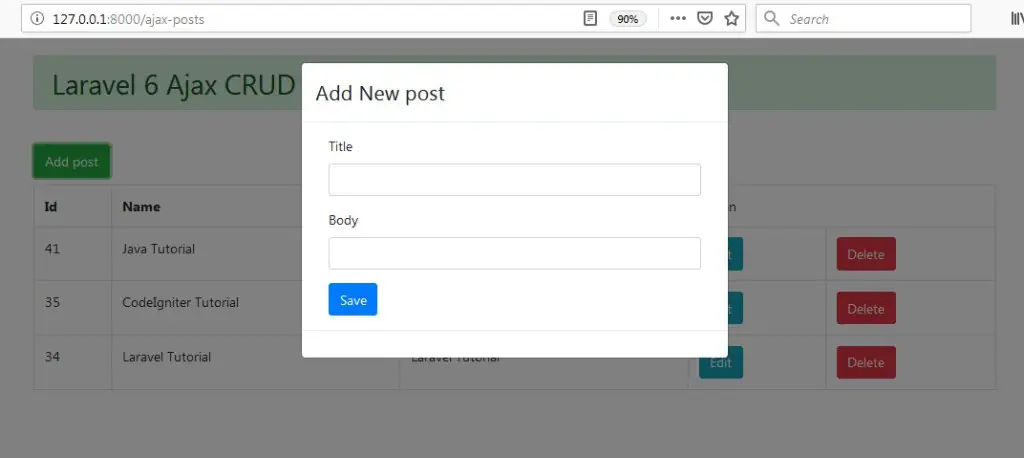
Create Operation
In this step, first we will create a view file named create.blade.php inside “resources/views/posts” directory and put the following code inside it –
resources/views/posts/create.blade.php
1 2 3 4 5 6 7 8 9 10 11 12 13 14 15 16 17 18 19 20 21 22 23 24 25 26 27 28 29 30 31 32 33 34 35 36 37 38 |
@extends('layouts.app') @section('content') <style> .uper { margin-top: 40px; } </style> <div class="card uper"> <div class="card-header"> Create Post </div> <div class="card-body"> @if ($errors->any()) <div class="alert alert-danger"> <ul> @foreach ($errors->all() as $error) <li>{{ $error }}</li> @endforeach </ul> </div><br /> @endif <form method="post" action="{{ route('posts.store') }}"> <div class="form-group"> @csrf <label for="title">Title:</label> <input type="text" class="form-control" name="title" id="title" /> </div> <div class="form-group"> <label for="price">Body:</label> <textarea name="body" id="body" class="form-control"></textarea> </div> <button type="submit" class="btn btn-primary">Submit</button> </form> </div> </div> @endsection |
Now open the PostController.php file, and modify the create function as following –
|
|
public function create() { // return view('posts.create'); } |
Once we have created the blade file for create operation and modified the create method in PostController.php, lets start the development server using following artisan command –
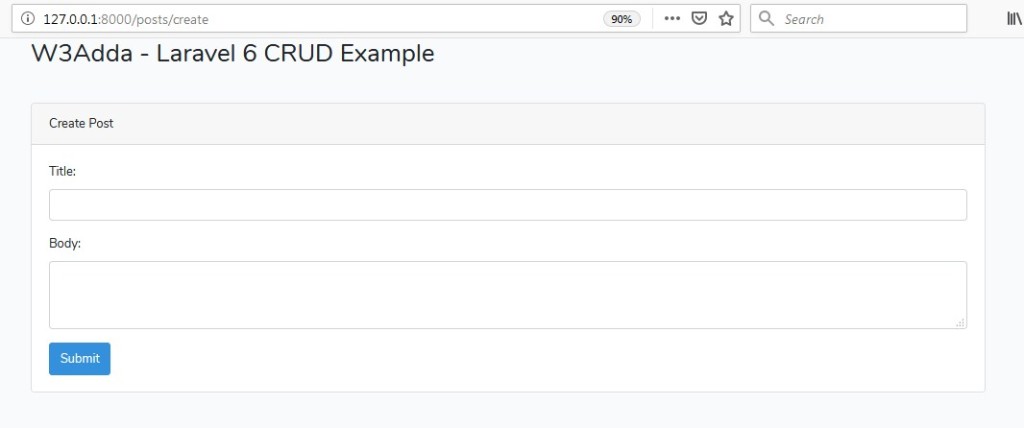
Now, open the following URL in browser to see the output –
http://localhost:8000/posts/create
Output:-
Validate and Save Data
After this, we create a script to validate and save data in database upon form submission. Lets open the PostController.php file, and modify the store function as following –
1 2 3 4 5 6 7 8 9 10 11 12 13 14 15 16 17 18 |
public function store(Request $request) { // $request->validate([ 'title' => 'required', 'body' => 'required', ]); Post::create($request->all()); return redirect()->route('posts.index') ->with('success','Post created successfully.'); } |
Restart the development server using following artisan command –
Now, visit the following URL in browser to create a post –
http://localhost:8000/posts/create
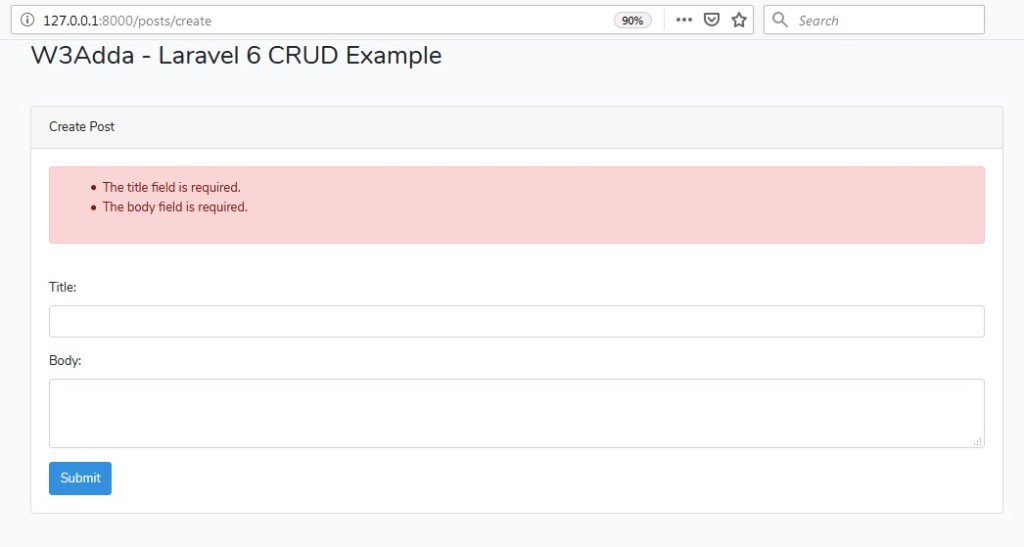
Here, now if you press the submit button the without filling up the required data(title or body), the store method validates the form data and you will be not able to save data to database and notified with following errors –
And, if after filling up the post title and body you press the submit button the form data will be submitted to the store method in PostController.php. The store method validates the form data and insert into the post table –
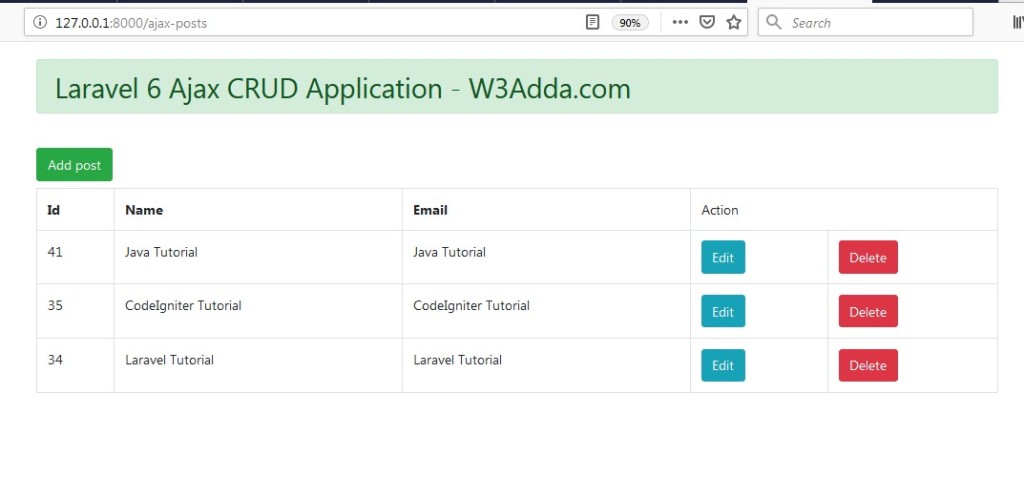
Upon the successful submission we will redirected to the index method –
http://localhost:8000/posts/
Retrieve Data
In this step, we will create a two view file named index.blade.php and show.blade.php inside “resources/views/posts” directory two list all the posts created and to view them individually. Lets create the blade files and put the following code inside it –
resources/views/posts/index.blade.php
1 2 3 4 5 6 7 8 9 10 11 12 13 14 15 16 17 18 19 20 21 22 23 24 25 26 27 28 29 30 31 32 33 34 35 36 37 38 39 40 41 42 43 44 45 46 47 48 49 50 51 52 53 |
@extends('layouts.app') @section('content') <style> .uper { margin-top: 40px; } </style> <div class="card uper"> <div class="card-header"> <a class="btn btn-primary" href="{{ route('posts.create') }}"> Create New Post</a> </div> <div class="card-body"> @if(session()->get('success')) <div class="alert alert-success"> {{ session()->get('success') }} </div><br /> @endif <table class="table table-striped"> <thead> <tr> <td>ID</td> <td>Post Title</td> <td>Post Body</td> <td colspan="3">Action</td> </tr> </thead> <tbody> @foreach($posts as $post) <tr> <td>{{$post->id}}</td> <td>{{$post->title}}</td> <td>{{$post->body}}</td> <td><a href="{{ route('posts.edit',$post->id)}}" class="btn btn-primary">Edit</a></td> <td><a class="btn btn-primary" href="{{ route('posts.show',$post->id) }}">Show</a></td> <td> <form action="{{ route('posts.destroy', $post->id)}}" method="post"> @csrf @method('DELETE') <button class="btn btn-danger" type="submit">Delete</button> </form> </td> </tr> @endforeach </tbody> </table> </div> </div> @endsection |
resources/views/posts/show.blade.php
1 2 3 4 5 6 7 8 9 10 11 12 13 14 15 16 17 18 19 20 21 22 23 24 25 26 27 28 29 30 31 32 33 34 35 36 37 38 39 40 41 42 43 44 45 46 47 48 49 50 |
@extends('layouts.app') @section('content') <style> .uper { margin-top: 40px; } </style> <div class="card uper"> <div class="card-header"> View Post <a class="btn btn-primary" href="{{ route('posts.index') }}"> Back</a> </div> <div class="card-body"> <div class="row"> <div class="col-xs-12 col-sm-12 col-md-12"> <div class="form-group"> <strong>Title:</strong> {{ $post->title }} </div> </div> <div class="col-xs-12 col-sm-12 col-md-12"> <div class="form-group"> <strong>Body:</strong> {{ $post->body }} </div> </div> </div> </div> </div> @endsection |
Now open the PostController.php file, and modify the index and show function with following code –
index method:-
|
|
public function index() { // $posts = Post::all(); return view('posts.index', compact('posts')); } |
show method:-
|
|
public function show(Post $post) { // return view('posts.show',compact('post')); } |
Restart the development server again, now you will be able to list all the posts and to view them individually.
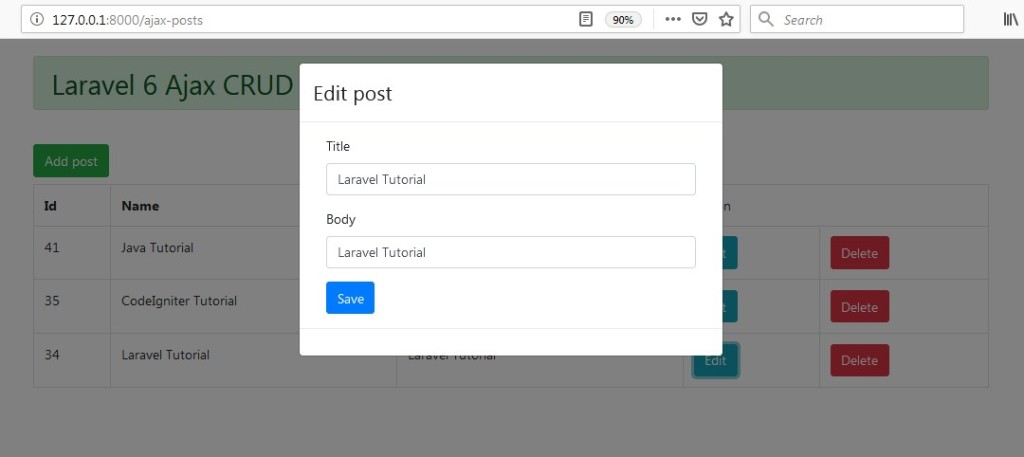
Update Data
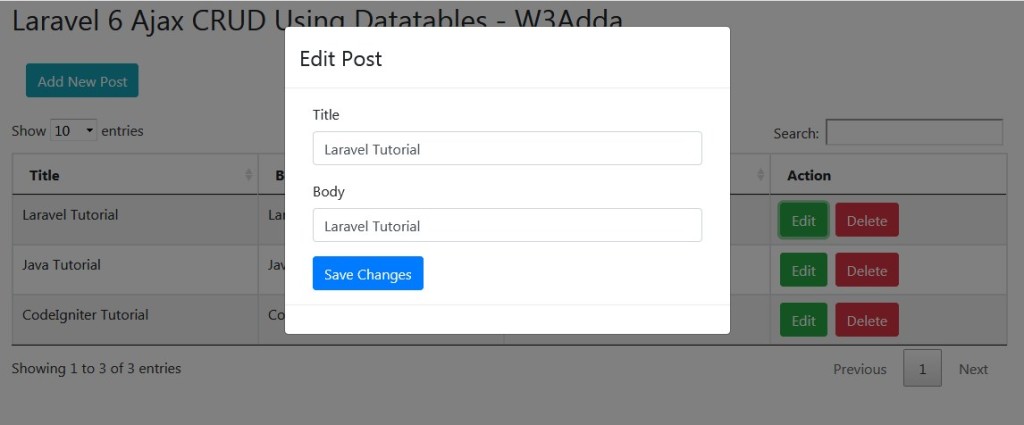
In the previous step, we already have a “Edit” button linked to edit action for each of the post respectively.In this step, we will create a view file named edit.blade.php inside “resources/views/posts” directory and put the following code inside it –
resources/views/posts/edit.blade.php
1 2 3 4 5 6 7 8 9 10 11 12 13 14 15 16 17 18 19 20 21 22 23 24 25 26 27 28 29 30 31 32 33 34 35 36 37 38 39 40 41 |
@extends('layouts.app') @section('content') <style> .uper { margin-top: 40px; } </style> <div class="card uper"> <div class="card-header"> Edit Post </div> <div class="card-body"> @if ($errors->any()) <div class="alert alert-danger"> <ul> @foreach ($errors->all() as $error) <li>{{ $error }}</li> @endforeach </ul> </div><br /> @endif <form method="post" action="{{ route('posts.update', $post->id) }}"> @csrf @method('PUT') <div class="form-group"> <label for="title">Title:</label> <input type="text" class="form-control" name="title" id="post_title" value={{ $post->title }} /> </div> <div class="form-group"> <label for="price">Body:</label> <textarea name="body" id="post_body" class="form-control">{{ $post->body }}</textarea> </div> <button type="submit" class="btn btn-primary">Update</button> </form> </div> </div> @endsection |
Now open the PostController.php file, and modify the edit and update function with following code –
edit() Method:-
|
|
public function edit(Post $post) { // return view('posts.edit',compact('post')); } |
update() method:-
|
|
public function update(Request $request, Post $post) { // $request->validate([ 'title' => 'required', 'body' => 'required', ]); $post->update($request->all()); return redirect()->route('posts.index')->with('success','Post updated successfully'); } |
The edit() renders the edit view for respective post with prefilled post data, upon the form submission the form data will be submitted to the update() method in PostController.php. The update() method validates the form data and update the post data, after the successful update operation we will redirected to the index method.
Delete Operation
For deleting the post, we already have a “Delete” action button linked to delete action for each of the post respectively.In this step there is no need to create a view file, we just have to open the PostController.php file, and modify the destroy() function with following code –
|
|
public function destroy(Post $post) { // $post->delete(); return redirect()->route('posts.index') ->with('success','Post deleted successfully'); } |
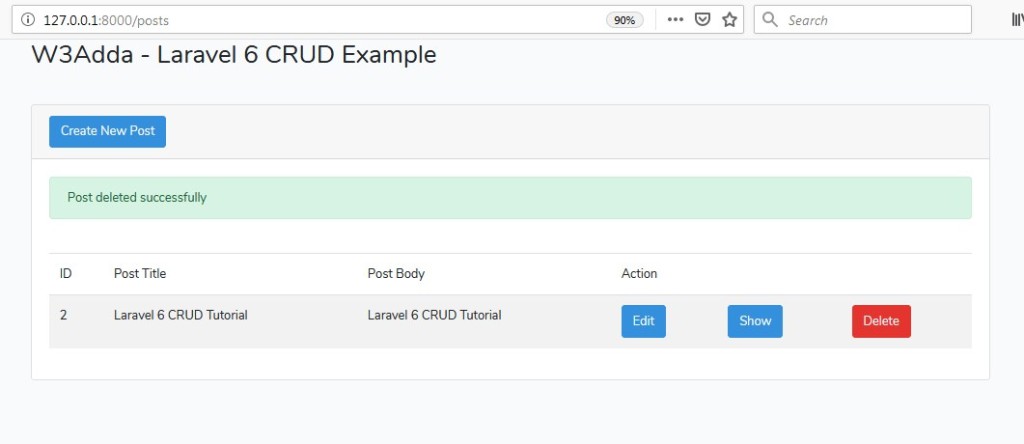
Now, when we click to the “Delete” action button, the respective post will be deleted.
Finally, the PostController.php file looks like this –
app/Http/Controllers/PostController.php
1 2 3 4 5 6 7 8 9 10 11 12 13 14 15 16 17 18 19 20 21 22 23 24 25 26 27 28 29 30 31 32 33 34 35 36 37 38 39 40 41 42 43 44 45 46 47 48 49 50 51 52 53 54 55 56 57 58 59 60 61 62 63 64 65 66 67 68 69 70 71 72 73 74 75 76 77 78 79 80 81 82 83 84 85 86 87 88 89 90 91 92 93 94 95 96 97 98 99 100 101 102 103 104 105 106 107 108 109 110 111 112 113 114 115 116 117 118 119 120 121 |
<?php namespace App\Http\Controllers; use App\Post; use Illuminate\Http\Request; class PostController extends Controller { /** * Display a listing of the resource. * * @return \Illuminate\Http\Response */ public function index() { // $posts = Post::all(); return view('posts.index', compact('posts')); } /** * Show the form for creating a new resource. * * @return \Illuminate\Http\Response */ public function create() { // return view('posts.create'); } /** * Store a newly created resource in storage. * * @param \Illuminate\Http\Request $request * @return \Illuminate\Http\Response */ public function store(Request $request) { // $request->validate([ 'title' => 'required', 'body' => 'required', ]); Post::create($request->all()); return redirect()->route('posts.index') ->with('success','Post created successfully.'); } /** * Display the specified resource. * * @param \App\Post $post * @return \Illuminate\Http\Response */ public function show(Post $post) { // return view('posts.show',compact('post')); } /** * Show the form for editing the specified resource. * * @param \App\Post $post * @return \Illuminate\Http\Response */ public function edit(Post $post) { // return view('posts.edit',compact('post')); } /** * Update the specified resource in storage. * * @param \Illuminate\Http\Request $request * @param \App\Post $post * @return \Illuminate\Http\Response */ public function update(Request $request, Post $post) { // $request->validate([ 'title' => 'required', 'body' => 'required', ]); $post->update($request->all()); return redirect()->route('posts.index')->with('success','Post updated successfully'); } /** * Remove the specified resource from storage. * * @param \App\Post $post * @return \Illuminate\Http\Response */ public function destroy(Post $post) { // $post->delete(); return redirect()->route('posts.index') ->with('success','Post deleted successfully'); } } |
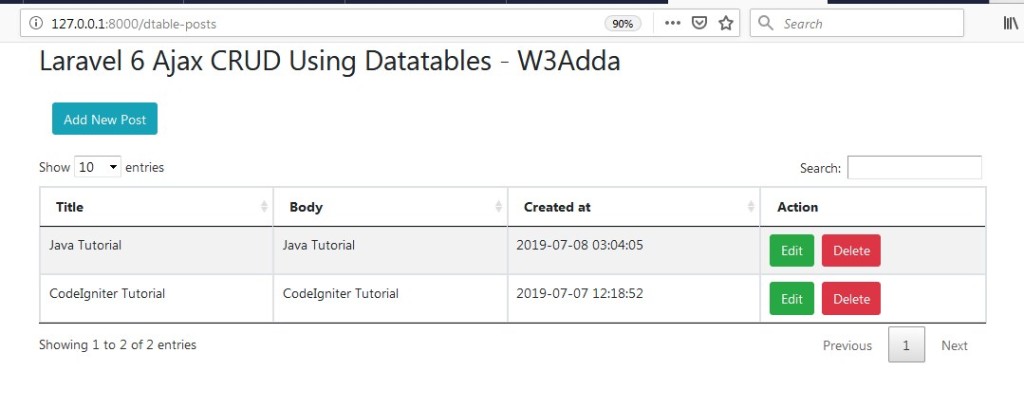
Now we have a working Laravel 6 CRUD Application ready, restart the development server using following artisan command –
and visit the following URL in browser to see the complete Laravel 6 CRUD Application in action –
http://localhost:8000/posts/


 Click “Edit” button to edit corresponding post.